Introduction
This guide walks you through the preparation needed before running a injection cycle. Specifically, turning on machinery, preparing the mold, and loading material settings.
-
-
Turn on the chiller located at the bottom left of the machine. The power button is on the left of the screen.
-
The chiller should be set to 15°C. Wait for it to drop to this temperature before proceeding with Step 3.
-
If the chiller is not set to 15°C select "set =" and you can edit the temperature.
-
Once you've entered temperature hit green check icon at bottom right corner.
-
-
-
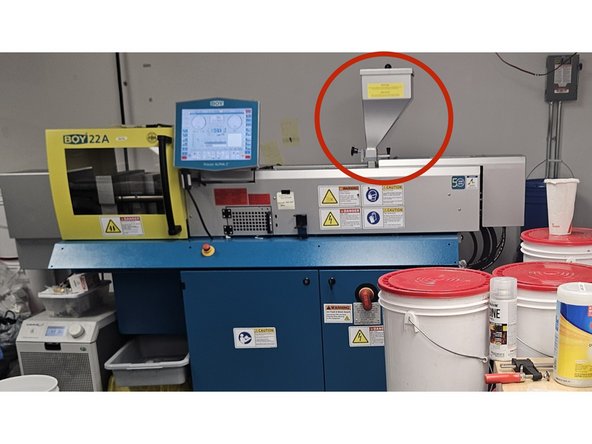
Remove the hopper lid and check for residual plastic from the previous run. In spring or summer, this material should likely be removed due to higher room humidity. Since the hopper is not properly sealed, the plastic is susceptible to moisture, especially recycled PLA.
-
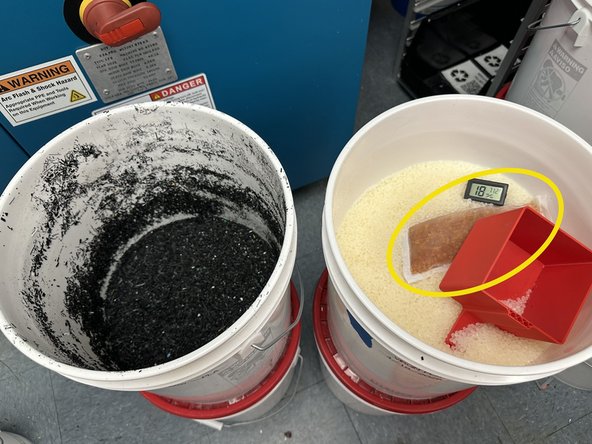
If the machine has not been run for several days, or the last run is unknown, it must be replaced with a fresh mixture. Store the removed plastic in an empty bucket with a bag of silica beads and, if available, a humidity sensor.
-
If you suspect a clog in the hopper throat or need to fully remove the hopper to clear old material, refer to Section 13 (“Clog in Throat of Hopper”) of the Common Failures Troubleshooting Guide.
-
Add new material to the desired level based on the number of runs planned. More material can be added between cycles, but the hopper should never be completely empty while the machine is running, as this can introduce air and cause uneven heating.
-
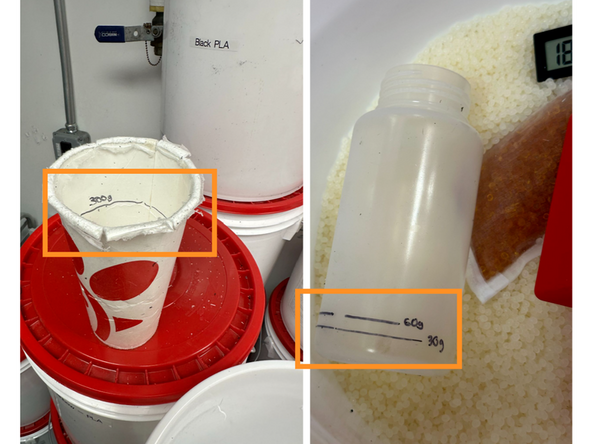
Use a 10:1 ratio of recycled PLA to virgin PLA, identifiable by the labels on the buckets. Scoop recycled PLA into the hopper in 300g batches using the paper cup, and virgin PLA in 30g or 60g batches using the plastic container. Once added, use a gloved hand to mix the materials until the virgin PLA is thoroughly combined.
-
Anything labeled “PLA” without “virgin” is recycled PLA. When selecting a bucket, choose one containing a bag of silica beads to help ensure the material is properly stored and of good quality.
-
If you intend to use a material or combination other than the 10:1 recycled-to-virgin PLA mixture described above, consult a senior injection molding staff member for guidance.
-
-
-
Turn main power on by rotating lever clockwise (currently in off state). The "on" and "off" positions are labeled on the yellow band at the base.
-
The lever has some resistance to it so it might be a little difficult to turn on. This is normal.
-
Once the lever is pointed downwards, the machine is on.
-
It is good practice to turn on the chiller before the main power, but if you accidentally forget, just make sure you turn on the chiller before turning on the screw heaters. Turning on the screw heater without the chiller could lead to damage in the screw housing from improperly controlled thermal expansion.
-
-
-
Insert the two MUD plates needed for your runs. If they contain inserts, make sure they are properly secured and assembled.
-
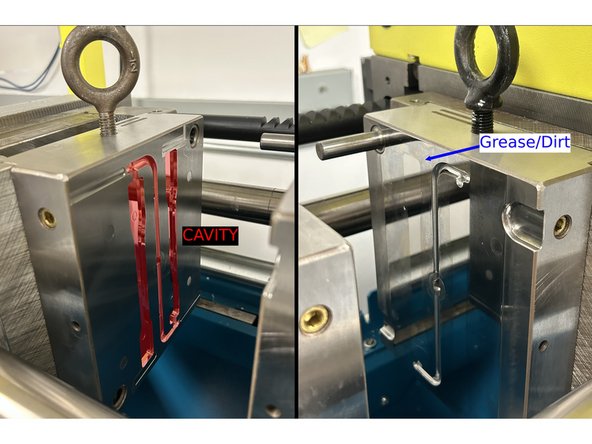
Using a paper towel, clean the mold surfaces and crevices with IPA to remove any present grease or dirt.
-
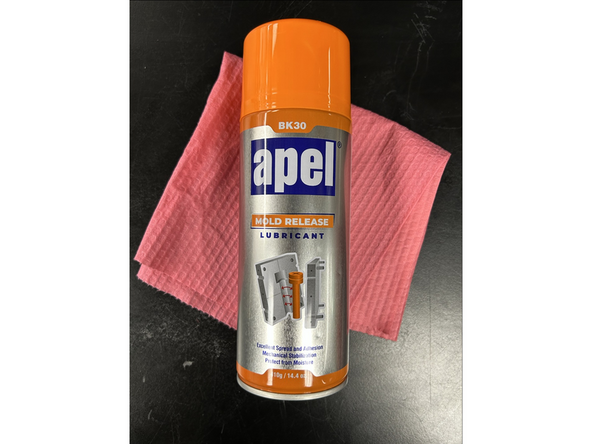
Apply Mold Release to a paper towel and spread a small amount across the mold cavity and faces to ensure parts come out easily.
-
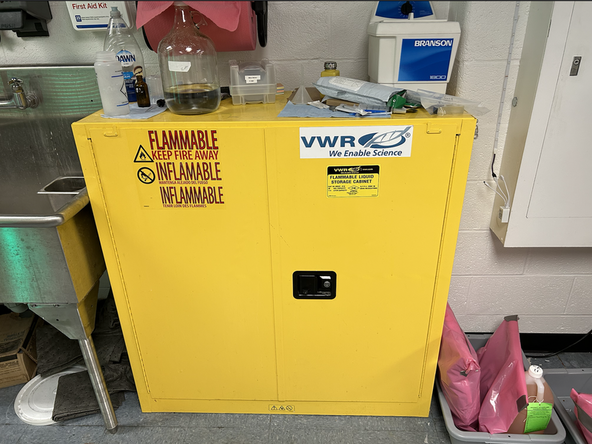
Mold Release & IPA can be found in the flammable safety cabinet by the door.
-
-
-
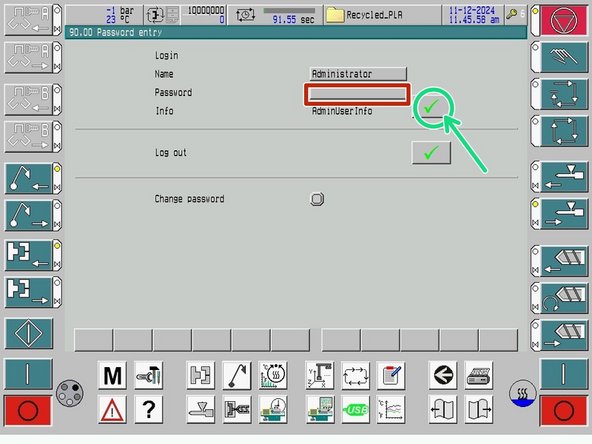
To load or write adjustments to material files we need to log into the admin user profile.
-
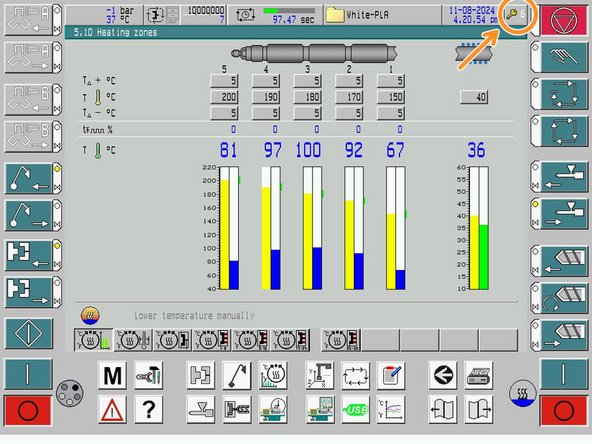
Press the key in the top right to enter the Password Entry screen.
-
The username is Administrator and the password can be found in the drive.
-
Once you've entered the password, select the green check mark. You now have admin access.
-
-
-
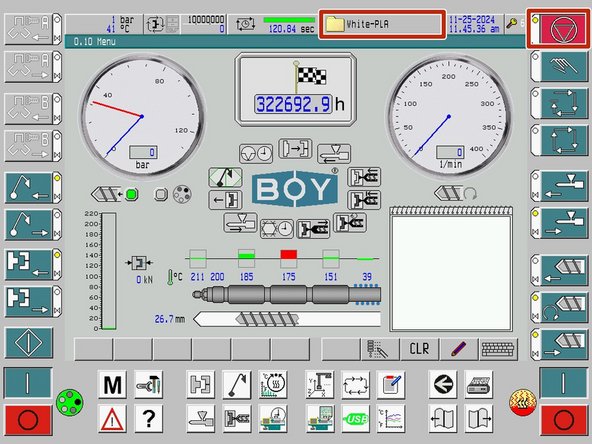
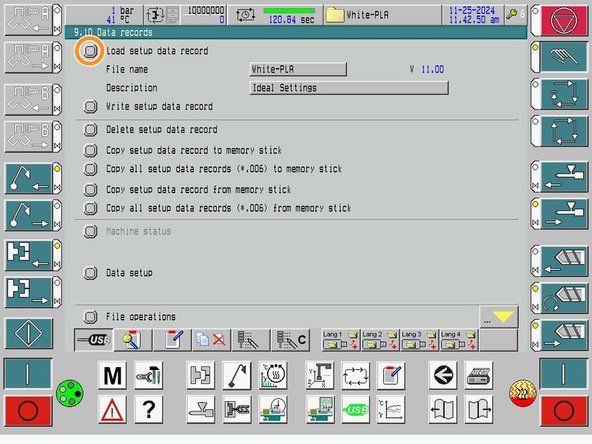
Enter the Data Records screen by pressing the folder icon in the top right.
-
The selector switch (top right of the screen) must be set to the system mode to load a file. This should be the default selection when not actively manipulating the machine using the operating keys in manual mode.
-
To load a specific file for the material that will be injected, press Load setup data record
-
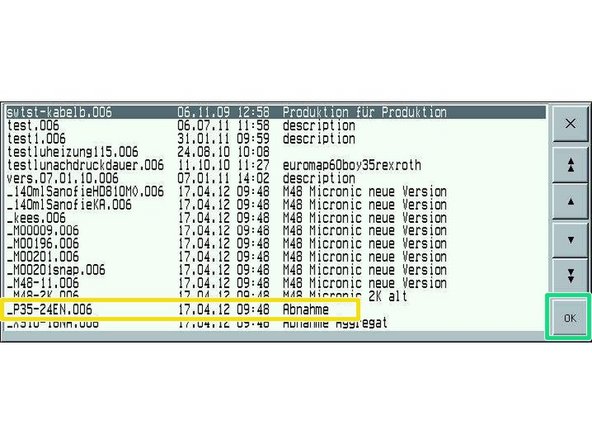
Find the specific labeled file you desire and select it.
-
Press OK. The file should now be loaded with the previously saved settings.
-
-
-
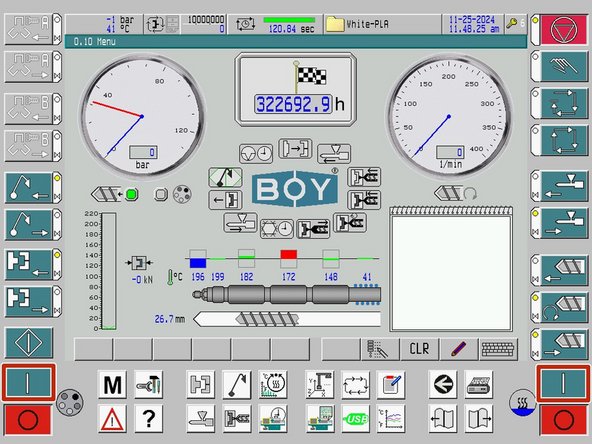
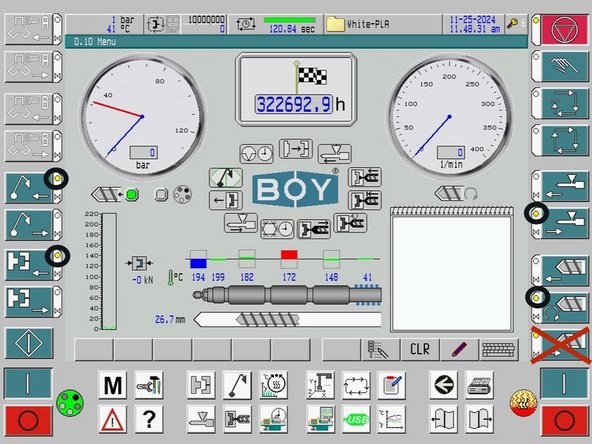
Turn on both the oil and screw heaters. The buttons will appear “pressed,” and the two heater indicators will become colorized.
-
It is important to do this after loading the setup file, since the heating presets may vary.
-
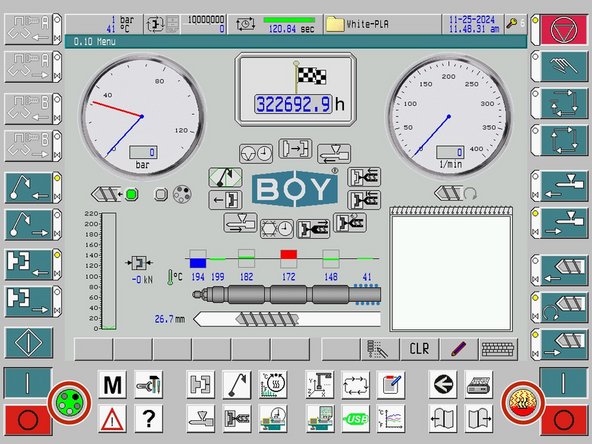
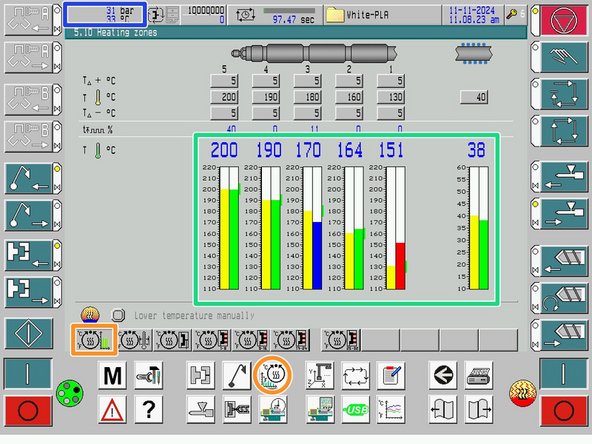
For a detailed view of temperatures, click either of the heating cylinder buttons at the bottom of the screen.
-
You must wait for both the oil and screw to reach their set temperatures before running the machine. The right bar for each section will be green once it enters the correct temperature range (typically +/- 5°C from the ideal temperature, though this is adjustable).
-
The oil temperature can be seen on the top left. During operation it should be 40-42°C
-
-
-
If fully replacing the PLA, the volume must be purged until the new material has completely replaced the previous material. If adding new PLA to existing material in the hopper, it should be purged 2-3 times, or as needed until the plastic comes out with the proper color, texture, and shot volume.
-
To purge the volume:
-
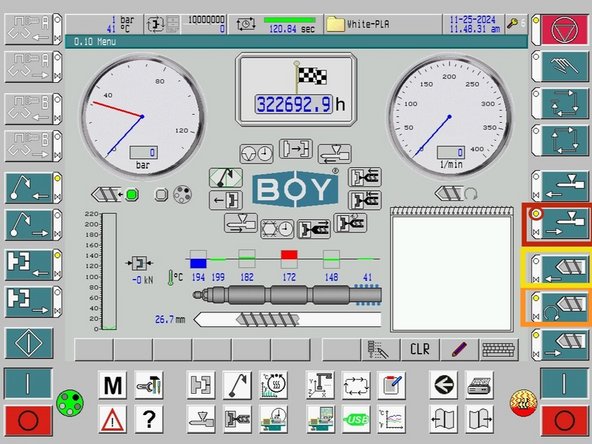
Move the plasticizing unit all the way back by holding the unit back button until movement stops. The circle indicator will turn yellow when the retraction limit has been reached; this is the case for all of the operating keys.
-
Move the screw all the way back.
-
Inject the shot fully forward (hold the button continuously, as tapping it can create multiple spurts that can be difficult to clean afterward).
-
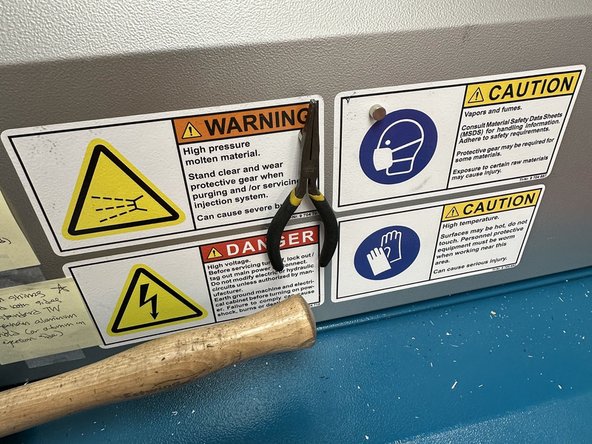
When operating around the nozzle or plasticizing unit, make sure that you are wearing the correct PPE. The nozzle reaches temperatures over 200°C. Make sure you are wearing heat resistant gloves.
-
Use the flat-nosed pliers (often attached to the side of the machine) to remove any plastic near the point where the nozzle meets the injection-side MUD plate.
-
Open the nozzle protection gate and wipe the nozzle with a cloth to ensure that no excess plastic from previous runs or purging is clogging nozzle.
-
-
-
Make sure the plasticizing unit and screw are fully retracted, the mold is fully open, and the ejector pins are fully retracted. The plasticizing unit and screw must be fully retracted to run the machine in semi-automatic or automatic mode.
-
Also verify that the ejector pins extend fully past the mold cavity and MUD plate surface when fully advanced. Only perform this check after fully opening the mold.
-
Do NOT use the decompression button (screw back movement)! This causes melted plastic to move backwards within the screw and can cause clogs. Only do so if necessary and with proper research.
-
The machine is now ready to run an injection cycle!
-




Cancel: I did not complete this guide.
One other person completed this guide.