
Introduction
Overview
In this guide, learn how to add or update a UMDashboards user's data access through Kuali Financial System (KFS).
Why is this necessary?
When viewing UMDashboards, dropdowns at the top of each dashboard for Division, Department, and Sub-Department are populated based on an employee’s KFS access security.
For example, if an employee has access to the A. James Clark School of Engineering in KFS, they would be able to see the A. James Clark School of Engineering, its departments, and sub-departments in UMDashboards.
Process
- The workflow first executes the Ad Hoc Recipients section of the form and is routed to the person(s) you indicated needed to approve the request.
- The process may take several days or weeks, depending on how you configured approval routing.
- After final approval, the KFS team will issue access to KFS within 3-5 business days.
- One day after the person's access to KFS is issued, the person's access in UMDashboards will be updated to mirror their KFS access.
- Any future changes to that person's KFS access will automatically reflect in UMDashboards.
Questions, comments, or concerns?
Please reach out to the Dashboards & Analytics team via the contact form on our website or via email to dashboards@umd.edu.
Video Overview
-
-
Tip: Click pictures in each guide step to open enlarged versions of them.
-
You will need to connect to the Campus VPN before you begin this guide.
-
Use the Cisco AnyConnect software available on TERPware.
-
-
-
-
-
Open your web browser and browse to KFS Web.
-
-
Scroll to the bottom of the page and look for the section titled Security.
-
Choose the option for KFS Access Security Form.
-
-
-
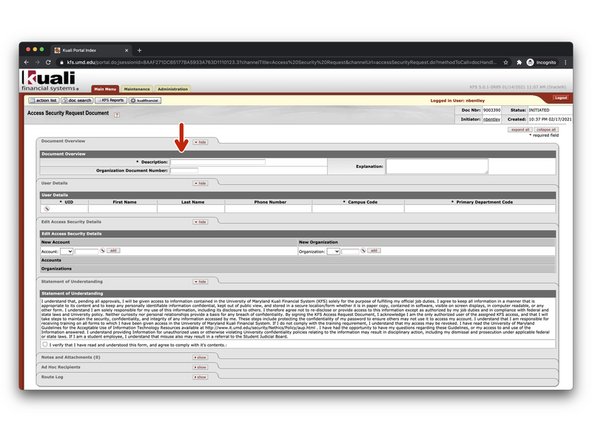
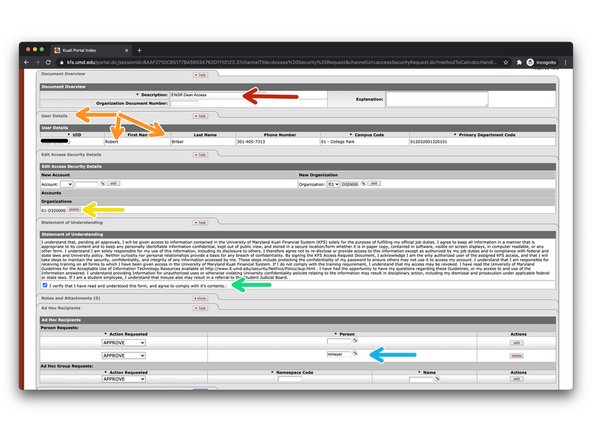
First, add basic information to your request.
-
Give your request a description.
-
For example, if I were to request access for the Dean of Engineering, I would use Dean Access to ENGR.
-
You may leave the explanation field blank.
-
-
-
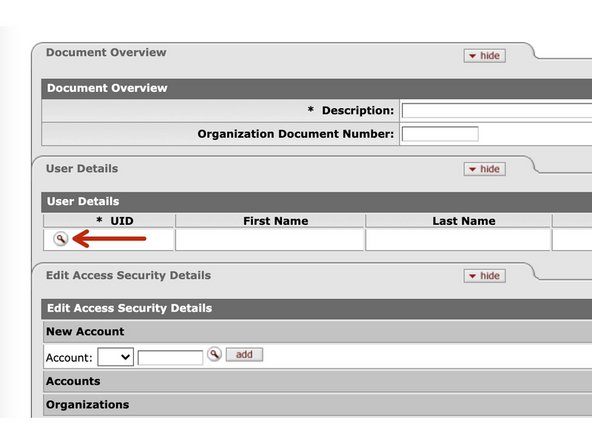
Let's complete the User Details section now.
-
The person listed in the User Details section should be the person for whom you want to issue access to KFS. This should not be your information unless you are requesting the access for yourself.
-
In the box labeled UID, click the magnifying glass to open the lookup screen.
-
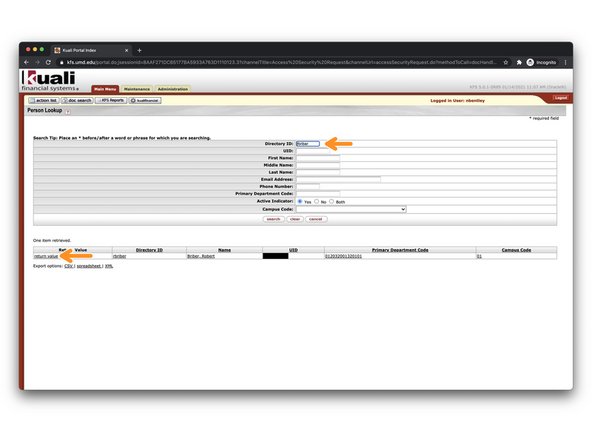
On the corresponding user lookup page that opens, use the fields to search for the person you wish to add for KFS access.
-
Tip: If you know their UMD email address, enter the name-part (jdoe for jdoe@umd.edu) into the Directory ID field and click search.
-
Click return value on the row that contains the person's information.
-
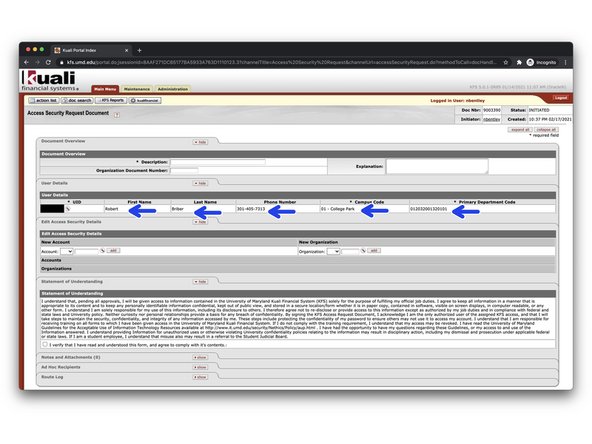
Now, verify the information in the User Details section contains the information for the person you wish to add for KFS access.
-
-
-
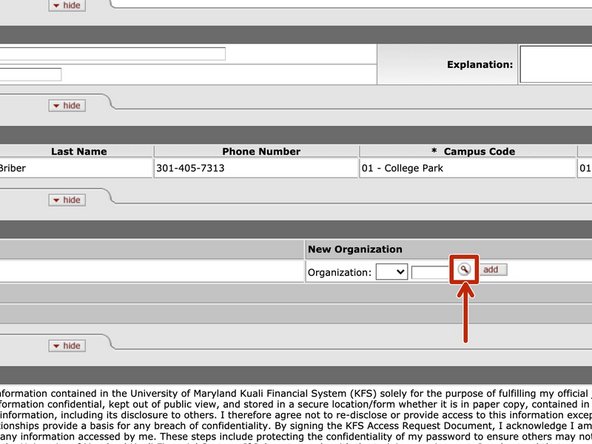
In this step, you'll add the access you want this person to have within KFS.
-
There are two types of access: Account or Organization. Organization access is most common and allows a person to access a group of accounts.
-
Click the magnifying glass next to the Add button under the New Organization column within the Edit Access Security Details section of the form.
-
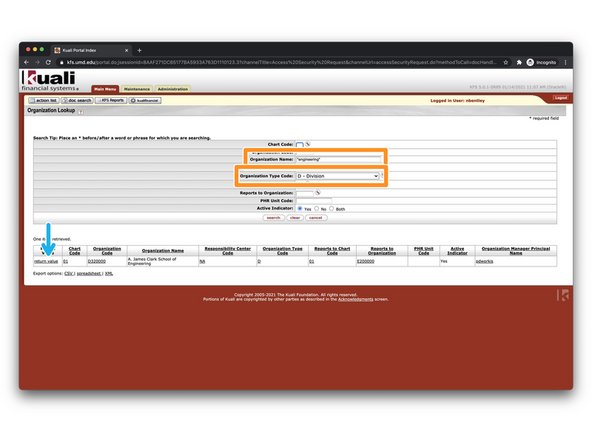
On the corresponding lookup page that opens, use the search fields to find the organization you wish to add to the person's access.
-
Tip: Use the Organization Type Code field to quickly filter at a single level of the University hierarchy. Use the Organization Name field in concert with the asterisk symbol to perform a wildcard search on the organization's name.
-
Click return value on the row that contains the organization you wish to populate into the KFS Access Security Form.
-
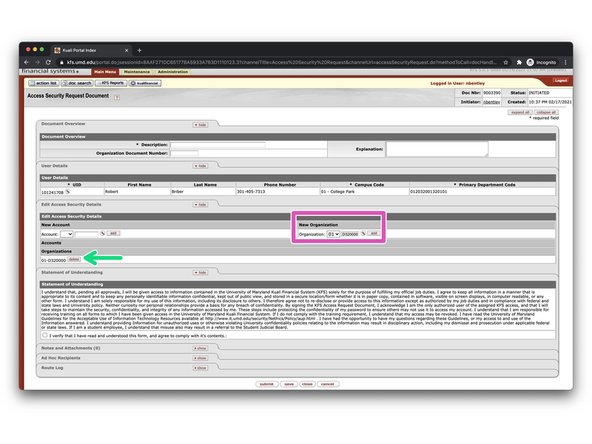
On the KFS Access Security Form, verify the organization code has been populated into the New Organization field. Click the dropdown next to the field and choose 01 (the chart code for UMCP). Finally, click the Add button to add the organization to the KFS Access Security Form.
-
Verify the organization shows up under the Organizations sub-header on the KFS Access Security Form.
-
-
-
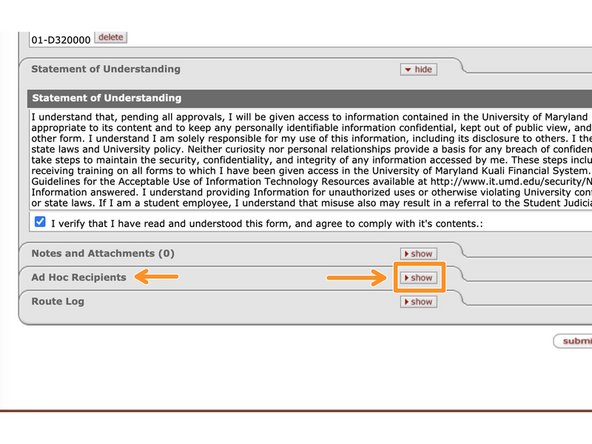
In this step, the only thing you will do is affirm the statement of understanding.
-
Check the box indicating you have read the statement of understanding required for access to KFS.
-
-
-
In this step, you will specify who is required to approve the access request prior to access being issued.
-
Depending on where the person whom is being granted access is in the University hierarchy, the required approvers may differ. When in doubt, specify the organization's or account's fiscal officer.
-
Continuing with our example of providing access to the Clark School's Dean, we will route the request to the Clark School's Asst Dean for Finance.
-
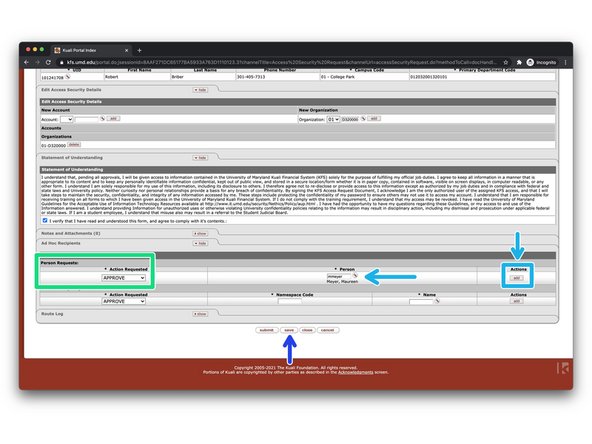
Expand the Ad Hoc Recipients section of the KFS Access Security Form by clicking the show button on the section header.
-
In the Ad Hoc Recipients section of the form, locate the column for Person Requests. Leave the default option of APPROVE selected in the dropdown under Action Requested.
-
Either use the magnifying glass to locate the approver's Directory ID or enter the Directory ID into the box if you already know it. After the Directory ID is entered, the approver's name will show up immediately below. Click add in the Actions column to save the Ad Hoc Recipient you just entered.
-
Click the save button at the bottom of the page to save the approval routing configuration.
-
-
-
In this step, you'll review the form for correctness before submitting it to initiate the workflow.
-
Ensure all form fields are completed and that the approval routing is configured correctly.
-
The description is not empty.
-
The User Details section contains the information of the person for whom you are requesting access.
-
The correct account(s) and/or organization(s) for access are listed.
-
The statement of understanding is checked.
-
The approval routing is configured correctly.
-
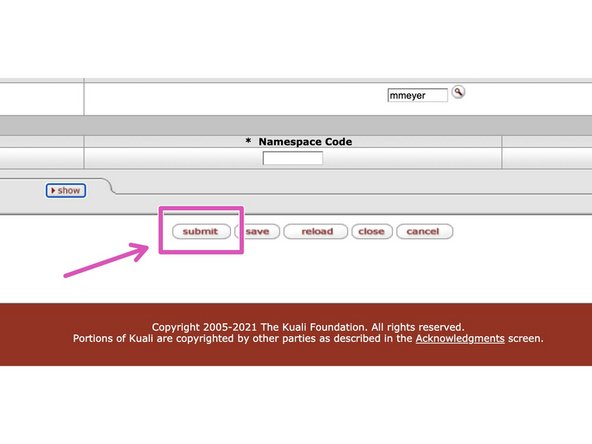
When you are satisfied, click submit at the bottom of the form to initiate the workflow.
-
-
-
After you have submitted the form, here's what you can expect next.
-
The workflow first executes the Ad Hoc Recipients section of the form and is routed to the person(s) you indicated needed to approve the request.
-
The process may take several days or weeks, depending on how you configured approval routing.
-
After final approval, the KFS team will issue access to KFS within 3-5 business days.
-
One day after the person's access to KFS is issued, the person's access in UMDashboards will be updated to mirror their KFS access.
-
Any future changes to that person's KFS access will automatically reflect in UMDashboards.
-


You have successfully submitted a KFS Access Security request.
You have successfully submitted a KFS Access Security request.