
Introduction
This guide explains how to operate the Artec Space Spider portable 3D scanner to capture scans of simple objects. Scanning most objects requires scans from multiple angles. Each scan captures an incomplete area of the object, so creating a complete mesh of an object requires further post processing. Refer to the Post-Processing in Artec Studio guide for an introduction to post processing. This guide exclusively provides an introduction to scanning.
-
-
Connect the power cable to the scanner.
-
Plug in the connection cable to both the scanner and the scanning laptop.
-
When the scanner turns on, you should hear the sound of the fan and you should see a flashing green light.
-
-
-
Place the scan object on a rotating stage or turn table if available.
-
When scanning, either move the scanner around the object, or turn the object slowly.
-
If a turn table or rotating stage is not available, you can use other tools to enable easy rotation of the target object such as:
-
A book
-
A piece of paper
-
A slab of wood
-
-
-
Both scanning and post processing with Artec scanners requires the Artec Studio software
-
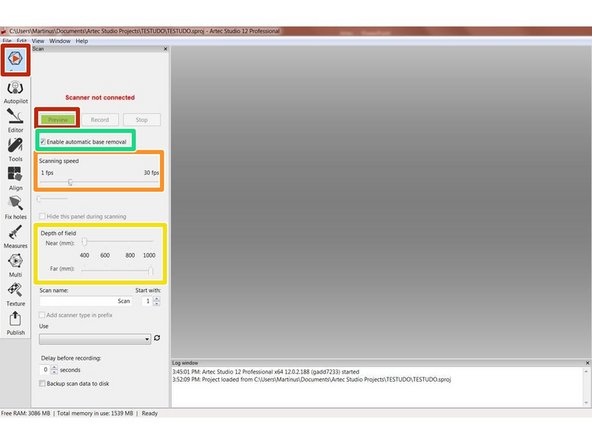
To start a scan, click the Scan button on the left-handed toolbar.
-
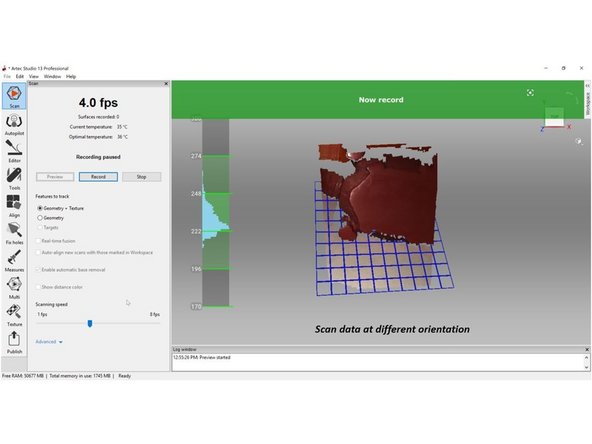
Click Preview to see the surfaces in scanners field of view and prepare to capture data.
-
If nothing is seen on the monitor, consider adjusting the scanner distance from the target object (Move it closer or further).
-
The scanning speed and depth of the field can be adjusted.
-
FPS represents the number of frame taken per second. The higher the number the more data the scanner collects.
-
The depth of field describes the range of distances from the scanner where it captures points.
-
Uncheck "Enable automatic base removal". This feature often removes useful surfaces.
-
-
-
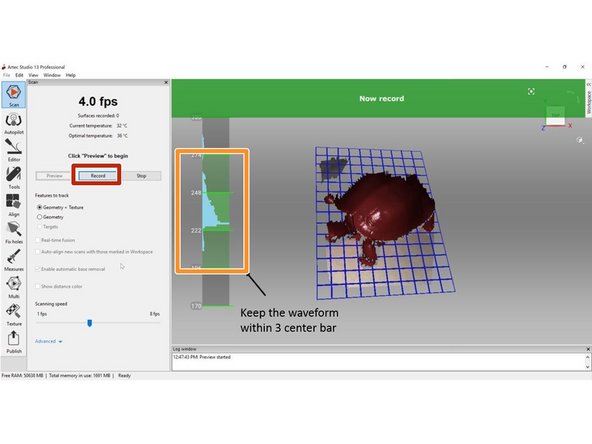
To start recording, hit the “Record” button or flick the toggle on the back of the scanner up.
-
Artec Studio creates a histogram with the distance between the scanner and detected points.
-
When running the scan, the majority of the points in the histogram need to be kept within the 3 center bar.
-
Move the object or scanner to capture as much visible surface as possible
-
Do not move both at the same time; this increases the chances of losing alignment
-
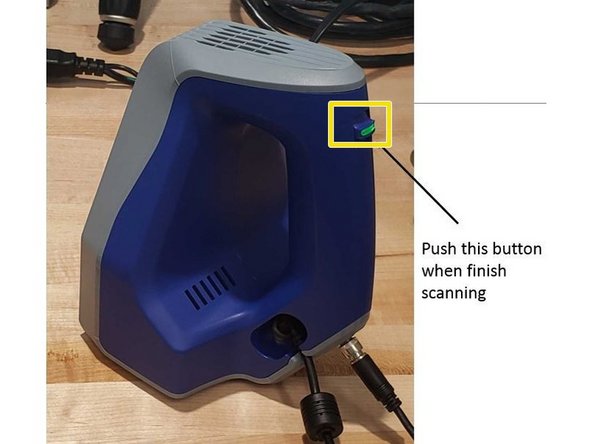
After capturing all visible surface, complete that individual scan by pushing the toggle on the back of the scanner down.
-
Completely capturing an object may require multiple scans with the object starting at different orientations
-
If the software displays a lost alignment message, restart the scan.
-
-
-
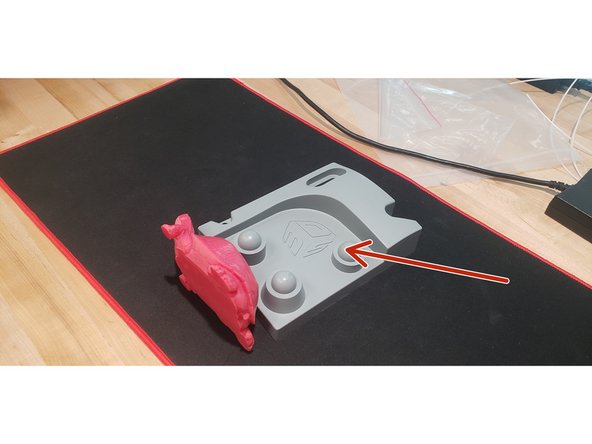
Move the object to another orientation and capture another scan.
-
If the object is not stable in the new orientation, use a vice or support structure to hold it in place.
-
Follow the same procedure as the previous step.
-
Do not worry if the vice or support structure get scanned as this can be removed in post processing.
-
Misalignment between scan data is not an issue; post processing involves a distinct alignment step.
-
Aligning separate scans at different orientations requires overlapping area. Make sure each of your scans captures the same surface as another to ensure alignment.
-
-
-
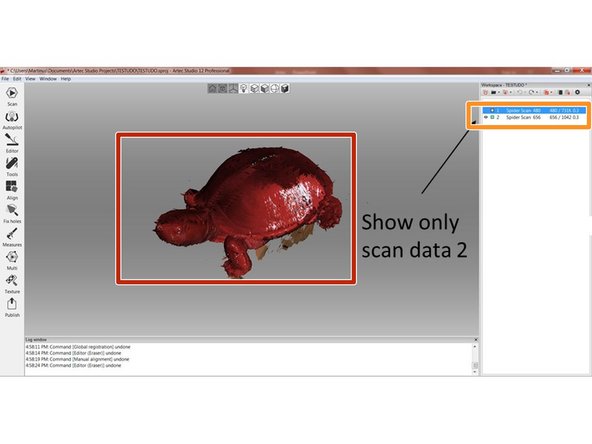
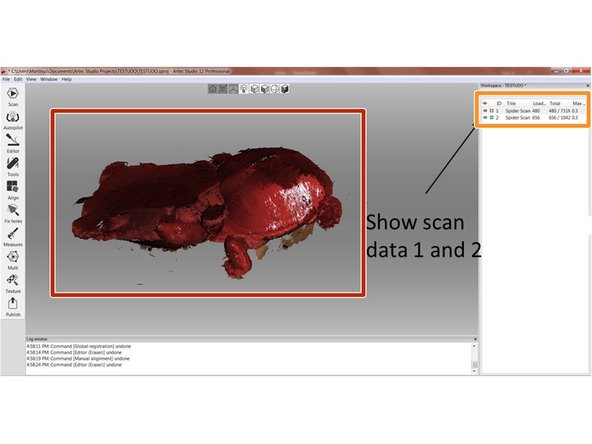
After the scanning, you will end up with multiple point clouds.
-
Newly captured point clouds appear with color data in the center of the screen.
-
All of the point clouds are listed in top right window.
-
Clicking the eye symbol shows or hides each point cloud.
-
View each scan, and if you notice any gaps or un-captured surfaces rescan those areas.
-


Congratulation you have learn the basic skill needed to operate Artec Spider 3D Scanner
Congratulation you have learn the basic skill needed to operate Artec Spider 3D Scanner
Cancel: I did not complete this guide.
9 other people completed this guide.