-
-
This is a basic guide on using the oscilloscope in the RPC. Please see these guides on more advanced usage on related oscilloscopes in the IES below, if you're interested. This oscilloscope has similar functions and the guides should still apply.
-
Math functions: Oscilloscope Advanced Usage (Math Functions)
-
Measurements: Oscilloscope Advanced Usage (Measurements)
-
-
-
Press power button in to turn the scope on.
-
Connect probes by inserting one of the four inputs and twisting clockwise until it clicks.
-
-
-
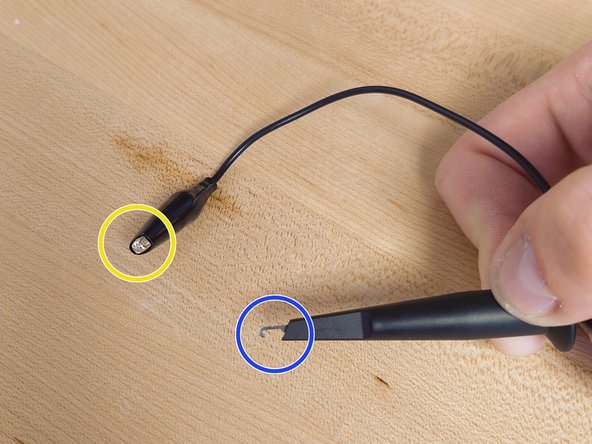
Connect this part to the signal you want to measure
-
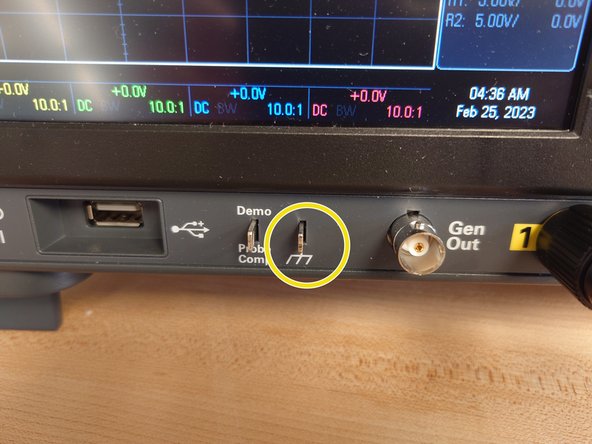
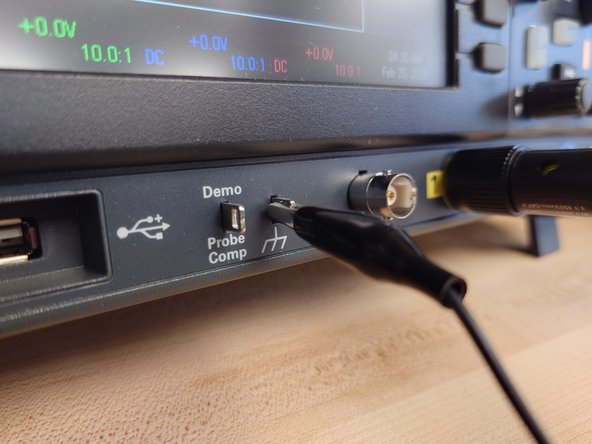
Connect this part to ground terminal on the oscilloscope, or to a verified working ground near the circuit you're testing.
-
Each probe's ground is connected together, so be careful not to create a short circuit when probing multiples parts of the circuit.
-
Do not connect a voltage source directly to the ground terminal.
-
-
-
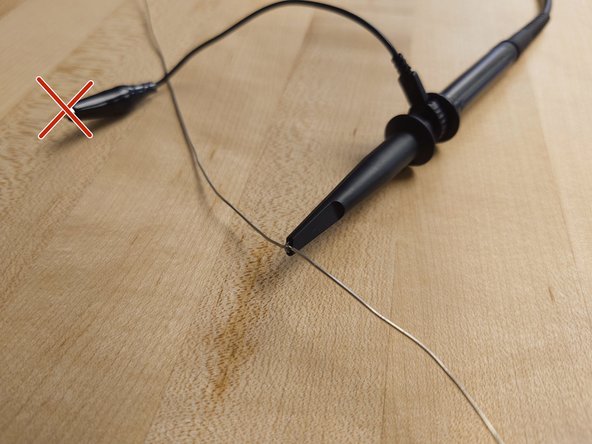
Pull back the cover of the probe to see the hook. Hook this over the wire, or whatever else you want to measure from.
-
There is also a point under the hook, which you can access by pulling the cover off. This point can be inserted into a breadboard.
-
Make sure the probe is grounded, as per the previous step.
-
There are more hooks in the top drawer nearest the electronics if you wish you use hooks on more probes.
-
-
-
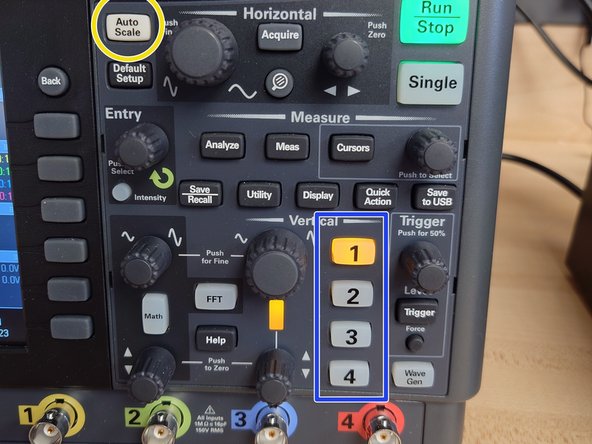
Press the numbered buttons to show or hide the four different inputs on the screen.
-
Your signal may not be very clear initially. Most of the time pressing the auto-scale button will scale the signal so that it appears on the screen nicely.
-
-
-
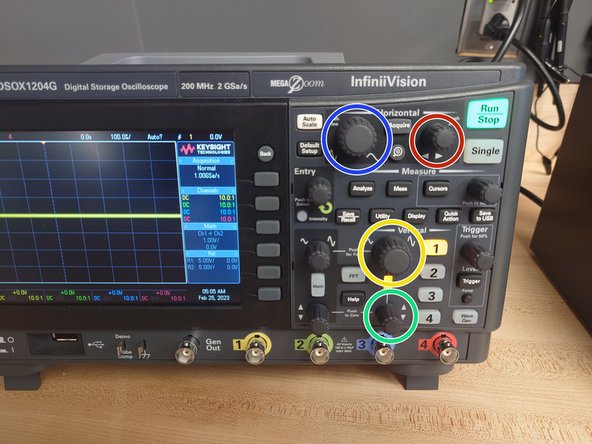
The auto-scale button is helpful, but you can also scale manually.
-
Vertical Scale - Clicking the knob will toggle between fine and rough tuning.
-
Horizontal Scale - Clicking the knob will toggle between fine and rough tuning.
-
Vertical Offset - Clicking the knob will re-center the waveform.
-
Horizontal Offset - Clicking the knob will re-center the waveform.
-
The vertical scale, horizontal scale, and horizontal offset are given in that order at the top of the screen.
-
-
-
You can simultaneously measure up to four signals at a time.
-
Vertical scaling can be different for each signal. Ensure you select the correct signal when you edit the scale.
-
Horizontal scaling and Horizontal offset will be applied to all signals.
-
Cancel: I did not complete this guide.
One other person completed this guide.


