Introduction
The miter saw is one of the easier saws to use, and is relatively safe when used properly.
-
-
Always make sure all proper PPE is worn.
-
Goggles
-
Ear Protection (optional but HIGHLY recommended)
-
Gloves should NOT be used around the miter saw.
-
-
-
Make sure all the following:
-
Tied back any loose hair
-
Removed any jewelry from wrists or hands
-
Rolled back any long sleeves
-
Wore closed toed shoes
-
Secured any and all loose and baggy clothing
-
-
-
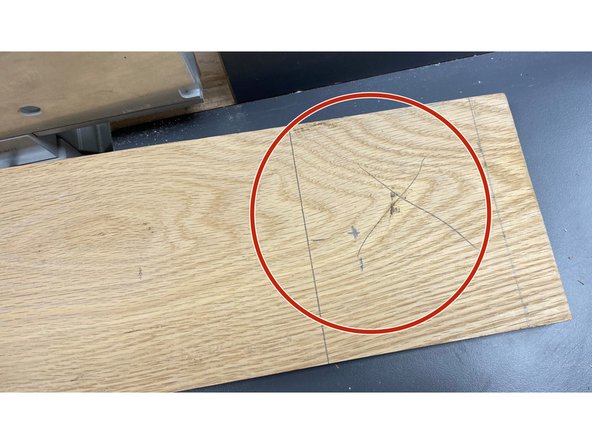
Using a straightedge or square, mark the workpiece with pencil to the desired cut length.
-
Make sure to mark an "X" on the material that will be cut off to easily tell the pieces apart when they are cut.
-
-
-
Before cutting, make sure the workpiece has a flat edge to push up against the fence of the miter saw.
-
This allows for the cut to be perpendicular to that specific edge.
-
Always make sure the workpiece is laying flat on the cutting bed as cutting a standing up piece is dangerous.
-
Clamps should ALWAYS be used to properly secure smaller workpieces.
-
While it is not necessary to clamp for larger workpieces, ALWAYS keep a hand on a larger workpiece to ensure it is stationary throughout the cut.
-
-
-
First, release the clamp so its able to clear the moveable fences, then turn it to face the back wall.
-
Lift up the clamp and put it into the opposite side hole with the flat edge facing towards you.
-
Turn the clamp back towards the shop once inside the hole and use as normal.
-
-
-
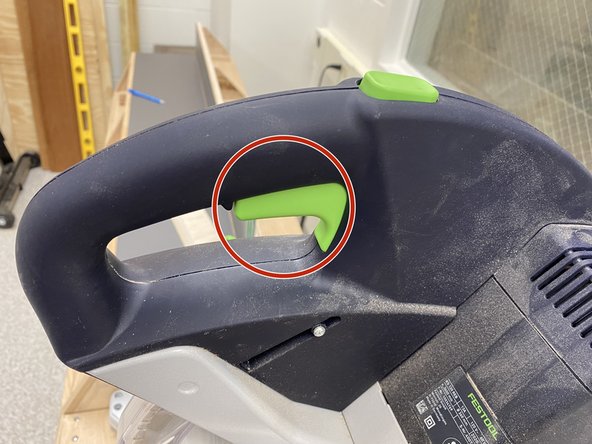
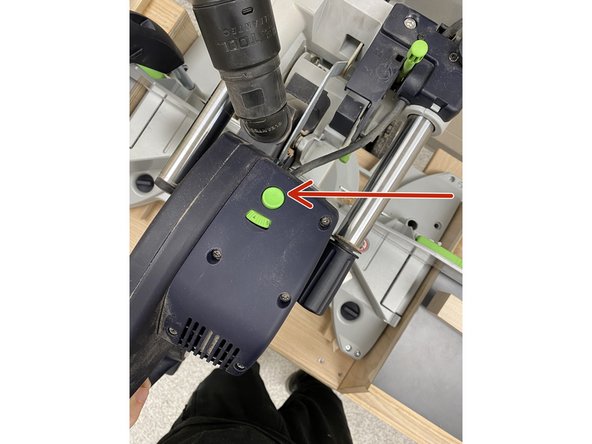
To view where the saw blade will end up when cutting, simply push down the bottom green button on the handle.
-
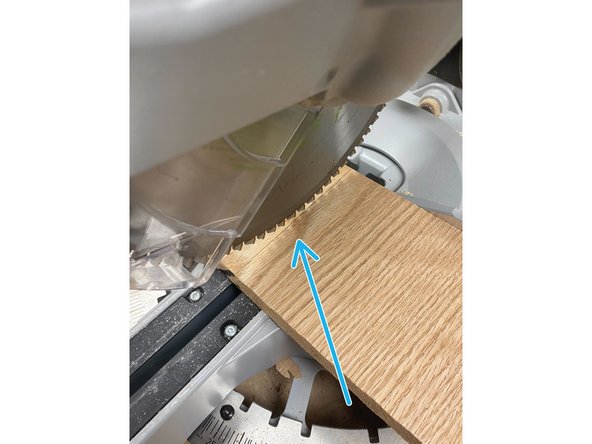
This unlocks the saw and lets it freely move down towards the workpiece.
-
It is important to note that the blade thickness should be accounted for when cutting.
-
Cutting on the "X" side of the marking line on a workpiece is advisable as cut pieces of wood cannot be made longer.
-
-
-
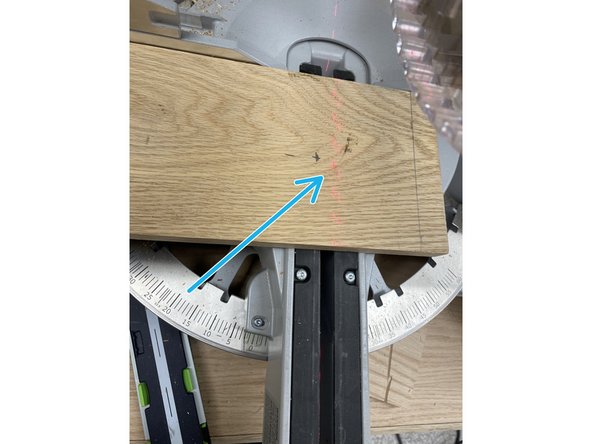
The Miter Saw has a green button for the laser guide on the back side of the handle facing the wall.
-
Pressing this gives a fairly accurate laser guide of where the blade will end up in the workpiece.
-
While this can be useful for rough outlines, physically moving the saw without turning it on is always clearer about where the saw will cut the workpiece.
-
-
-
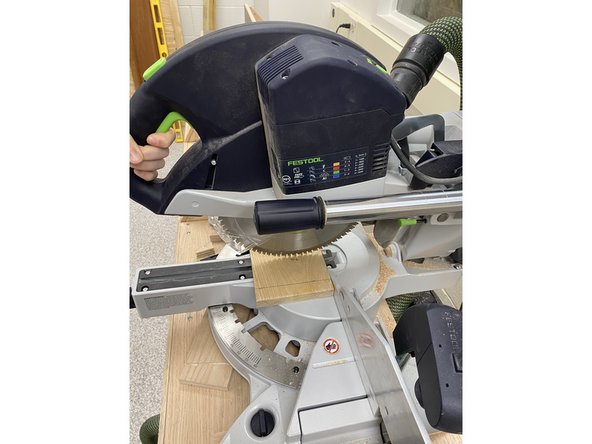
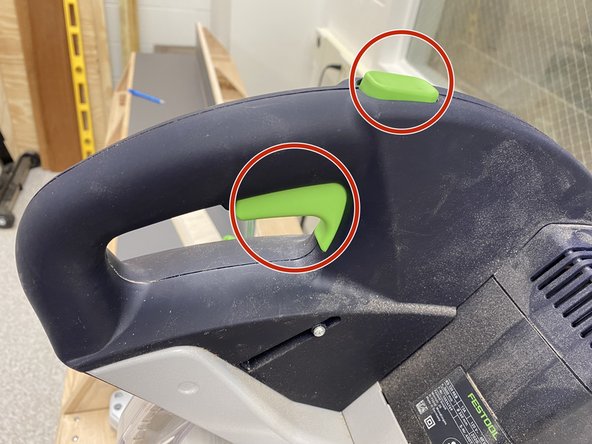
To cut, simply push down both the top and bottom green buttons on the handle at the same time.
-
This allows for the saw to both move freely and start spinning.
-
This also causes the vacuum attached to the saw to start.
-
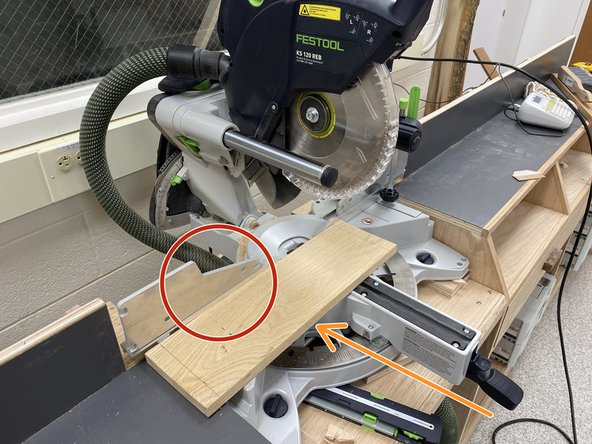
This miter saw has the ability to slide towards the user, so when cutting it is always ideal to start with the saw closest to the user and then push it back towards the wall to get a nice clean cut.
-
If the saw makes any unexpected rattling noises or something seems wrong, stop using the saw and find a staff member immediately.
-
-
-
When cutting, it is important to use confident and controlled motions.
-
This is to prevent the wood from jumping or binding with the saw, which occurs when moving the saw too quickly.
-
If the saw idles while spinning on the wood or moves too slowly while cutting, it will start to burn the wood from the friction against the saw blade.
-
-
-
Stop blocks are very useful to create a lot of cuts that have the same length.
-
By using a clamp and a scrap piece of wood on the miter saw bench, the edge of the workpiece can be pushed up against the stop block to achieve the desired length.
-
-
-
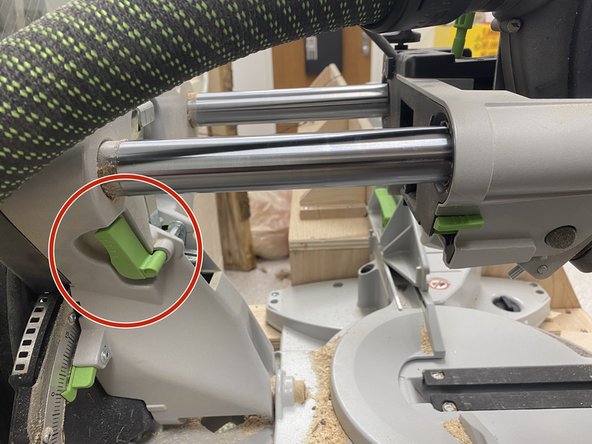
The Miter Saw can also be turned into a basic chop saw.
-
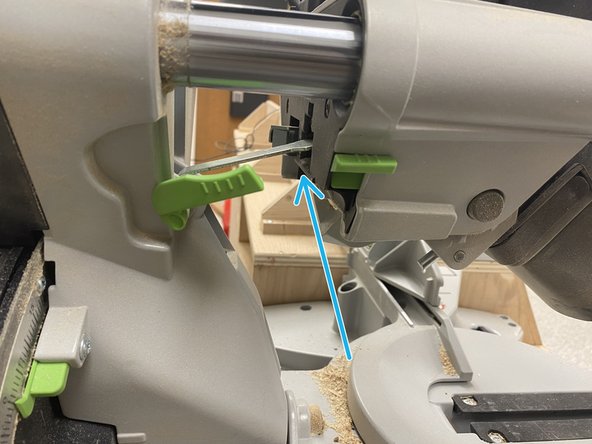
This is done by pulling the saw head towards the user and then turning the green switch on the left side of the saw clockwise. It will have a bit of resistance when it gets closer to the correct position.
-
The saw head should then be pushed back into the metal arm to lock it into place.
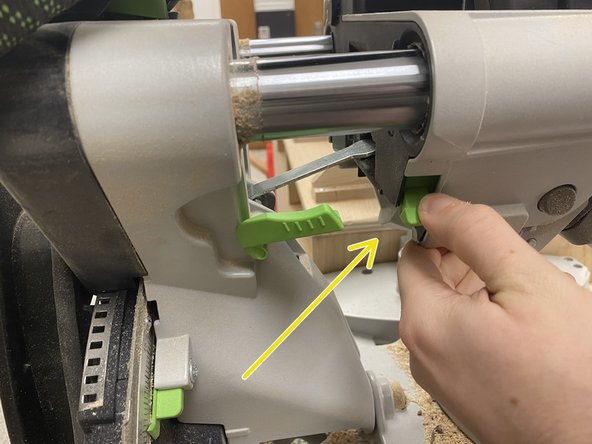
-
To release the saw head, push the green button that is on the saw head down and move the saw away from the metal arm.
-
It should lift up on its own and allow the saw to return to its base position.
-
-
-
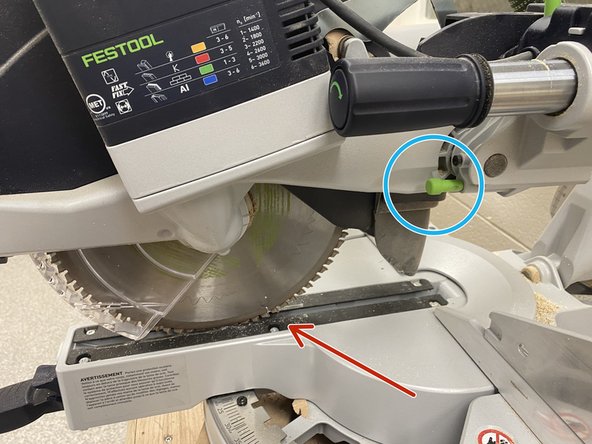
Using the bottom trigger, lower the saw all the way into the saw well.
-
Then push the green pin on the right side of the saw in to lock the saw into place.
-
This allows the saw to move back and forth, but not up and down.
-
-
-
Once the miter saw is off, put it back in the upright position:
-
Release any clamps or stop blocks used.
-
Return any adjustments made to the saw such as angling or locking the saw into a specific orientation.
-
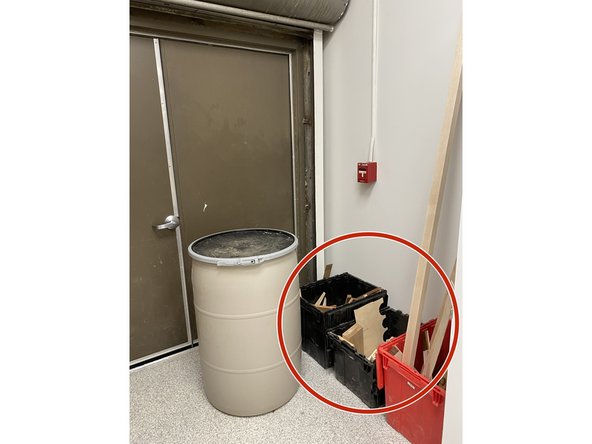
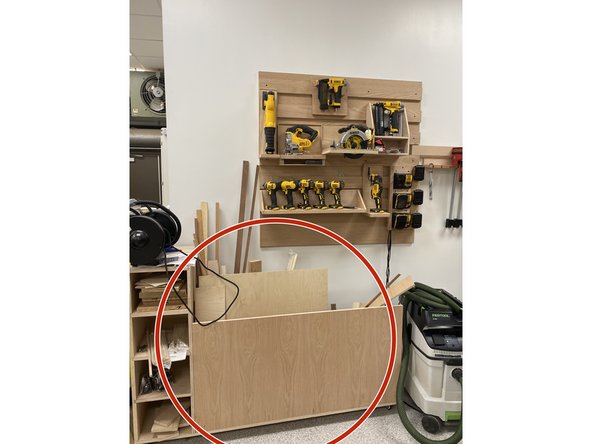
Move any scrap pieces from cutting either to a scrap bin or to whatever workbench you are using.
-
Scrap bins are located in the back of the woodshop by the brown metal doors and by the DEWALT power tool wall.
-