Introduction
The belt sander’s belt and disc need to be periodically replaced, as they gradually become more and more worn. This guide will show you how to identify the need for the belt/disc to be replaced, as well as how to replace them when the time comes. This includes all the necessary prep-work and safety precautions!
-
-
Before making any machine adjustments or maintenance, ensure the sander is unplugged from the power source
-
Use a brush or compressed air to remove chips or debris from the sander - do not use your hand.
-
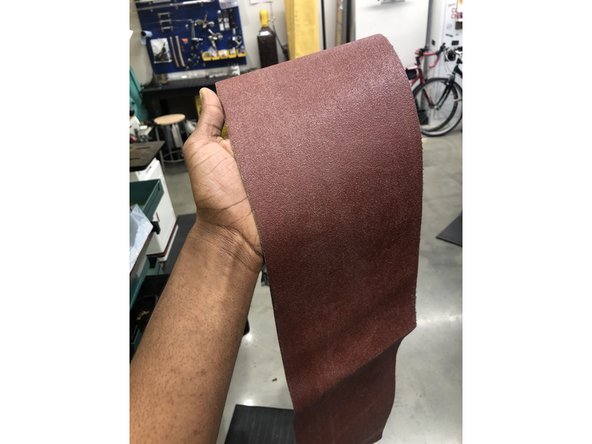
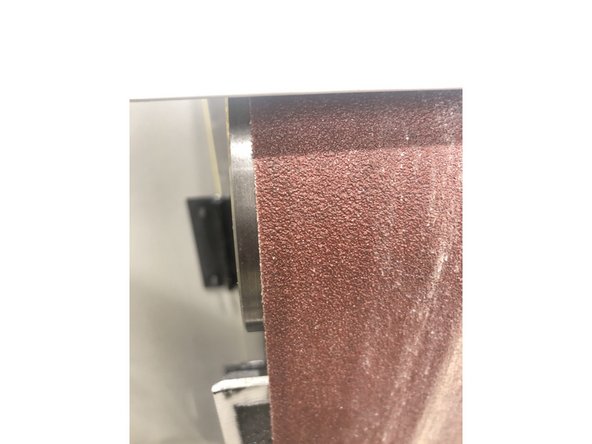
Carefully inspect the belt/disc for excessive abrasive wear. Take note of any holes, tears, worn patches or rings.
-
Depending on the level of wear, a replacement may be in order.
-
-
-
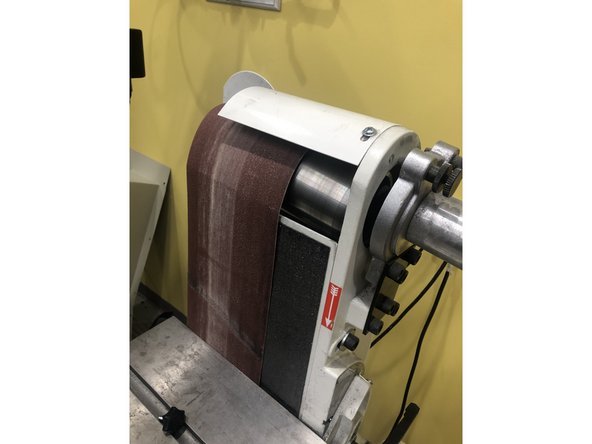
With the machine disconnected from the power source, ensure the belt arm is sitting in its upright (vertical) position.
-
Over on the left side of the machine, remove the lock screw and open the side panel that covers the belt assembly.
-
-
-
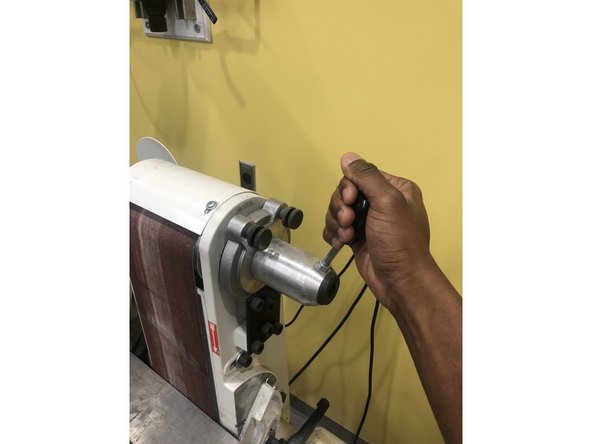
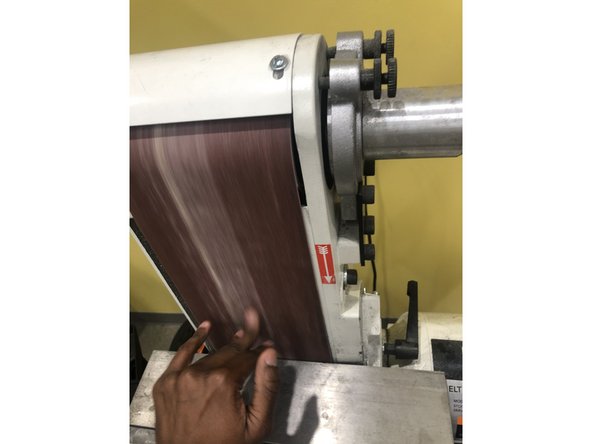
Release the belt tension using the handle, and slide the belt off the wheels in one motion.
-
(Note: you have to hold down the handle and slide the belt off at the same time, if this proves to be difficult, call a friend to lend a hand!)
-
-
-
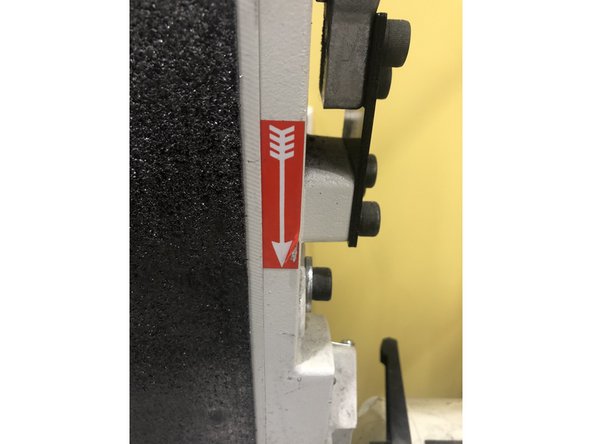
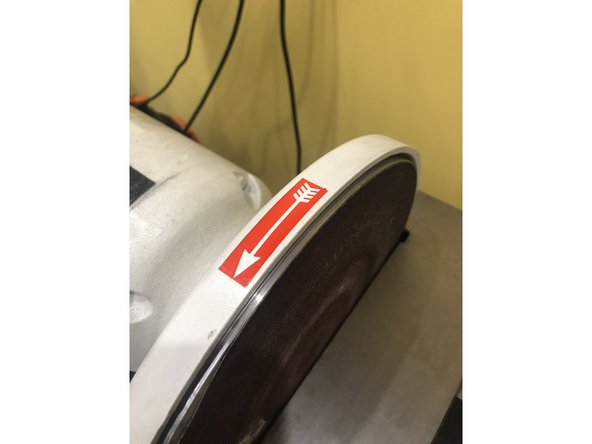
Most brands of replacement abrasives are directional, and must be installed in the proper direction.
-
Directional belts are so indicated on the backing material by arrows.
-
The direction of the abrasive should match that of the arrow on the platen assembly.
-
-
-
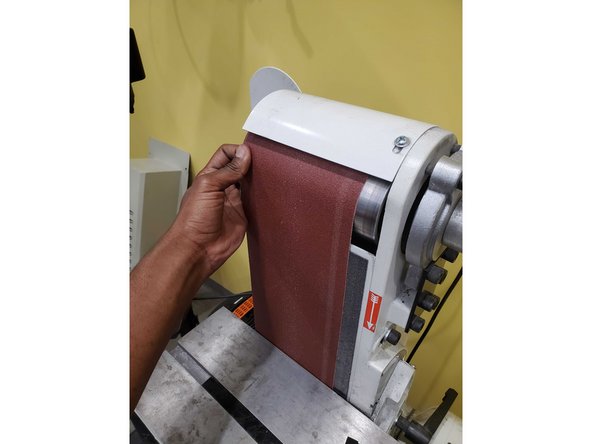
Once belt direction has been determined, pull the belt tensioning handle toward you with one hand.
-
At the same time, use the other hand to slide the belt onto both drums and over the platen pad.
-
If you find the belt is sitting a little offset on one of the drums, keep adjusting until properly centered.
-
(Note: you have to hold down the handle and slide the belt on at the same time, if this proves to be difficult, call a friend to lend a hand!)
-
-
-
Now, the belt is centered, but is it properly aligned in relation to the position of the drums?
-
To verify alignment, rotate the belt (by hand) and observe how it tracks. The belt should run centered on the belt wheels.
-
If the belt has a tendency to track (veer) left or right of the center, further adjustment will be needed (proceed to next step)
-
-
-
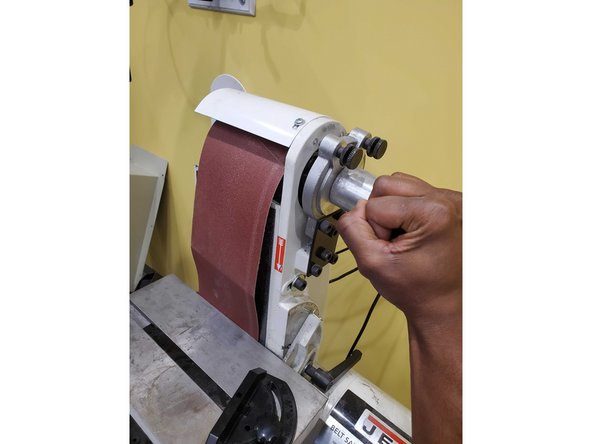
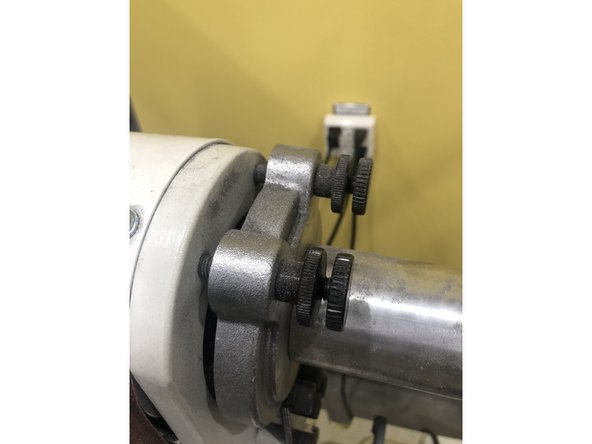
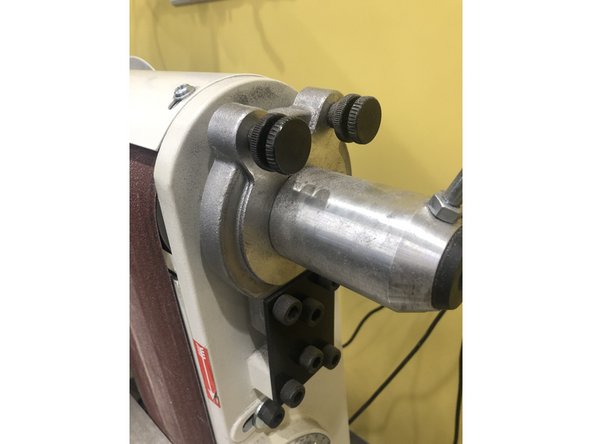
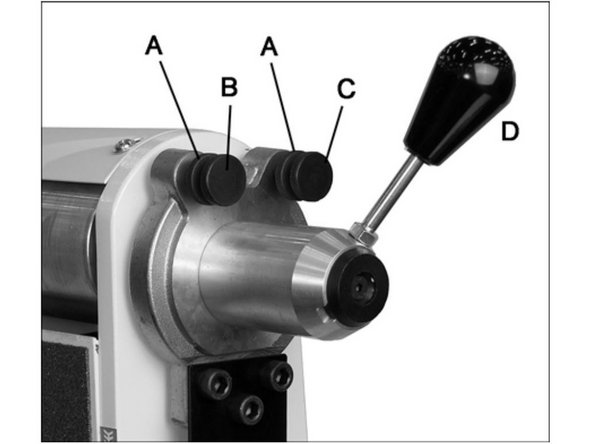
Loosen the lock nuts (Part A) then begin to turn the front screw (Part B) while turning the belt by hand.
-
Observe the belt tracking, once the belt begins to move in the desired direction, stop and adjust the rear screw (Part C) in the same manner.
-
Which direction should you turn the screw? General rule of thumb; if the belt is veering left, tighten by turning the screw rightward. If it's veering right, loosen by turning the screw leftward.
-
-
-
Plug the sander back into the outlet and grasp the tension adjustment handle.
-
(Note: be ready to pull down on the tension adjustment handle should the belt want to run off the belt wheel.)
-
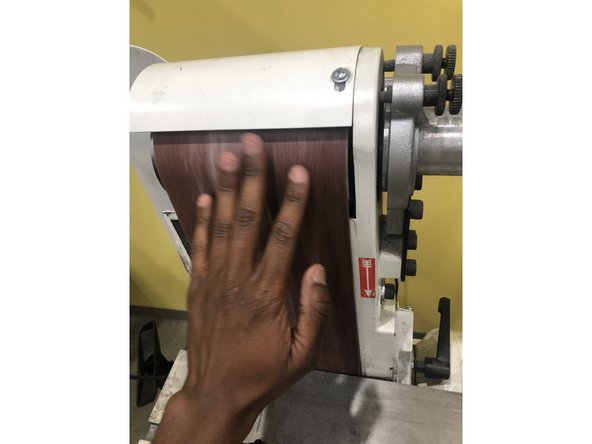
Power up the machine and observe the travel of the belt. Fine adjustment of the tracking may still be necessary.
-
When tracking has stabilized, slowly release the belt tension handle and let the machine run for 2 minutes.
-
Once adjustments are satisfactory, tighten the lock nuts (Part A).
-
-
-
Ensure the sander is disconnected from the power source.
-
Slowly work the tip of a knife under the abrasive disc, and work it around the circumference of the disc until abrasive can be removed by hand.
-
Clean the aluminum disc of any residual adhesive, using mineral spirits or similar solvent. Allow to dry.
-
-
-
Make sure the aluminum disc (area where new abrasive disc will adhere too) is clean and dry.
-
Peel the backing from the abrasive and carefully insert it between disc and table; align and press into place.
-
Rotate disc a half turn and press other half of abrasive into place. Make sure to remove any entrapped air by pressing all parts of the abrasive against the disc.
-