-
-
To begin we must get the appropriate allen wrenches. You will need x mm, y mm, and z mm sizes.
-
Firstly it is important to loosen the 2 grub/ wyrm screws on the front face of the recoater. These screws only need to be loosened by 1 turn. As long as they can befreely moved with your finger they are ready to be uninstalled.
-
Next remove the 6 screws holding the recoater in place.
-
It is recommended you get a magnetic plate to hold all the screws with so keeping track of the smaller components is easy.
-
Additionally the replacement and subsequent rebalancing will be easier if we pull the recoater forward. To do this lower the plate first so it is well below the recoaters rubber blade height. Then bring the recoating unit forward to begin working with it.
-
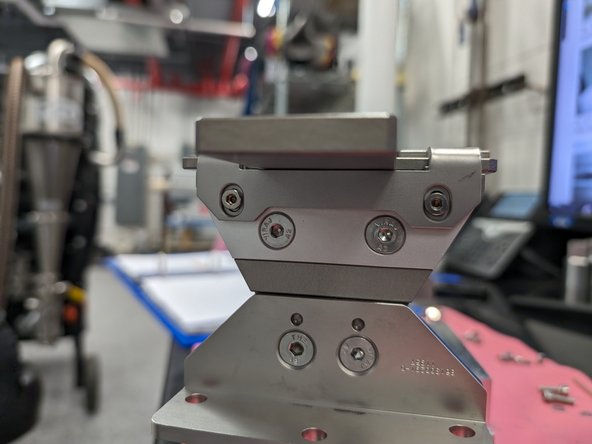
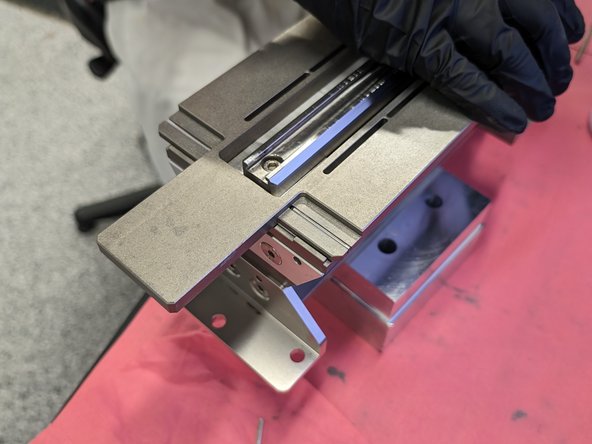
Remove the recoating unit from the machine and place it on a prepared surface where you can easily operate on the part. It is important to note that you should orient the head as shown in the second picture to avoid unnecessary stress on the screws.
-
-
-
The next step is to begin taking apart the head and cleaning each of the seals and pieces till they are free of powder and are clean when wiping with an alcohol soaked towel.
-
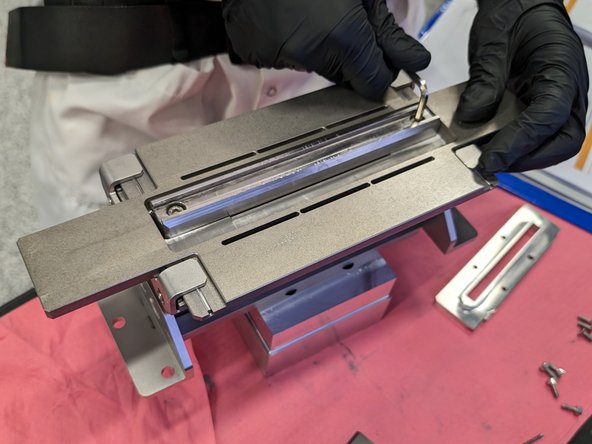
The first step in disassembly is the removal of upper most plate screws followed by removing the plate itself.
-
The plate has a seal on the bottom side that will need to be cleaned.
-
Next we remove the Big Black Block! (insert the screw here)
-
Finally we will remove the adjustment screws by taking them all the way out. Simply use the coarse adjustment and back the screw out all the way.
-
These threads are very fine and are delicate so be careful when taking them out of the machine
-
-
-
Next we will remove the guide rails for the wiper blades. Loosen the two screws that lock the rail in place. There are springs? under this part so make sure it doesn't fly away.
-
Using a file careful smooth out the top end of the rails if you notice they are brittle or fragmented. Potential damage may block the wiper blade from creating a properly flat layer.
-
Next we take remove the screws holding in the sliding doser block and the mounting flanges. Clean these areas with isopropyl and a cloth.
-
After cleaning the flanges remove the sliding doser block.
-
-
-
Finally replace all of the pieces back in the order they came off.
-
Taking a new wiper blade cut the length in half to make it fit the SLM.
-
Next take the wiper blade and wash off the outer coating with isopropyl and a cloth.
-
Fully dry the wiper blade and then resoak in isopropyl. After, fill the guide rails with isopropyl as lubricant to install the wiper blade.
-
-
-
Next when you replace the assembly into the machine make sure that you tighten screws to a finger tightness at first.
-
This will allow us to move the wiper blade to its designated position for rebalancing.
-
Slide 2 pieces of paper under the wiper blade. Make sure the paper is slightly offset so you can pull the bottom one without touching the top sheet.
-
Using the fine and coarse adjustment screws slowly and equally lower the wiper blade.
-
Lower the blade until the bottom sheet of paper cannot be pulled with your fingers.
-
Remove both sheets of paper
-
Set the blade to roughly 220mm on the position screen. ADDITIONALLY DO NOT USE THE COARSE ADJUSTMENT WITHOUT LOOSENING THE GRUB SCREWS!
-
Almost done!
Finish Line


