
Introduction
This is the second guide to the Jira project management software, if you haven’t already navigate back to the Jira folder and read the “Getting Started” guide. In this guide you’ll learn how to create issues which will be how you track you special project through its workflow.
-
-
Once logged into Jira you can click on the create button which will open up a window
-
In the create issue window you'll want to change the project to the lab you're associating the project with or the generalized 'special projects' project
-
Next you'll want to set you issue type which will almost always be a task so you shouldn't have to worry about the other ones that you may see.
-
-
-
The Summary can be equated to the title of the project you are creating, you'll want to use a generalized title that can easily communicate the project in a condensed from.
-
When first creating the issue you'll want to put in an estimate for how long you think someone might need to complete this project. Try to take into account all aspects of the project and feel free to round up as this is just an estimate.
-
If you are creating an issue that is similar to one which has already been created, you can base you prediction off that one.
-
The reporter is essentially the supervisor for the project, they'll get put on watch and get notifications for all events that take place in the issue.
-
Your respective LC is typically going to be the reporter for a project going on in their lab
-
Make sure that you write an adequate description such that if you assign this task to someone they can gain a full understanding of the task and it's goals.
-
I have added an example in the second picture of this step so feel free to base your issues on this exemplar
-
-
-
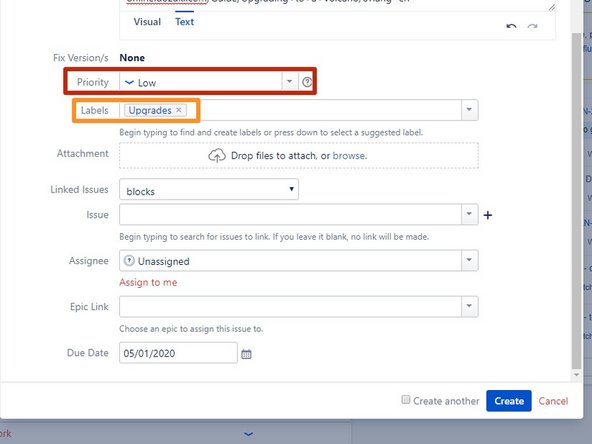
The next step to creating your issue is adding a priority. The priority ranges from lowest to highest in 5 stages.
-
Adding labels to your issue helps a lot when tracking the issues from a lab perspective as they are typically associated with what the issue is trying to accomplish.
-
You can technically create new labels for the issue but please refrain from doing so since it will clutter up the drop down and cause unnecessary confusion in classifying tasks.
-
The only labels you should have to worry about are as follows: Documentation, Labspace, Procurement, Maintenance, Upgrades, Training, Structure, Meetings, and Brainstorming.
-
If you need clarification on any of these labels feel free to ask your appropriate LC
-
-
-
The assignee is the staff member who will actually be performing the work
-
Jira is a bit weird in that it doesn't allow for multiple people to be assigned to one issue. Therefore you may have to clone an issue and then link the two issues together.
-
In addition to linking cloned issues you can set up an issue to block another one meaning the current issue must be completed before the other one or vice versa.
-
Lastly, you can setup a date of completion for the project or just leave it blank
-
-
-
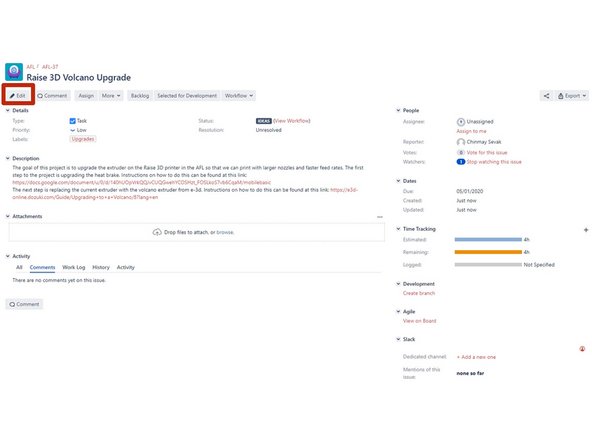
Finally after you've created your issue you'll be able to see it in the standard issue view
-
If you need to edit any aspects of this issue that have been discussed in this guide you can simply click on the edit button and it will bring up the same menu we started with initially.
-
-
-
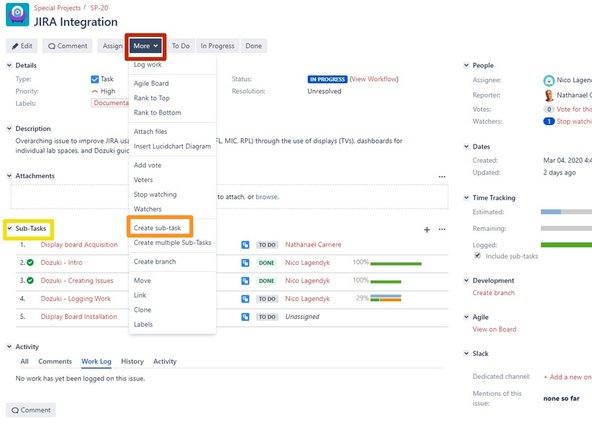
A good way to break up a large project is to use sub-tasks
-
When in an issue click on the more button at the top which will drop down a menu
-
Then click "Create sub-task" which will bring up a window which looks exactly the same as the create issue window and you can go back to step 2 and complete the guide all over again for a more specific task.
-
Sub-tasks come in real handy when you have multiple aspects of a project that you'd like to assign to different people
-
When you're done the sub-tasks will become a new section in the issue where you'll be able to see their progress and assignee
-


Congratulations! You now know how to create issues and track your special project through Jira. Continue on to the “Logging Work” guide to finish out the trio of introductory guides.
Congratulations! You now know how to create issues and track your special project through Jira. Continue on to the “Logging Work” guide to finish out the trio of introductory guides.
