Introduction
Preparing the Desktop Metal Shop Printer to print is perhaps one of the most time consuming and complex processes of the entire print workflow. Each and every part of the machine should be checked for proper function and correct installation, as an error here could either be wildly dangerous, delay the print considerably, or waste many materials (and money).
Each step should be taken patiently, and remember to have 2 operators working on these processes. Some materials can be over OSHA recommended limits of 50 pounds for a single person during these processes.
Images by: Terrapin Works
-
-
Insert USB stick (loaded with appropriate files) into the printer
-
On the touchscreen, import the job to the printer
-
Eject the USB stick using the printer interface
-
Remove the USB stick
-
-
-
Check the water level of the vacuum, refill if needed (see separate guide)
-
Turn on vacuum
-
Turn red valve to start gas flow
-
Verify pressure is set to ~1 bar
-
Check gauge on front of vacuum to verify that pressure is within acceptable range
-
If the vacuum is not performing well, the bag or water may need to be replaced
-
-
-
Visually check if there is enough binder level in the left utility cabinet
-
Visually check the binder waste containers in the right utility cabinet
-
If more than half full, empty into appropriate waste container
-
Check the water source for humidifier and verify they are set to 60-65% (by opening left utility cabinet)
-
-
-
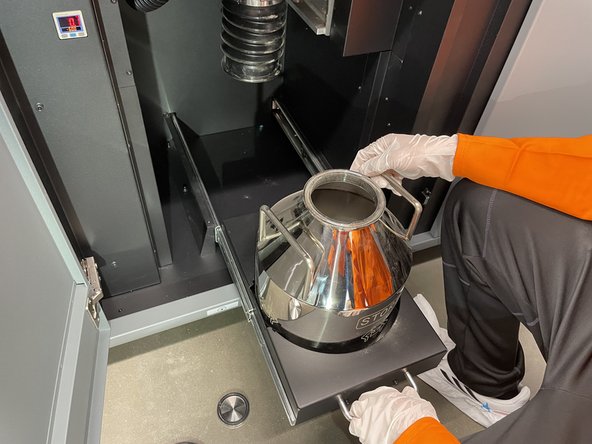
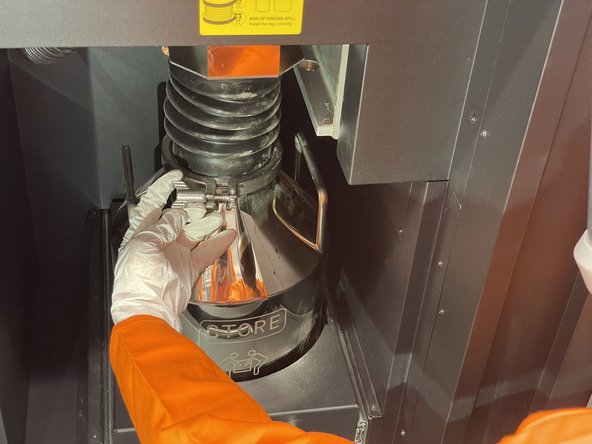
Check to make sure a empty powder store keg has been installed on the printer (center utility cabinet)
-
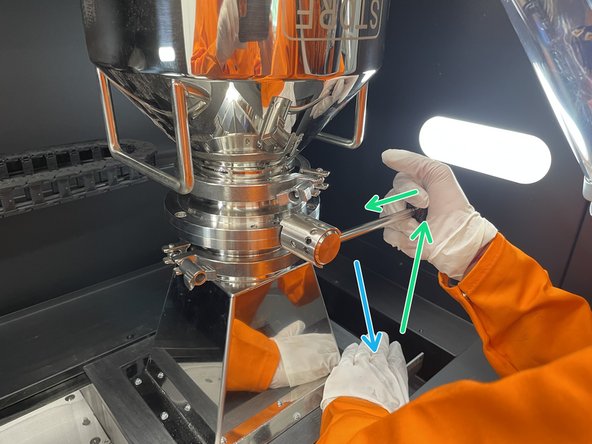
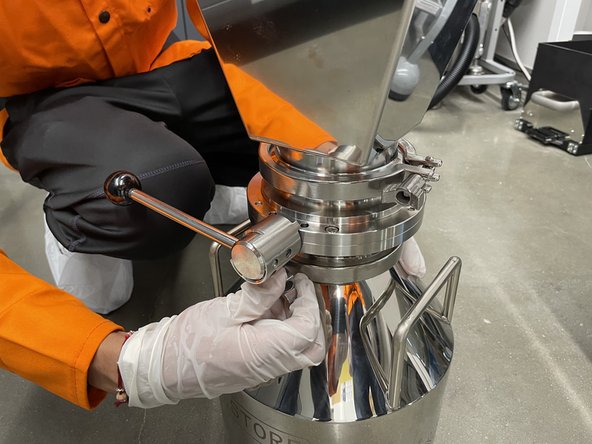
Carefully disconnect the powder chute by undoing the clamp
-
Slide the drawer out to see inside the overflow keg and verify that it is empty
-
Slide it back and reinstall the clamp
-
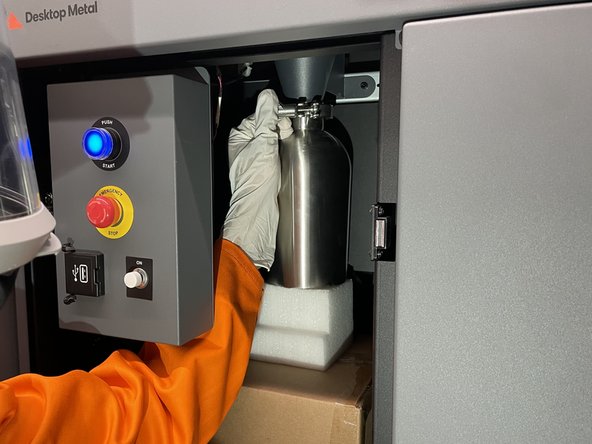
Check to make sure the fines keg has been installed on the printer (left utility cabinet)
-
-
-
Throughout this process, the printhead can manually be moved (slowly) back and forth to gain better access to both sides of the carriage
-
Select Maintenance > Cleaning > Clean Air Knife
-
Push the printhead carriage further to the right, gently
-
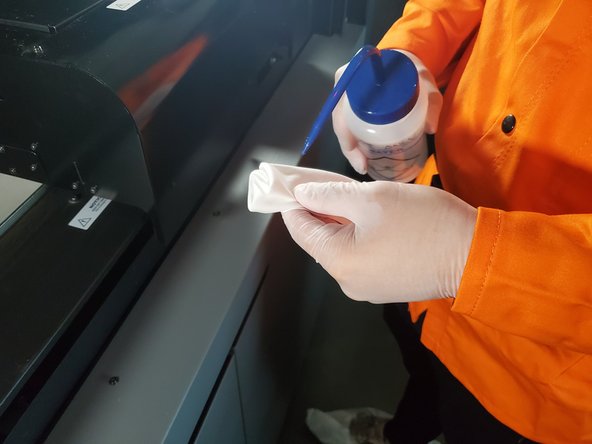
Get a lint free cloth and wet it with DI water
-
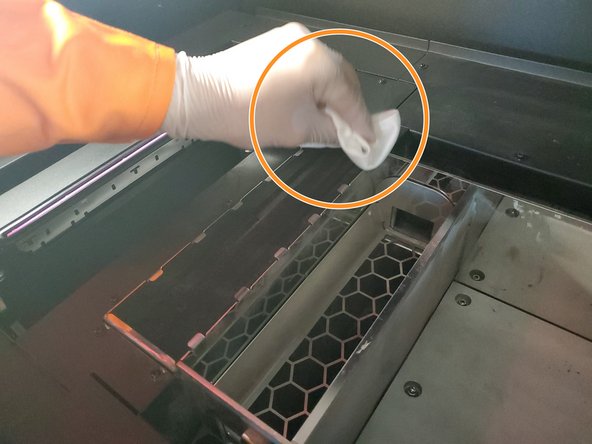
Reach under the printhead carriage and gently wipe the print head nozzles and air knife
-
Do these one at a time, carefully feeling for where each one is
-
Repeat with fresh area of cloth until no powder is visible
-
-
-
With a lint-free cloth and DI water, clean the print head cap (on the left) gently
-
With a lint-free cloth and DI water, clean the spit pad (on the left) gently
-
Vacuum the inside of the build area if any excess powder is visible
-
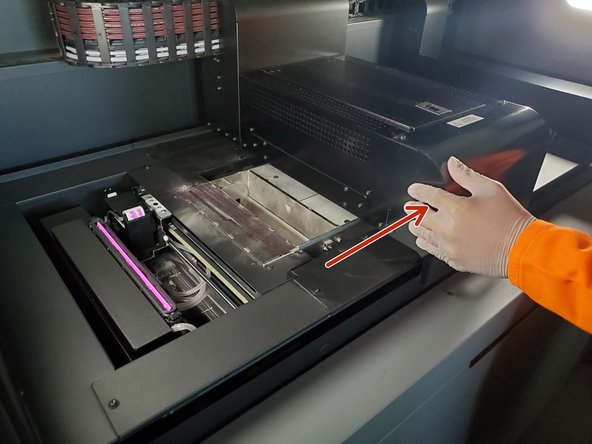
Select Maintenance > Clean Roller
-
Use a dry, lint-free cloth to wipe the roller (on all sides) until no powder or ink appears on the cloth
-
If ink is present while cleaning roller, use a small amount of DI water to wet the cloth and dry the roller at the end of cleaning
-
-
-
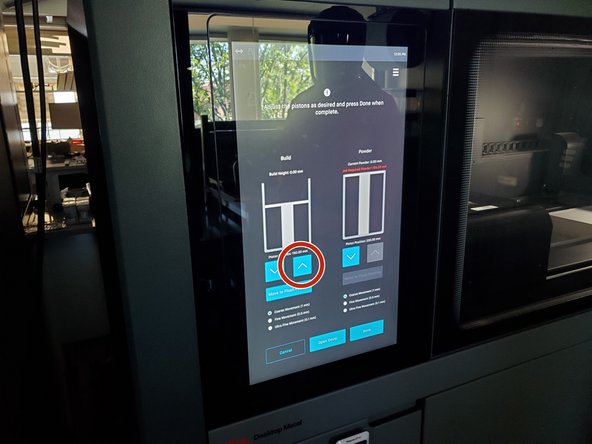
Select Maintenance > System > Move Pistons
-
Use the up arrow to raise the build piston to maximum height
-
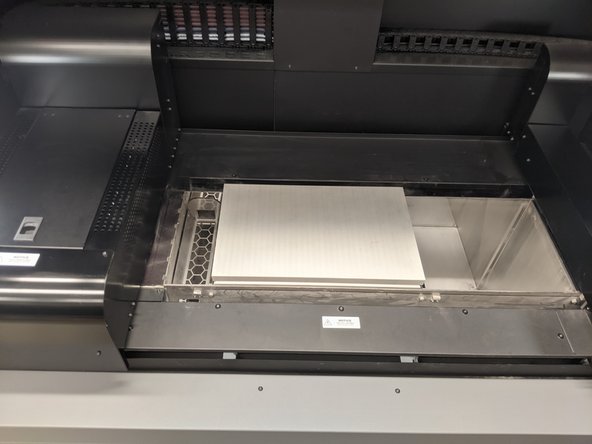
Select Open Cover
-
Set the build plate in the build area by aligning the edges
-
The build plate can only go in one way
-
Close the printer door and press the blue reset button
-
Lower the build piston so the build plate is just below the edge of the print chamber, then press Done
-
-
-
Select Maintenance > Test Print > Print
-
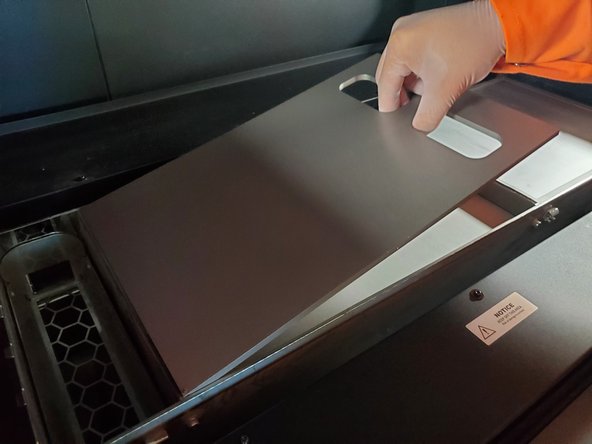
When prompted, open door and install test print fixture
-
Position finger holes towards the right
-
Ensure tabs are sitting on the build area perimeter
-
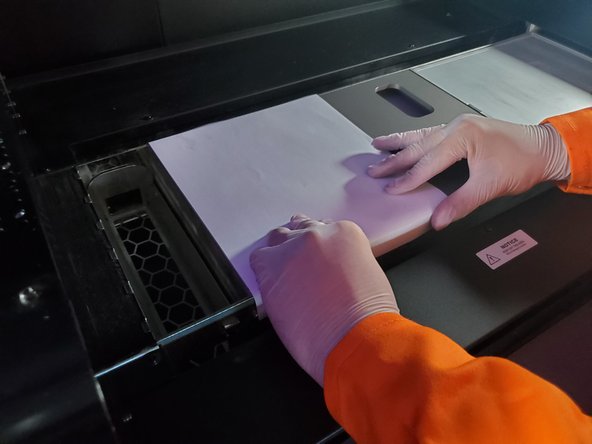
Place paper so long edge of paper is lined up with left side
-
Fold down excess paper
-
Tape down right and/or left edges of paper with masking tape
-
-
-
Once test fixture is installed, close the door and press the reset button
-
Select Yes to run pre-job maintenance
-
The printer will run the test page, and will display a prompt to remove the test page fixture
-
If the fixture is in the printer after it is prompted to remove it, the roller will hit the fixture during axis zeroing
-
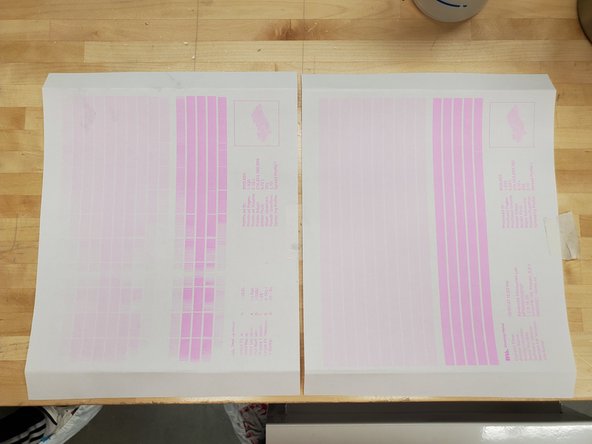
Inspect the test page and look for any issues with the print
-
If issues are found, follow the Shop hardware user guide for further instructions
-
-
-
Select Powder > Powder Volume > Add Powder
-
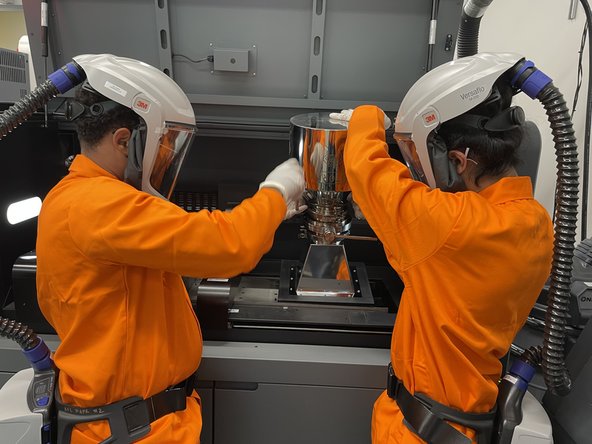
Using mixed powder, remove keg cap and install the funnel
-
Clean inside of funnel with vacuum and dry paper towel if needed
-
Line up the handles perpendicular to the lever to make it easier when loading powder
-
-
-
Be very careful to avoid putting weight on the sheet metal parts of the printer
-
With two people, lift and align the powder keg + funnel onto the powder feeder
-
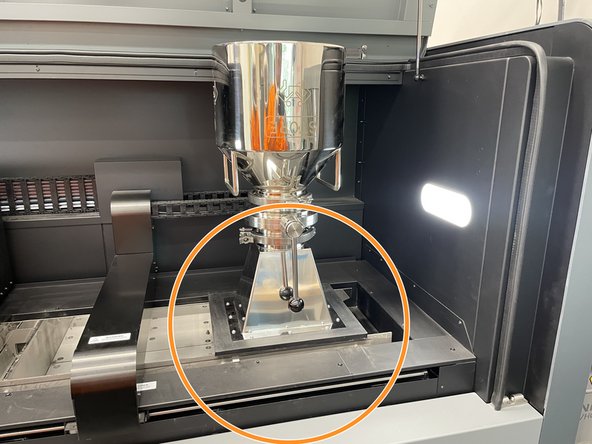
Ensure the funnel is seated properly
-
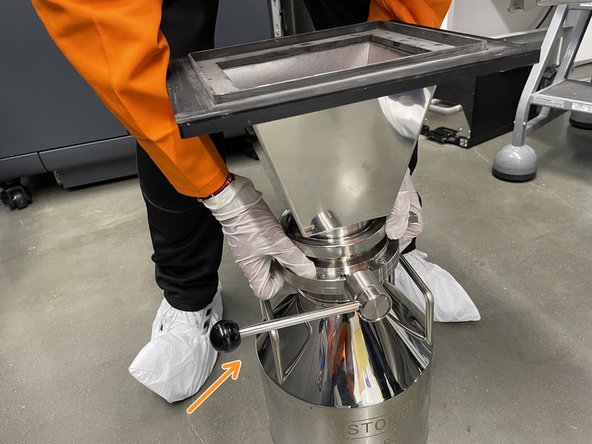
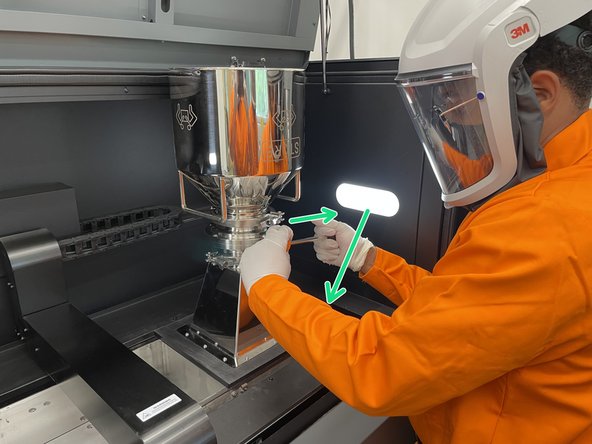
Pull the lever to unlock it, and then turn it to dump powder into the feeder area
-
Wait 10-15 minutes, gently tapping on the keg and funnel with a rubber mallet to encourage powder to fall through
-
-
-
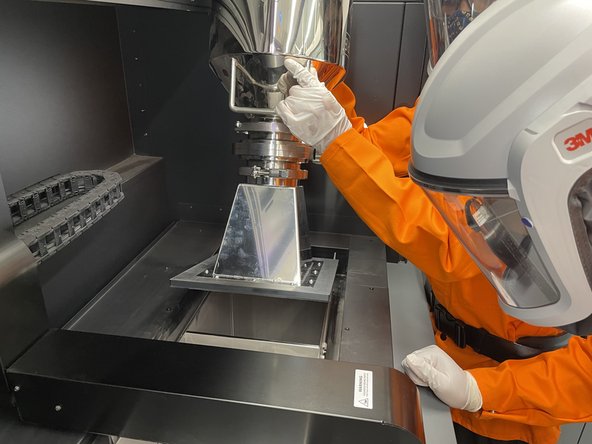
5-10 minutes after tapping funnel with rubber mallet, slowly lift an edge of the funnel up and have a second operator look inside to see if powder is being kicked up
-
If a powder cloud is visible, allow more time for settling
-
Once powder has settled, close the lever by pulling out, turning and making sure it locks back into a fully closed position
-
Be sure to hold down the funnel, this will require a lot of force
-
Remove the funnel and keg from the printer
-
Unclamp the funnel from keg and wipe down surfaces to remove extra powder
-
-
-
Level the powder in the powder feeder area by using a spatula to even it out
-
Check powder height with a ruler
-
If more powder is needed, repeat steps 10-12 with more mixed powder
-
If another keg may overflow the printer, use a scoop instead to slowly load the printer
-
Use the vacuum to control dust clouds as they are kicked up
-
-
-
Select Maintenance > Powder Management > Fill Bed
-
Answer the prompt on screen about loading powder
-
Answer the prompt on screen about the build plate
-
Answer the prompt on screen about the test page
-
-
-
Raise the build piston until the plate is about 3mm below the edge of the print area
-
Raise the powder piston until the powder is just below the edge of the feeder chamber
-
Select Confirm when both pistons are in position
-
Select Spread to begin spreading powder
-
Adjust the number of passes left to fill the bed while observing each pass
-
Once the powder bed is covered in powder, allow 4-5 more passes to pack the powder properly
-
-
-
Once the powder bed is prepared, select Done
-
Select the job to be printed from the queue
-
Select Print
-
Follow all on-screen prompts and answer or correct as needed
-
Observe the beginning of the print to verify that all is functioning properly
-