
Introduction
Clearing the woodshop of dust is a vital aspect to both keeping the woodshop clean and your lungs clean. While it may seem like such a small aspect of the woodworking process, keeping your workspace clean and tidy helps you and others keep the woodshop running smoothly and saves you from having to clean mountains of sawdust at the end of the day. This guide will show you the main methods of dust collection in the woodshop.
-
-
The brooms in the woodshop do what brooms usually do: push dirt along the ground to create mounds of dirt that are easier to collect at once.
-
The woodshop has two big push brooms, a matching broom and dustpan set, and four hand brooms.
-
Brush your sawdust into piles and use the dust pan to collect these piles.
-
Vacuum any loose dust not collected by your sweeping.
-
Sweep, pile, and clean any big piles of dust around any areas and tools you used throughout your shift.
-
-
-
These are portable, rolling vacuums that can connect to most Festool modular tools.
-
The shop has four Festool vacuums, with one attached semi-permanently to the miter saw for ease of use.
-
To use with another Festool tool, plug vacuum into an outlet, then plug tool into vacuum's attached outlet. Set knob to auto. Attach vacuum hose to tool.
-
The auto mode turns the vacuum on automatically when the connected tool activates.
-
To connect a hose to a tool, line the arrows of the hose and tool together. Push as far as possible. Twist hose clockwise.
-
Cleaning and emptying these vacuums will be covered in step 13.
-
-
-
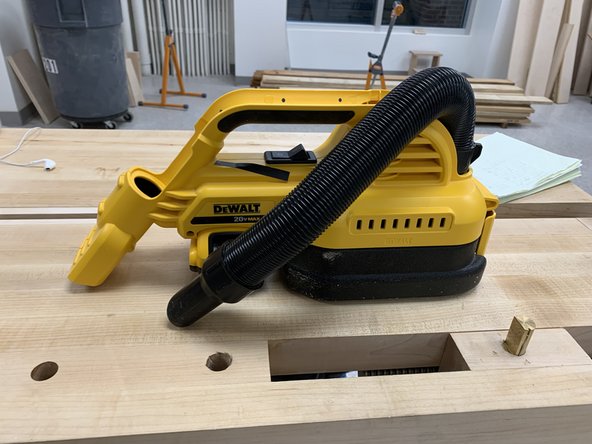
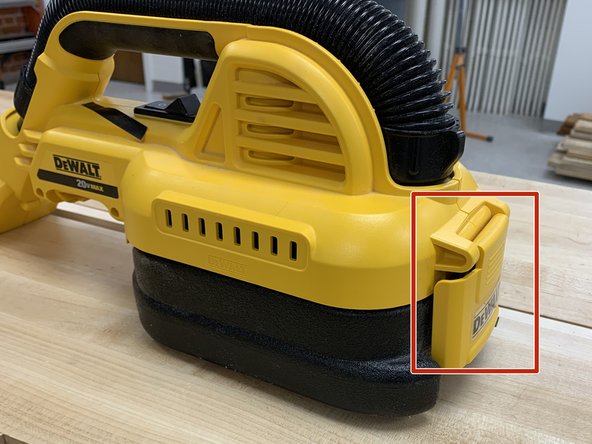
A handheld DeWalt hand vacuum that helps you clean dust as you go.
-
Uses a standard DeWalt power tool battery.
-
Black hose can be removed from yellow mouth for easier use.
-
Cleaning and emptying of this vacuum is covered in step 12.
-
-
-
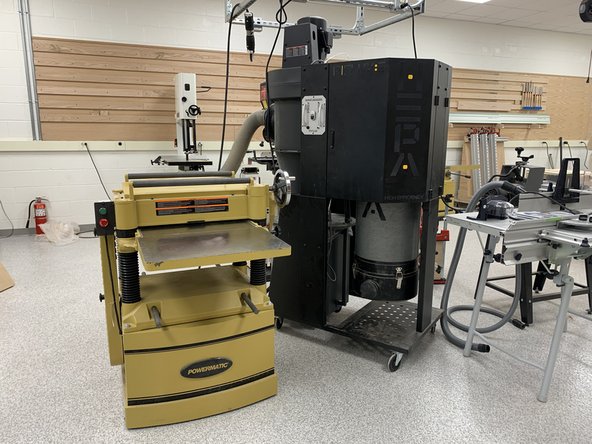
Hearing protection is HIGHLY RECOMMENDED when using the planer and this dust collector due to the volume, exposure time, and proximity to the noise.
-
This dust collector will be one of the first things you see when you enter the woodshop. This big black vacuum is used with the planer and drum sander, removing the big chips and dust.
-
Turn on the vacuum using the silver panel whenever the planer will be used.
-
To empty and clean this dust collector, refer to step 9.
-
-
-
Hearing protection is HIGHLY RECOMMENDED when using the table saw and this dust vacuum due to the volume, exposure time, and personal proximity to the noise.
-
This dust collector is attached permanently to the table saw to collect excess dust produced by the table saw. Dust will still be kicked onto you, so be prepared to sweep and clean after use.
-
Turn on the collector using the red switch before turning on and using the table saw.
-
To empty and clean this dust collector, refer to step 10.
-
-
-
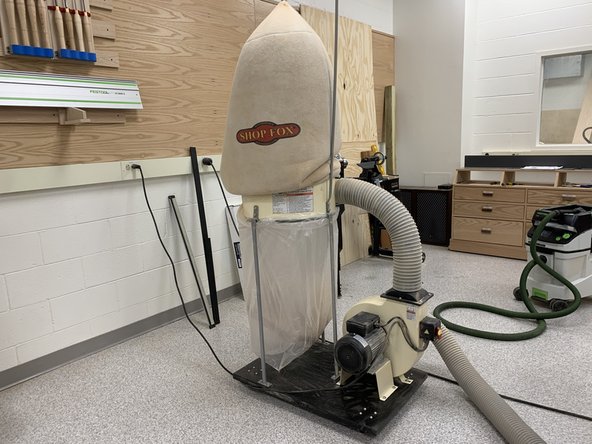
Hearing protection is HIGHLY RECOMMENDED when using the table saw and this dust vacuum due to the volume, exposure time, and personal proximity to the noise.
-
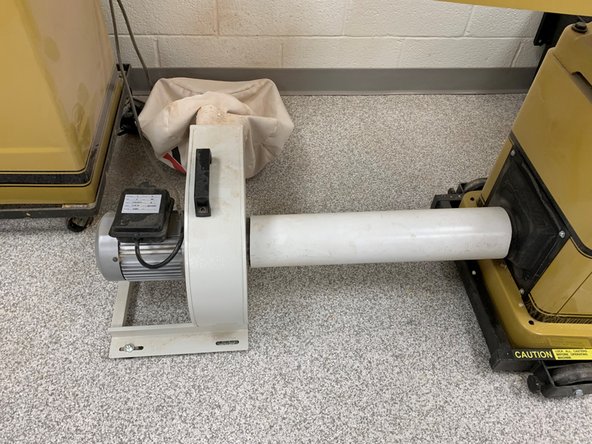
The dust collector is attached via PVC to the jointer. Use this whenever you turn on the jointer.
-
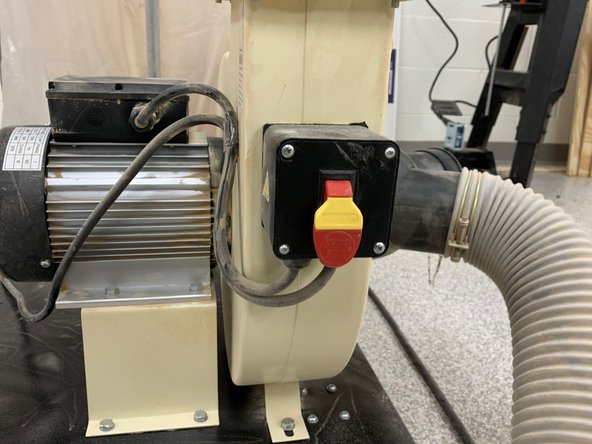
Flip the red switch on the collector before turning on and using the jointer.
-
If the chips and sawdust fly off the cutting area and towards the infeed table, check step 11 for cleaning instructions.
-
-
-
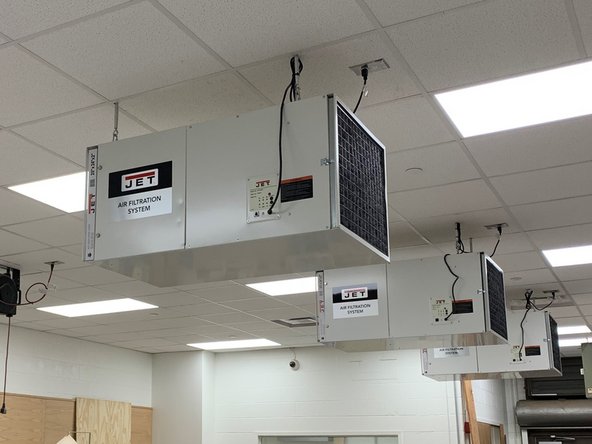
Turn on these air filters whenever you are cleaning a large dust collector, or if you are working on a project that generates a lot of dust.
-
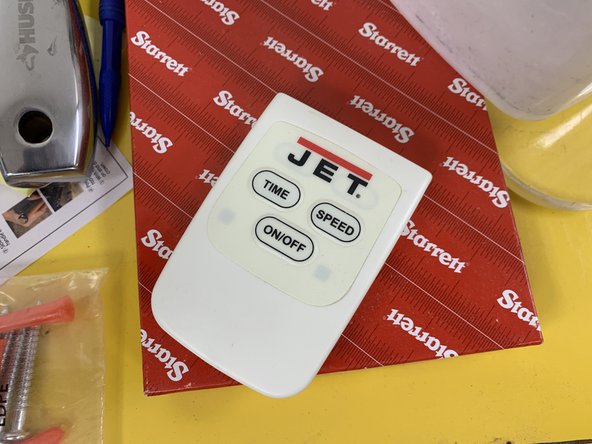
Locate remote on the top of the yellow chemical cabinet.
-
Point remote at each air filter and press the on/off button.
-
-
-
This should be done every Friday or as needed, based off Ted Baker's or an LC's recommendation.
-
Turn on the JET Air Filters. Move sawdust bin to the center of the room for easy access.
-
Recommended cleaning order is as follows:
-
Empty and clean planer waste.
-
Change and replace table saw bag.
-
Empty and clean jointer collector.
-
Sweep floor, paying special attention to the area around the table saw.
-
Vacuum piles and any loose dust. Empty Festool vacuums into sawdust bin.
-
-
-
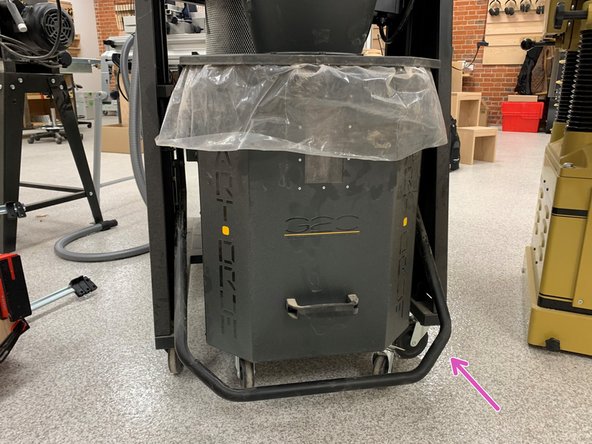
Open the black doors around the waste bin by popping out the handles.
-
Undo the metal latch holding the band around the top of the waste bin. Tip over and empty into sawdust barrel.
-
The bin will be heavy, so expect it to fall downward. Prepare yourself to catch it.
-
Turn the bin upright and undo the three latches on the bottom. Empty the bottom bin into the sawdust barrel.
-
Lift lever to lower other dust bin. Empty bag into sawdust barrel. DO NOT throw away bag.
-
-
-
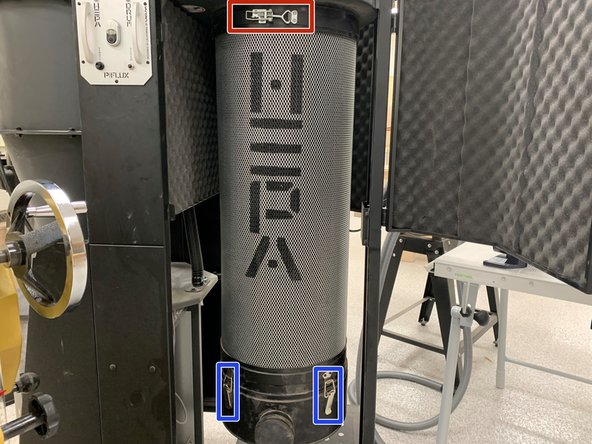
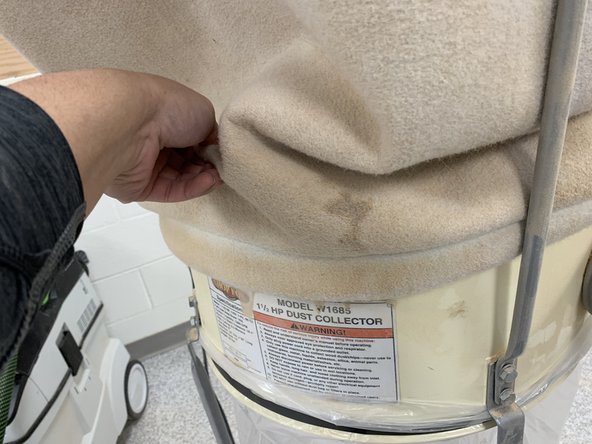
Lift the edges of the canvas bag to loosen and remove dust trapped between the bag and dust collector.
-
Undo metal latch holding the metal ring around the beige body.
-
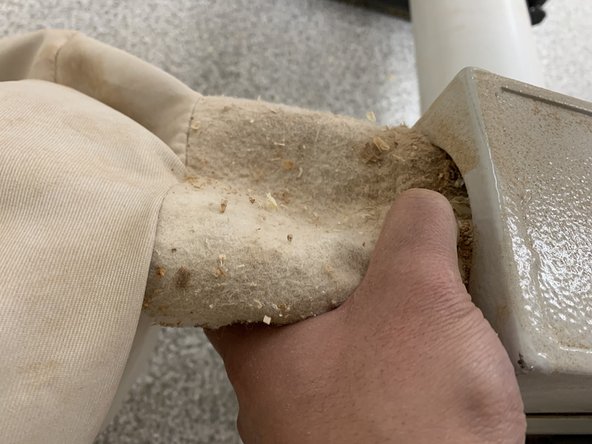
Hold the bag to ensure bag doesn't fall and shoot loose sawdust everywhere.
-
Tie off bag and place in corner of the woodshop for disposal.
-
Grab a new plastic bag from the back room and place into dust collector.
-
Ensure plastic bag is wrapped around the entirety of the dust collector and the hoop is secured tightly against the dust collector body.
-
-
-
Squeeze bag mouth to release it from the dust collector.
-
Hold bag over sawdust bin and shake out until empty.
-
Reattach bag using the same method you used to take it off.
-
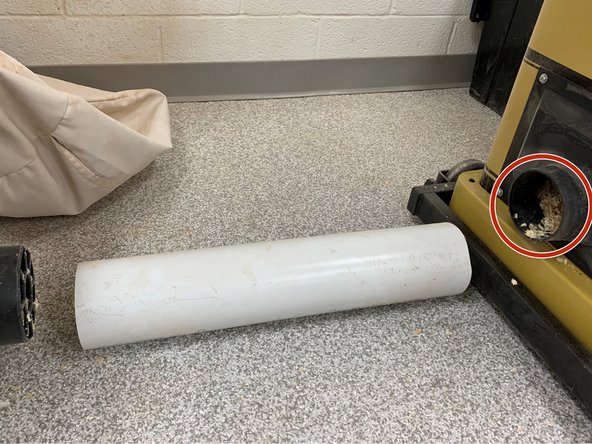
Remove the PVC pipe from dust collector and waste port by moving dust collector to the side. Inspect for clogs and remove any using Festool vacuum.
-
Insert Festool vacuum hose into jointer waste port and remove any loose dust.
-
Reattach PVC pipe to both jointer and dust collector.
-
-
-
Unlatch the yellow latch on the backside of the vacuum.
-
Remove black waste bin and empty into nearest trash can.
-
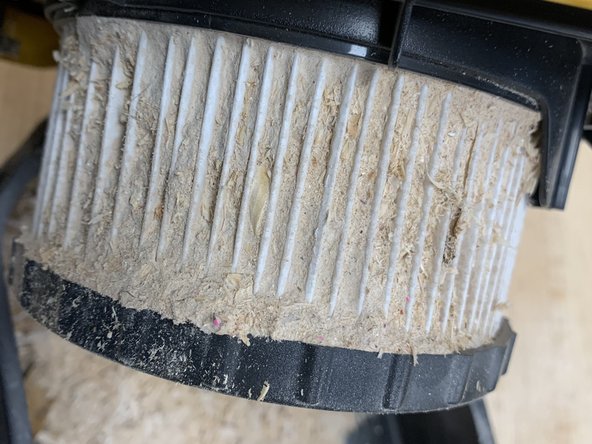
Check filter for any clogs. Clean clogs using any thin item (pencil, screwdriver, dowel, etc.).
-
-
-
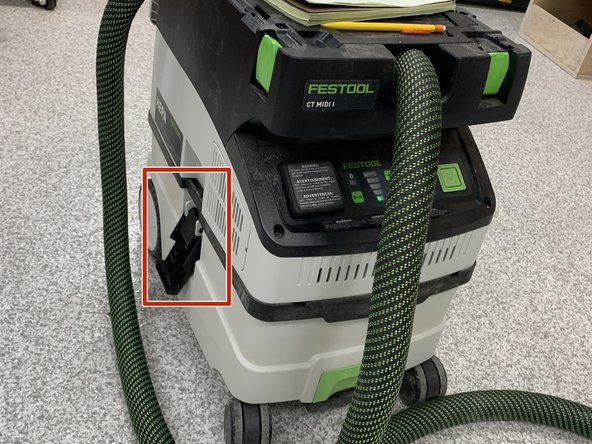
Unplug the vacuums before emptying them.
-
Undo the black latches on either side of the vacuum (only one is pictured).
-
Lift the top half off the wheeled base.
-
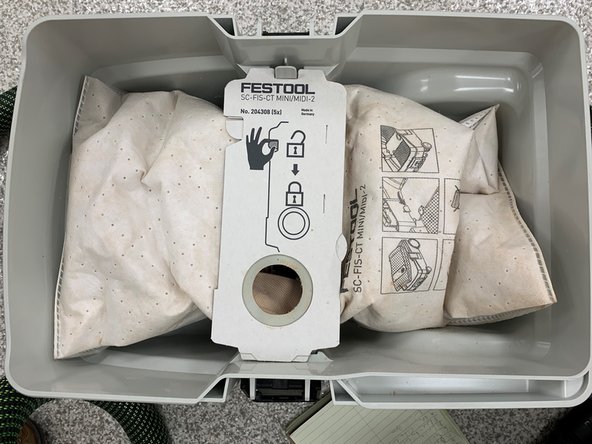
Disconnect the vacuum bag and empty into saw dust bin.
-
Reconnect vacuum bag and reconnect halves when done emptying.
-


Keeping the woodshop clean of sawdust is a vital aspect to keeping the shop running smoothly. Once you’re done using a machine, clean up after yourself as best you can. Also clean the shop 15 minutes before the end of your shift.
Keeping the woodshop clean of sawdust is a vital aspect to keeping the shop running smoothly. Once you’re done using a machine, clean up after yourself as best you can. Also clean the shop 15 minutes before the end of your shift.
Cancel: I did not complete this guide.
One other person completed this guide.
Team
