Introduction
This guide will explain how to slice an stl file for the Markforged printers using Eiger.
Images by: Nico Lagendyk
-
-
If you haven't already, register an account into Eiger.io
-
You must be added to the Terrapin Works organization to access our printers. An LC or FTE can add you if you do not have access.
-
Navigate to the sign-in page and sign into your account to open up the software
-
The search bar can be used to find folders or parts
-
You can create a new folder and name it in a way to complement your workflow
-
Click on create folder and it will automatically open
-
-
-
Eiger works a little differently to most other 3D printer slicers
-
Each part must be imported and sliced individually, and are combined after slicing if more than one part per print is desired
-
Eiger saves version history of each change and tracks if a part has been printed as part of a print job
-
Parts with compatible settings (same material, layer height, and the same or no reinforcement) can be batched together in "Jobs"
-
"Jobs" with multiple parts should be utilized to minimize printer idle time if efficiency is a concern
-
-
-
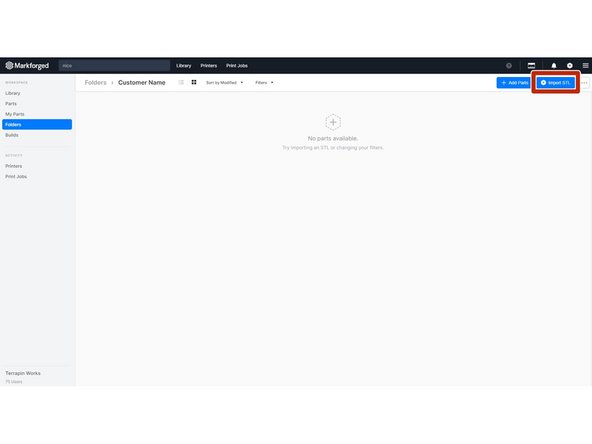
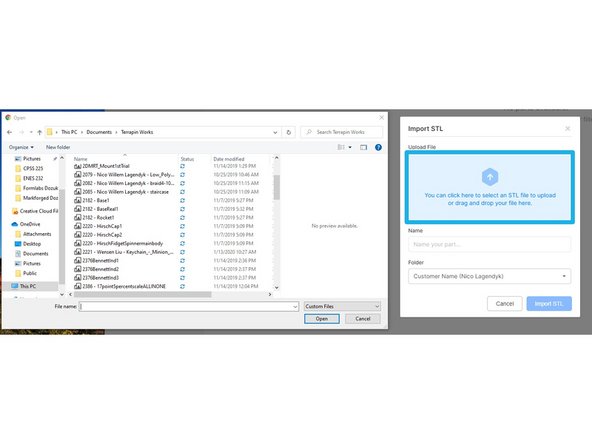
Click on "Import STL" to add the STL to the current folder
-
You can either drag the STL into the blue box or just click it and it will bring up your file explorer where you can navigate to wherever you keep your STL files
-
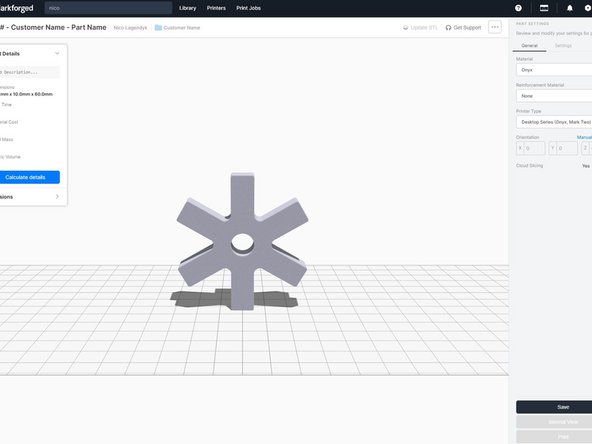
Once you've imported the file you'll be sent to the first slicing screen
-
-
-
In this first slicing screen you can adjust the material, the size and the orientation
-
Select the desired material
-
Select the desired reinforcement material
-
Reference the Eiger: Advanced Slicing for more instruction on this
-
Select the machine type
-
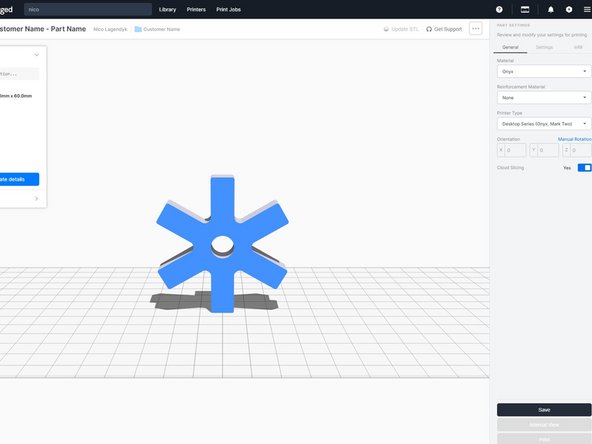
Hovering over any face on the part will highlight blue, and if you left click it will align that face to the build plate
-
This is a very useful feature for a quick printable orientation
-
-
-
Input the desired layer height
-
Keep in mind that parts intended to be printed together should be sliced with the same layer height
-
Select the base units the file was exported in
-
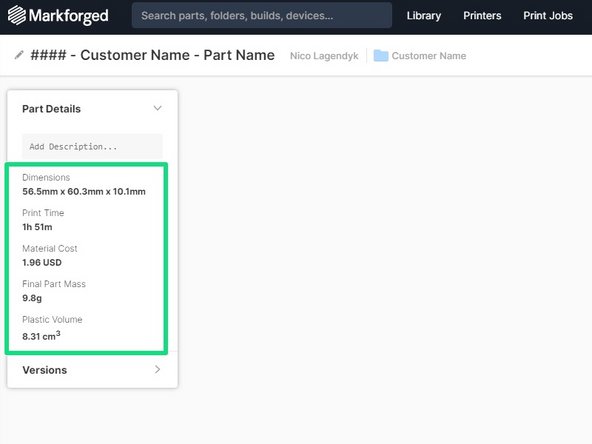
You can check the bounding box dimensions under part details ribbon on the left side of the screen
-
Part scaling can be selected here
-
Parts do not usually have to be scaled, but certain models may need slight tweaks for mechanical fitment
-
Select the desired support settings
-
Default works well in most situations, but support angle should be changed if generated support will be printed in very long strips, as this could be difficult to remove cleanly
-
-
-
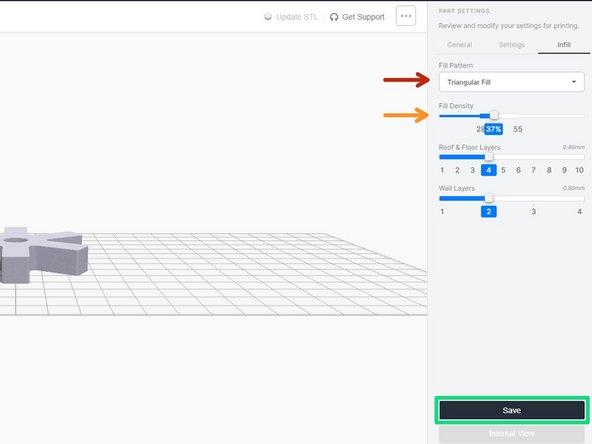
Select the desired infill pattern
-
Triangular fill is fine in most situations
-
Select the desired infill percentage, which should remain within the recommended range
-
The number of floor and roof layers should not be changed in most situations
-
Selecting "save" will slice the part and give you information about Print Time, Material Cost, Final Part Mass, and Plastic Volume
-
-
-
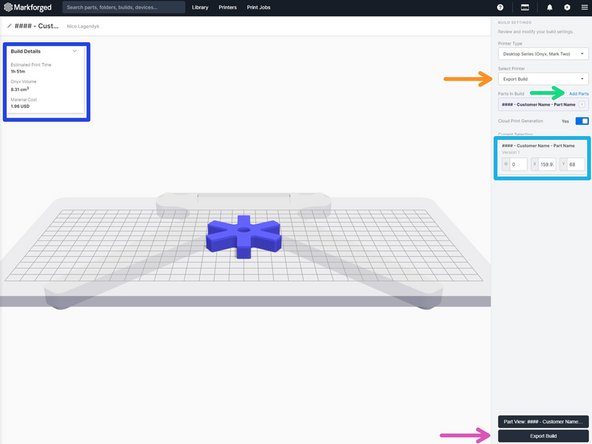
Selecting "Print" will bring up the job creation screen
-
Select the desired export/print option
-
Print/Queue a job by selecting the correct printer in this dropdown
-
Use the "Add Parts" option to select more parts to print in a single job
-
Move the part by dragging it around or using the inputs on the right sidebar
-
Once finished, select Print which will bring up a window that will either allow you to send the job to print or add it to the machine's queue
-