
Introduction
To ensure the smooth operation of the Epilog Fusion Pro 36, all of these tasks should be performed as needed. Because this laser cutter is open for use to non Terrapin Works employees, it is integral these maintenance tasks are performed regularly. Most of these maintenance tasks are to be done on an as-needed basis.
All of the necessary materials for maintenance are located in either the cabinet next to the Epilog or the cabinet for the Formlabs Fuse.
-
-
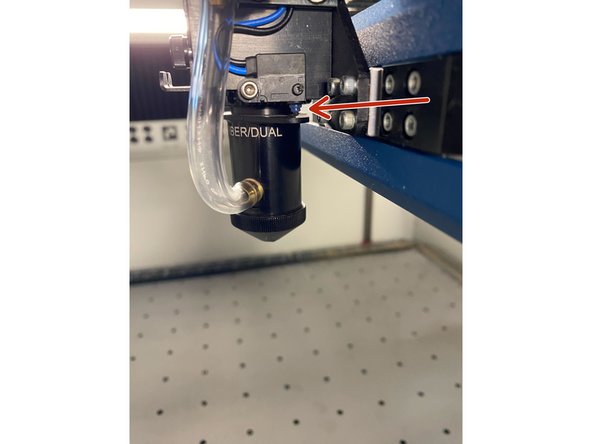
Remove the lens by unplugging the air assist, unscrewing the bottom thumb screw and then untightening the clamp screw. This will allow you to slide out the whole lens assembly.
-
Materials Needed: Cotton swab/lens paper, optics cleaning fluid, and nitrile gloves.
-
Use a cotton swab that is soaked with optics cleaning fluid OR a single drop of lens cleaner and the lens paper located in the cabinet next to the Epilog.
-
Gently swab/rub the optics to remove dust and debris in a circular motion.
-
Prepare a fresh swab/lens paper and clean the surface with a gentile circular motion to clean off any excess optics cleaning fluid.
-
The lens should appear to be clear and have no blemishes on the surface. If it remains cloudy even after cleaning or the scratches do not go away, a new lens may be needed.
-
You are REQUIRED to wear gloves when cleaning/dealing with the lenses. The tiniest amount of dust or oil results in a poor cleaning of the lens. This means you will have to clean it again.
-
-
-
Screw of the bottom part of the lens assembly to gain access to the other side of the lens.
-
DO NOT SKIP THIS STEP. If too much buildup of dust/smoke/particles is on the lens, it will no longer cut/engrave properly.
-
Use a Q-tip with a drop of cleaning fluid and gently rub the surface of the lens until it appears clear.
-
Then use a clean Q-tip to wipe away any excess cleaning fluid.
-
Allow the lens to dry before putting the cap back on and using it in the machine.
-
-
-
Materials needed: cotton swab or soft cloth, mild household cleaner or isopropyl alcohol.
-
Use a soft cotton cloth and mild household cleaner or isopropyl alcohol to gently wipe the Auto Focus plunger until it is clean.
-
Removing residue helps ensure precise focusing. This does not have to be done very often, but debris may impact auto focusing.
-
On older models of the Epilog this was more necessary, do this maintenance as needed.
-
-
-
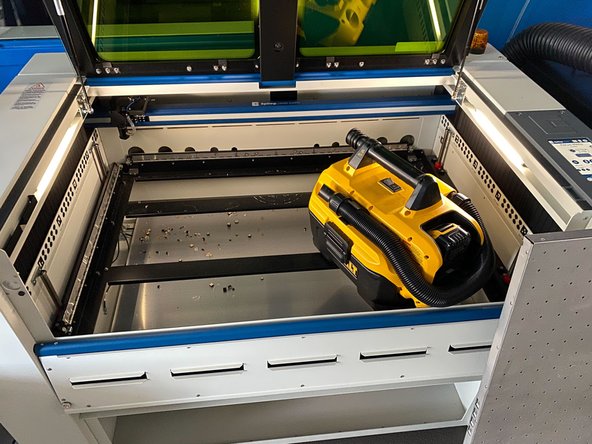
Materials needed: Small brush or vacuum cleaner.
-
Remove the Cutting Table and clean out the table tray using a small brush or vacuum cleaner.
-
This will reduce any fire hazards by removing debris that has fallen through the table.
-
-
-
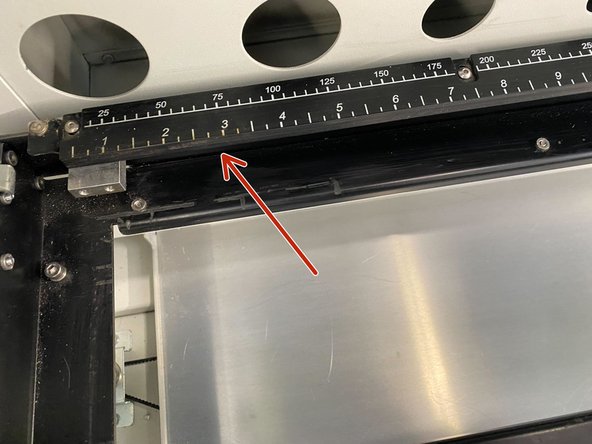
Materials needed: Soft cloth such as blue shop towel and mild household cleaner or isopropyl alcohol.
-
Use the soft cloth to wipe all surfaces that are exposed to dust and debris. The most common places to clean are the vents on the back wall and the rulers.
-
This keeps corrosive dust and debris from building up on interior surfaces.
-
-
-
Materials needed: Lubricant and syringe from your Epilog Accessory Kit.
-
After cleaning the rail (see weekly maintenance guide), place about an inch-long bead of Epilog supplied grease into the top and bottom grooves of the x-axis rail.
-
After applying the grease to both grooves, run the X-carriage over the grease to work it into the bearing block and rail.
-
Turn the machine off to easily move the x-carriage back and forth over the grease.
-
Proper lubrication ensures optimum performance and a long life for your bearing system.
-
Apparently it's self-lubricating - if the machine starts to make weird sounds when moving, call support and ask how to find the bearing rails as the manual does not indicate where they are.
-
-
-
Materials needed: Wire Brush, KN95 mask.
-
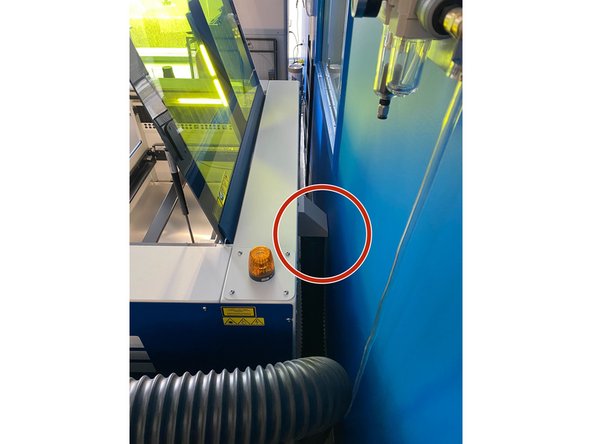
Make sure the exhaust blower you are using receives proper maintenance. Periodically clean the exhaust blower and duct system to remove built-up debris.
-
The exhaust blower hose connection is located on the back of the Epilog and requires unlocking the wheels to access.
-
Use a screwdriver to undo the hose clamp and clean out any dust that may have built up over time.
-
Cleaning the exhaust system removes built-up debris and reduces fire hazards.
-
If you move the epilog you may have to realign the laser.
-
-
-
Book technician for preventative maintenance and service
-
This can be done through the epilog website or calling the support number: +1 303-277-1188
-
-
-
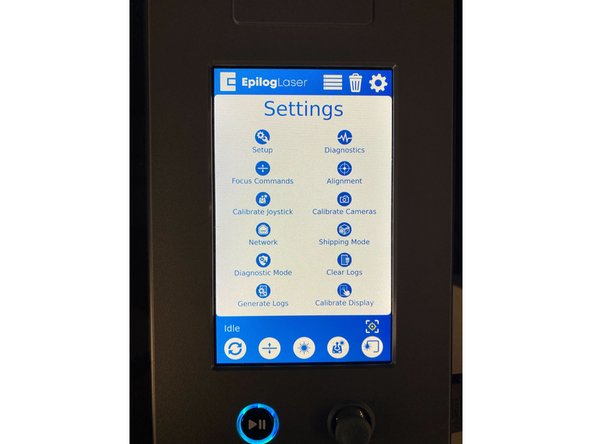
Long press the word Settings to reach this menu.
-
This menu gives you info on the machine as well as the ability to do certain things such as the beam alignment and other advanced settings.
-
This is also useful for whenever you have to contact customer support and they tell you to go to this menu.
-
Generally, this should NEVER be accessed by non-employees as these settings have the ability to damage the machine if misused or make it difficult to use the machine properly.
-


This is all of the maintenance required for the Epilog. For additional general information on maintenance, visit the Epilog Laser Training Suite to view video walkthroughs on maintenance. A login is required and can be made using the serial number of the Epilog (which can be found on the maintenance settings menu as well as on the back of the machine) and a @umd.edu email address. Attached to this guide is also some documents from the Epilog Laser Training suite (which are outdated but similar processes), and the relevant sections from the user manual.
This is all of the maintenance required for the Epilog. For additional general information on maintenance, visit the Epilog Laser Training Suite to view video walkthroughs on maintenance. A login is required and can be made using the serial number of the Epilog (which can be found on the maintenance settings menu as well as on the back of the machine) and a @umd.edu email address. Attached to this guide is also some documents from the Epilog Laser Training suite (which are outdated but similar processes), and the relevant sections from the user manual.
Cancel: I did not complete this guide.
2 other people completed this guide.