-
-
Eventually in your time as an HP TC you will run into this error. "Print Failed to Send". This message will appear in the slicer when you try to send a print to the HP (image 1).
-
This will be accompanied by an associated error on the HP shown in the second image.
-
This problem typically only occurs when the files you are trying to send over the network are very large.
-
-
-
Basically what is happening is that because your file is very large it takes a long time to send to the HP over Wi-Fi. During the entirety of this time, the HP requires you maintain the same IP address to facilitate the transfer.
-
However, by default your computer will change its IP every few seconds through automatic DHCP. So when the IP changes during your file transfer, the connection gets terminated and the slicer spits out "Failed to send print"
-
We need to fix this by changing your computer to a static IP.
-
The picture shows documentation in the HP user manual which supports this.
-
If you are wondering why smaller files will send, but larger files won't. It's because smaller files can send in the few seconds before your IP changes.
-
-
-
Lets Fix this!
-
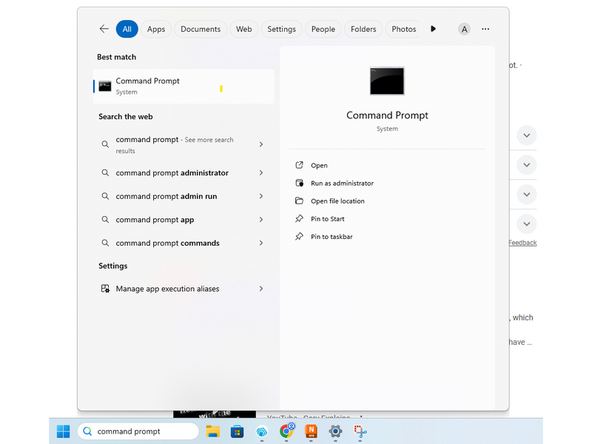
Go to windows search bar and type "command prompt" and open the application.
-
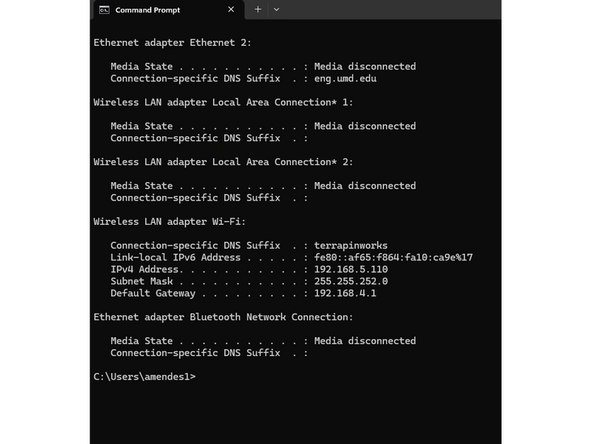
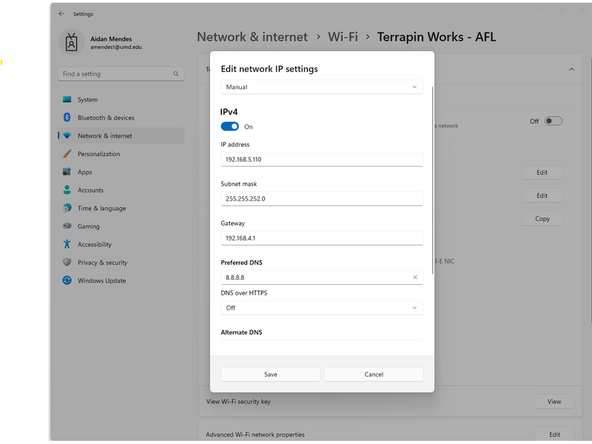
Type "ipconfig" into the window and press enter. You should see a bunch of information detailing your wifi IPv4, Gateway, and Mask. Take note and save the info for the next step.
-
-
-
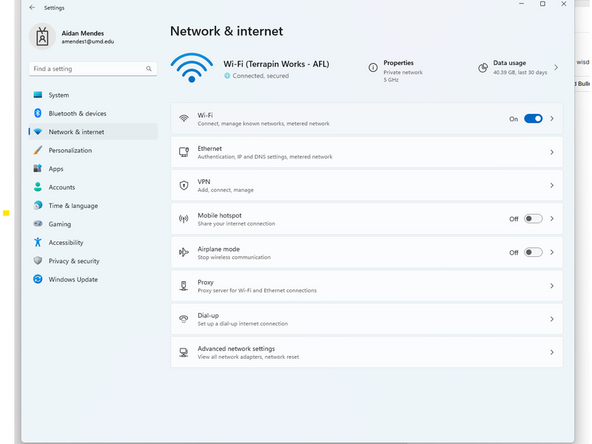
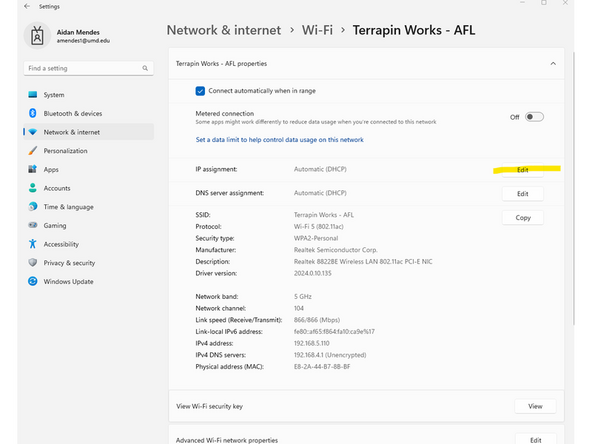
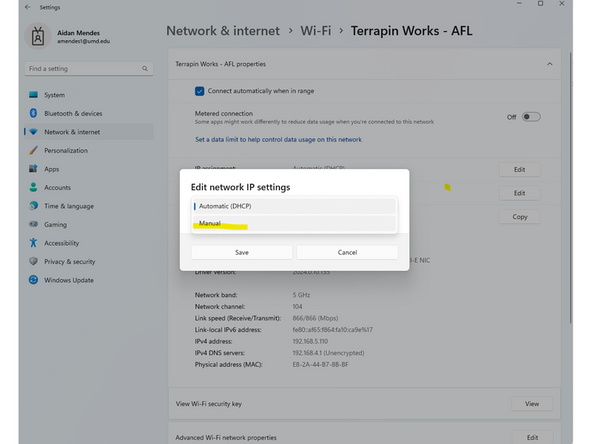
Open windows taskbar and type "settings". Then click on the tab named "network and internet" and click on "wifi". Then click on "Terrapin Works - AFL properties". Finally select "edit" on the IP Assignment.
-
-
-
Select "Manual" from the drop down and change the slider to on for IPV4. Next copy the information from step 3 into the corresponding fields. For preferred DNS use "8.8.8.8".
-
Before you save make sure to use the "make me admin" application to give yourself admin privileges. After you have admin privileges, save the settings.
-
-
-
With your static IP now set, try to resend the print from the slicer. Hopefully this fix works for you, if not remember Google is always your friend!
-