Introduction
This guide provides instruction on removing and installing the liquefier tips from the print head of the Fortus.
-
-
Open the top door and hood and use a step stool to easily access the gantry area
-
The print head is very hot, even when the machine is not printing. Only touch the dedicated handle and the aluminum casing that the handle is mounted to
-
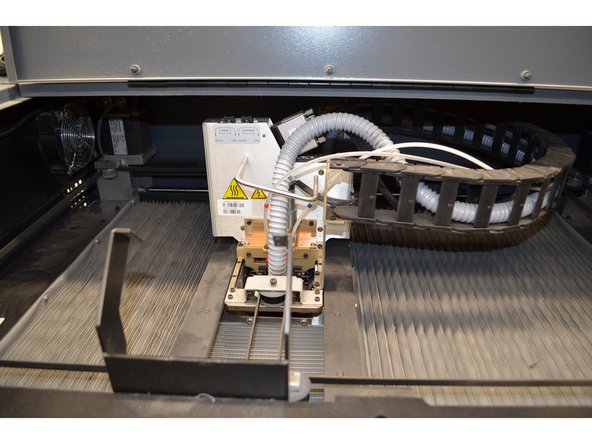
Manually move the print head so that it is close to the maintenance bracket; this will make it much easier to maneuver the head
-
Loosen the two captive screws that hold the print head in place
-
Using two hands, lift the print head straight up until it is free of its gantry mount. Make sure not to hit any part of the print head against its surroundings as you move it
-
Place the print head on the maintenance bracket, lining it up using the two locating pins on opposite corners of the mounting surface
-
Carefully tighten the two captive screws so that the print head is secure on the maintenance bracket
-
-
-
Do not touch the liquefier blocks with bare hands; they are extremely hot. Consider using gloves as an additional safety measure
-
Loosen the screws that hold the halves of each liquefier block together
-
Use the ball end hex key or another tool to pry the top half of the liquefier block away, allowing the tip to slide out. To avoid touching the hot tip, have the tip container ready to catch it
-
You may have to push gently on the tip to free it from the block. Do not use excessive force; make sure the screws are loose enough to allow the tip to come out
-
-
-
Select the appropriate replacement tip(s) using the compatibility chart included here and in the Fortus user guide
-
Carefully slide each tip into its respective liquefier block
-
To avoid print failure and serious damage to the machine, ensure the tips are fully inserted. The top of the tip plate should be flush with the bottom of the liquefier block
-
Tighten the screws in each liquefier block to secure the new tips. They should be snug, but do not over tighten
-
-
-
Support the print head with one hand while loosening the captive screws that hold it to the maintenance bracket
-
Using both hands, carefully move the head back to its gantry mount and tighten the screws. Be careful not to over tighten
-
Close the top door and hood, then proceed to this guide to calibrate the machine
-