Introduction
There is a specific sequence of processes that must be followed whenever the material type is being changed. This guide details what steps must be taken and the most efficient and time-effective way to complete them.
-
-
Before starting the changeover process, navigate to Modeler Status > Material Status
-
Take note of the amount of material left in each canister
-
-
-
Gather all of the supplies needed for the changeover: new material canisters, appropriate tips, and the ball-end Allen wrench included with the machine
-
Make sure the model and support material are compatible with each other and that you've chosen the correct tips for each
-
From the main menu, navigate to Operator Control > Change Tips/Mat'l
-
This will guide you through all the necessary steps in the correct order
-
It is strongly recommended that you use this material changeover option rather than doing it manually using the Load/Unload Mat'l menu
-
-
-
Select Unload Model and Support.. and wait for the machine to unload the canisters
-
It will unload first the model canister and then the support canister. The canister LED will first flash rapidly, then it will flash at a slower rate when the canister is ready to be removed
-
Once unloaded, remove the canister(s) from the machine and insert the new canister(s)
-
For more detail on this process, see steps 2 and 3 of this guide
-
Label any partially used canisters with a sticky note that includes the material type, amount of material left (from step 1), and the date it was removed from the machine
-
-
-
The liquefier tips are material-specific once they have been used, so you must change the respective tip(s) whenever the model or support material is changed
-
See this guide for detailed instructions on changing tips
-
You only need to change a tip if the material is changing. For example, if you do not change the support material, then the support tip can remain
-
-
-
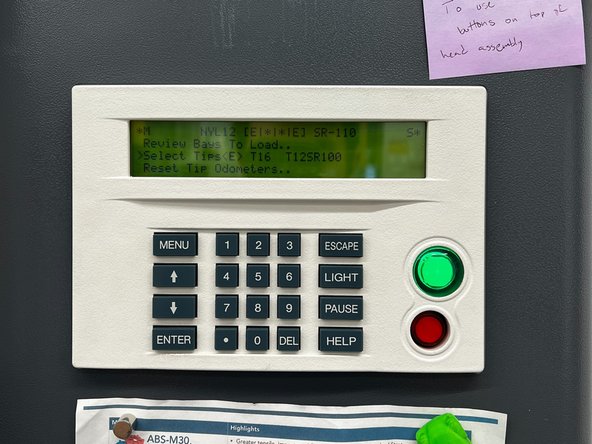
Navigate to the next page in the changeover process by choosing Select Materials/Tips..
-
Cycle through the possible combinations of tips by using the Select Tips command. Stop when the configuration displayed matches the tips you just installed
-
Select Reset Tip Odometers.. and take note of the values associated with each tip. Add that number to the cumulative value on the sticky note inside each tip container
-
Press the Enter key to clear the odometer value of the tip(s) that were changed
-
-
-
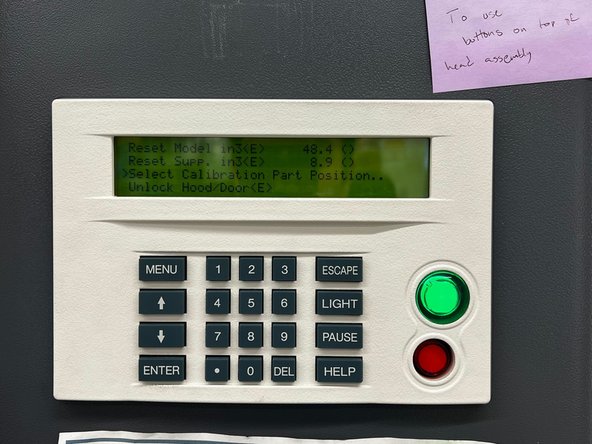
Unlock the oven door from the Reset Tip Odometers page and place a build sheet on the platen
-
See step 4 of this guide for details and troubleshooting about inserting a build sheet
-
Once the build sheet is secure, navigate to Select Calibration Part Position > Locate Part Start
-
Use the 2, 4, 6, and 8 keys to jog the head to the desired start position. It is recommended that you place the first calibration part at the front left corner of the build sheet
-
When selecting a part start, the model tip indicates the front left corner of the bounding box of the part
-
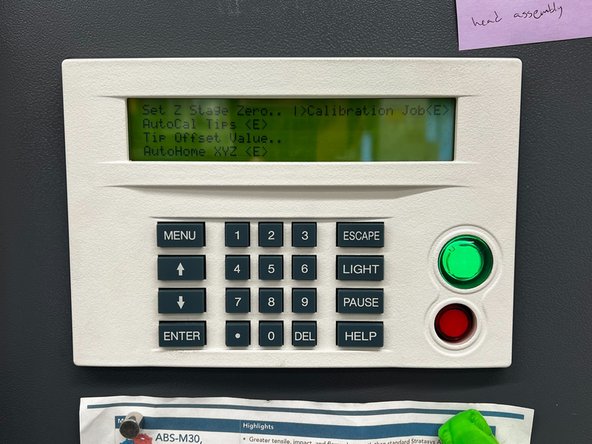
Press Enter to set the part start, then select Load and Calibrate..
-
-
-
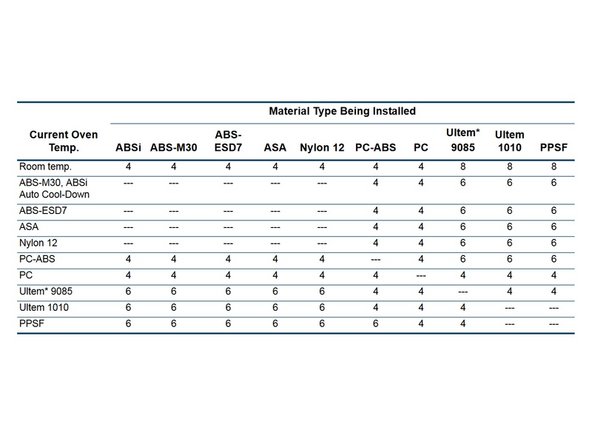
Whenever the new model material has a different oven temperature from the previous material, there is a required oven stabilization time
-
If you used the Change Tips/Mat'l option, the machine will determine the appropriate stabilization time and will print the calibration part automatically when that time has passed
-
-
-
Any time that one or both of the liquefier tips is changed, you must perform the XYZ Offset Calibration
-
Once the oven temperature has stabilized and the first calibration part has been printed, see this guide for details on performing the calibration
-