
Introduction
Reference: Most of the text and images used in this guide are taken directly from the GF Manual. Check the attached document if you need further instructions.
-
-
Always turn the GF off before cleaning!
-
The GF should have a thorough cleaning every 40 hours of operation (roughly once a semester)
-
Note: The camera may need more frequent cleaning (see Step 3)
-
Cleaning takes about 30-45 minutes to perform
-
Materials needed: Zeiss wipes, Kim wipes, lint-free paper towels, gloves, water, IPA, compressed air, a vacuum, and the lens holder (KN95 mask may also be a good idea with so much dust)
-
Pages 40-51 in the manual
-
-
-
To remove the crumb tray, lift the lid and swing down the front door. Lift the crumb tray slightly and slide it towards you.
-
Be careful not to tilt the crumb tray up, or it will knock into the printer head and rails.
-
Tilt the tray handle-side-down over a trash bin and empty out the debris. If necessary, turn the tray upside down and shake out anything that's left. Be careful not to bend the grid.
-
Wipe the metal floor of the GF with a dampened (water or IPA) lint-free paper towel. Vacuum if necessary.
-
Pay special attention that the four dimples where the crumb tray sits are clean. If anything sits in those dimples, the tray won't align properly.
-
Allow all moisture to dry completely before turning the GF back on
-
Return the crumb tray to the original location, sliding it in horizontally. Be careful not to contact the printer head or the rails.
-
You know it's in place when the tray feet drop into the small dimples and it no longer slides side to side
-
-
-
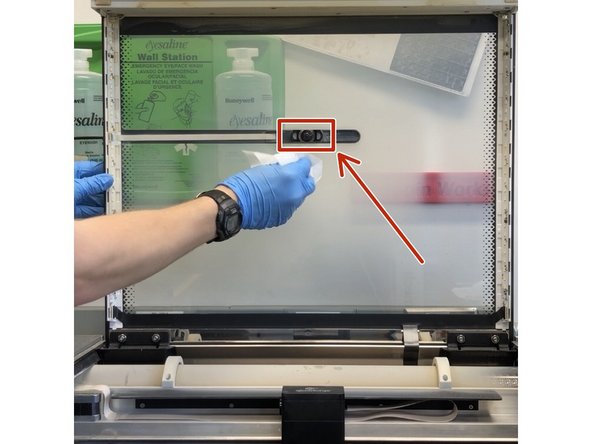
Dampen a Kim wipe with IPA and gently wipe the lens of the wide angle camera on the GF's lid
-
You can also wipe down the glass lid, but this is not necessary
-
Allow all moisture to dry completely before turning the GF back on
-
-
-
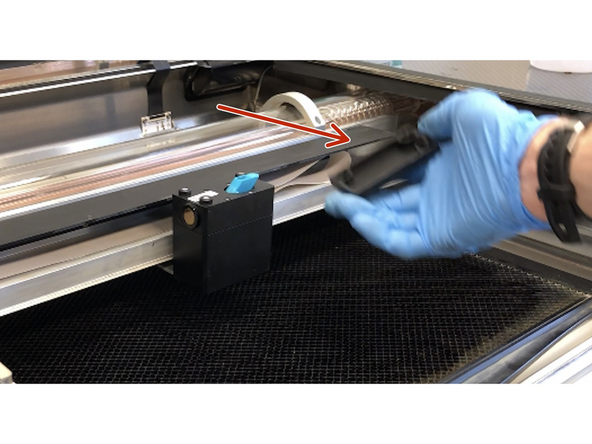
Begin by removing the printer head
-
Grasp the printer head as shown, and pull gently up and back to disengage the magnets and remove it
-
Do not detach the ribbon cable from the printer head
-
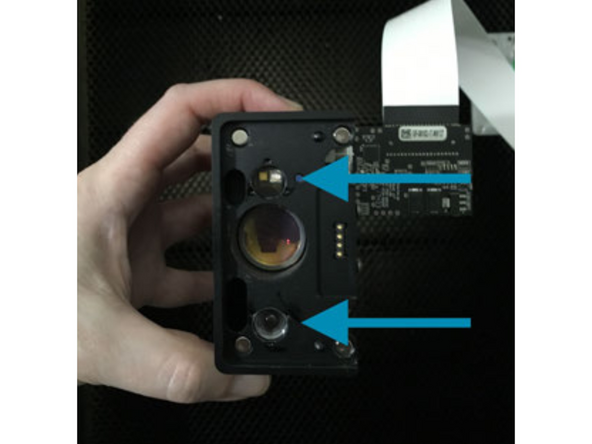
Turn the printer head over and gently wipe the small window on each side of the lens with a Zeiss wipe
-
-
-
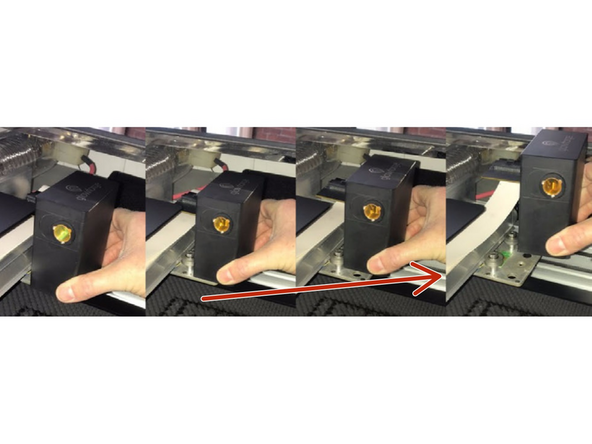
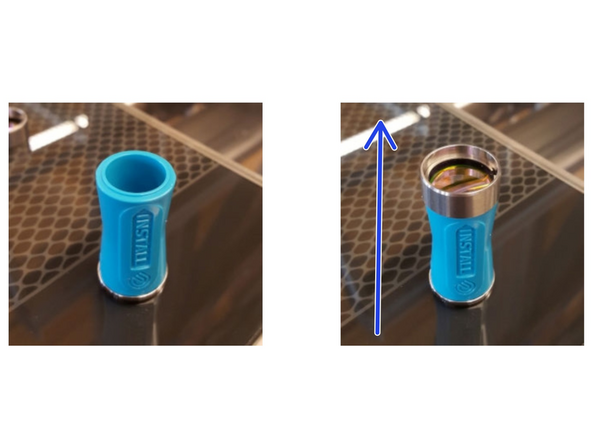
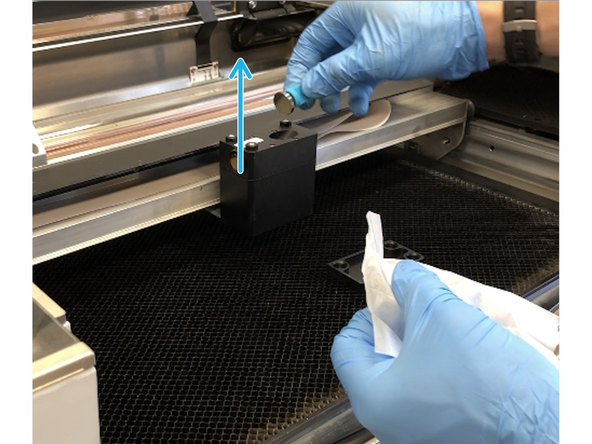
Gently insert the lens tool (found on the right side exterior of the GF) into bottom of the head with the "Remove" arrow pointing in. When you hear the magnet click, withdraw the tool and the lens.
-
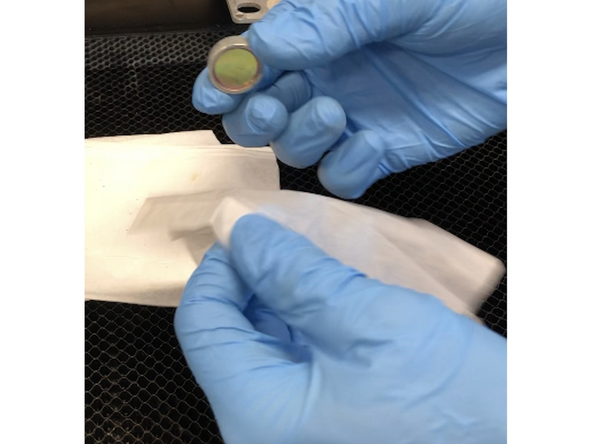
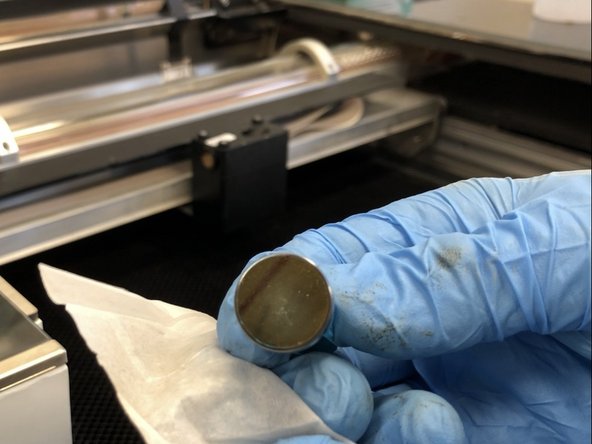
Gently slide the lens off the lens tool. Wipe both sides with a Zeiss wipe.
-
Be careful to touch only the metal ring to avoid fingerprints and scratches on the lens. Don't let the lens touch anything except Kim or Zeiss Wipes.
-
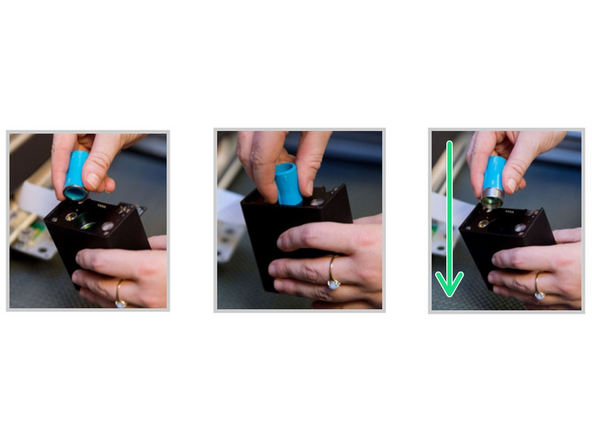
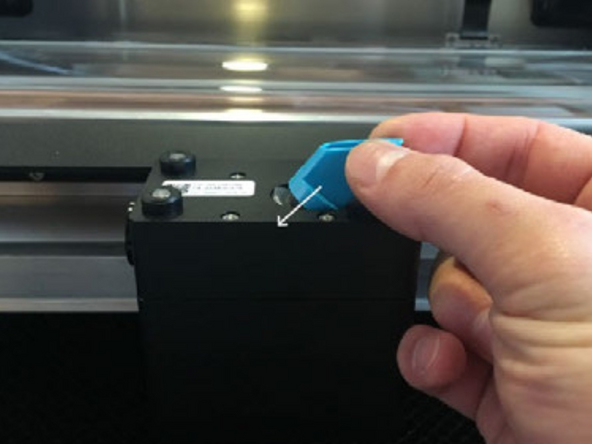
Set the lens on the lens tool with the "Install" arrow pointing up. The lens should be open-side up (like a bowl on top of the lens tool). Make sure the lens sits firmly on the tool and does not wiggle.
-
Gently slide the lens tool up into the printer head until the magnet clicks, then remove the tool.
-
Snap the printer head back on (reverse directions of how you took it off in Step 4)
-
-
-
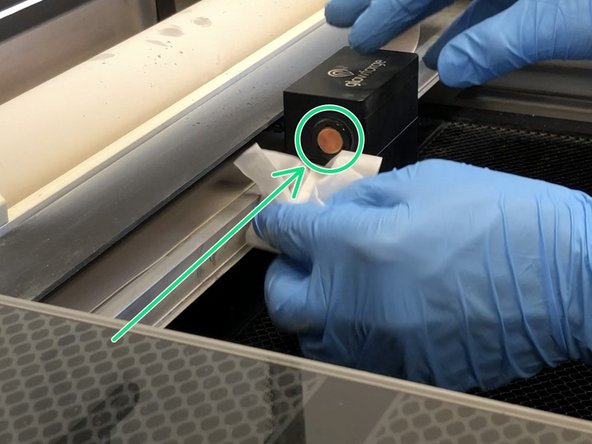
Wipe the window on the left side of the printer head using a Zeiss wipe
-
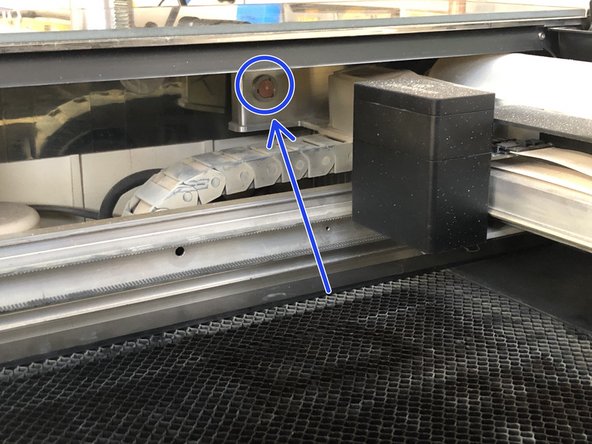
Carefully reach over the left rail and wipe the window on the left side of the housing using a Zeiss wipe
-
Only touch the windows with Zeiss or Kim wipes to avoid fingerprints and scratches
-
-
-
The mirror in the printer head should be cleaned approximately every 120 hours of operation (roughly once every academic year)
-
Gently move the printer head to the center of the laser arm. The top of the printer head is held on by magnets. Grasping only the top, pull up carefully to remove it and set it aside.
-
Gently pick up the mirror
-
Gently clean the mirror using Zeiss wipes. Use several passes until the mirror is clean, each time moving to an unused portion of the Zeiss wipe.
-
Do not touch the mirror surface with your bare fingers
-
If the mirror has a spot in the middle of it after cleaning, or is generally unable to be cleaned to a reflective finish, it needs to be replaced. Skip the rest of the cleaning steps and email a photo to GF support (support@glowforge.com).
-
-
-
If the mirror is unblemished, replace it carefully. Replacing the mirror incorrectly can permanently damage the GF.
-
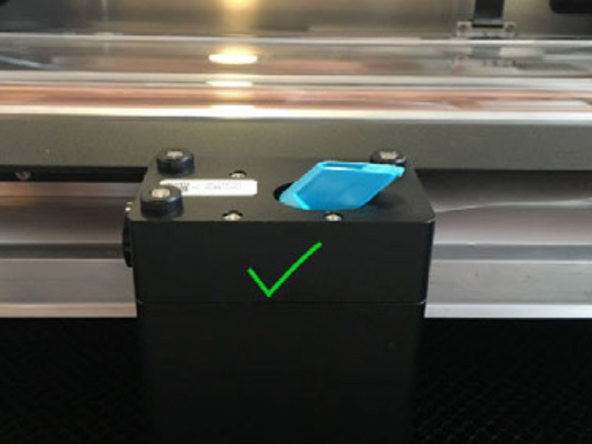
Hold the mirror by the handle and gently slide it into the notch with the mirror at a 45 degree angle to the top of the printer head
-
Assure the GF logo on the handle faces up and is parallel to the floor. It will rest softly in place - you don't need to push it in.
-
Tap the blue handle once. This will help ensure that the mirror is resting properly in place.
-
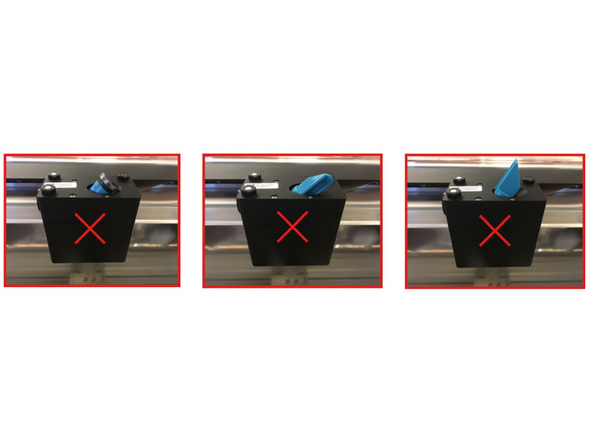
The mirror should not look like any of the red images!
-
Replace the top of the printer head
-
-
-
It’s normal for dust to accumulate inside the GF. It is not necessary, but you can clean the circuit boards, laser tube, and inside casing.
-
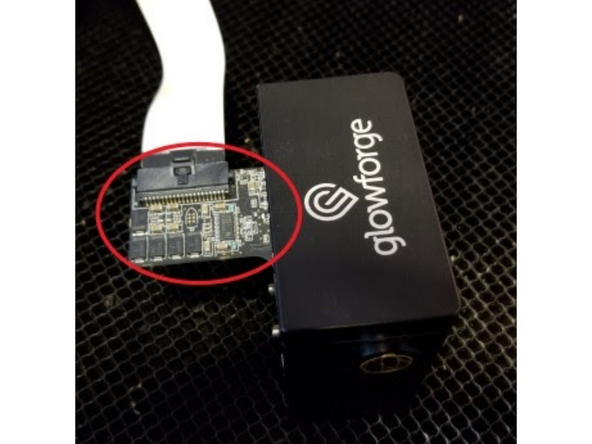
Remove the printer head as described in Step 4 (without disconnecting the ribbon cable). Use compressed air to clean off the circuit board, then replace the printer head.
-
There's another circuit board on the left side of the GF. Use compressed air to clean this off as well.
-
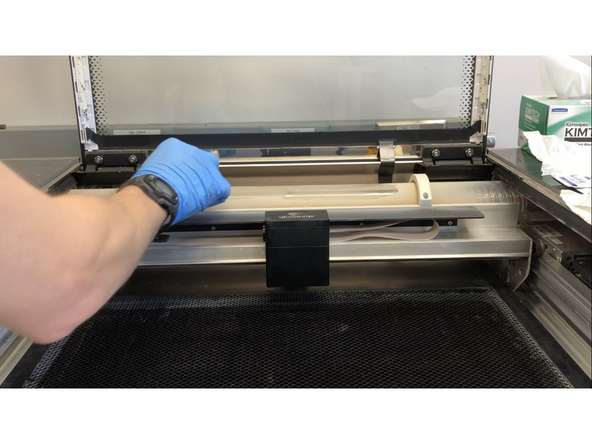
Use both hands when sliding the laser arm
-
Spray a lint-free paper towel with IPA or water and gently wipe the laser tube, glass lid, and other dusty surfaces.
-
Allow all moisture to dry completely before turning the GF back on
-
To clean the exhaust hose, remove the hose by squeezing the two ends of the ring clamp together and pull the hose away from the GF. Use a vacuum to remove dust and debris. Then replace the hose.
-


Reference: Most of the text and images used in this guide are taken directly from the GF Manual. Check the attached document if you need further instructions.
Reference: Most of the text and images used in this guide are taken directly from the GF Manual. Check the attached document if you need further instructions.