Introduction
The quoting process for the HP is a bit more complex than other technologies and is easily done as a separate step to slicing. This guide will walk you through how to quote jobs for the HP Jet Fusion 580 Color 3D printer.
Necessary Software
- Web browser
- Autodesk Netfabb
- Mircrosoft Excel/Google Sheets
Images by: Nico Lagendyk
-
-
Isolate HP jobs using the filter at the top of the workflow
-
Download relevant files
-
Accepted File types: .stl, .obj, .3mf
-
-
-
Click "Add Parts" from the top ribbon
-
Select files from the file explorer window and click "open"
-
A window verifying your parts will pop-up, click "Add Parts"
-
-
-
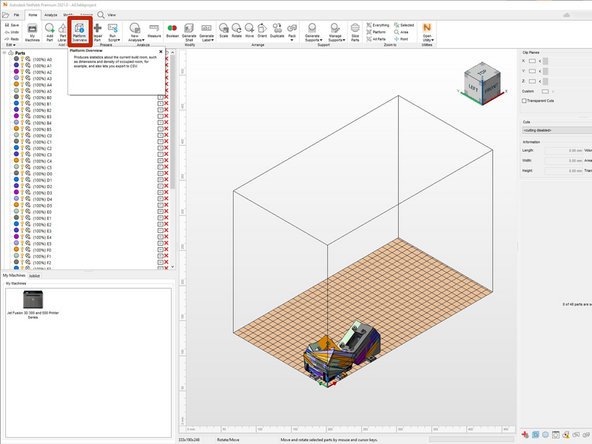
Click Platform Overview on the top ribbon
-
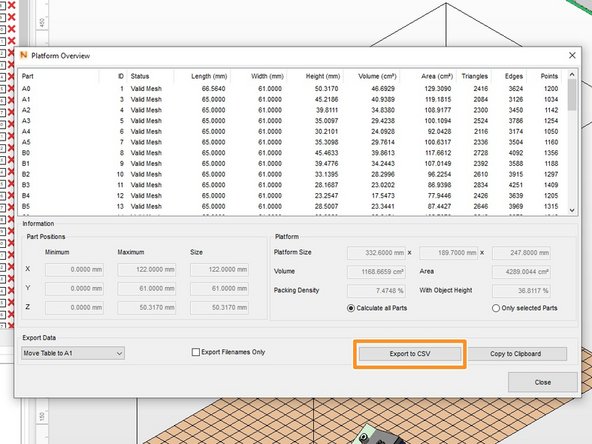
All the relevant data can be seen in this window
-
For larger jobs like this example, it is easiest to export the data
-
Click "Export to CSV"
-
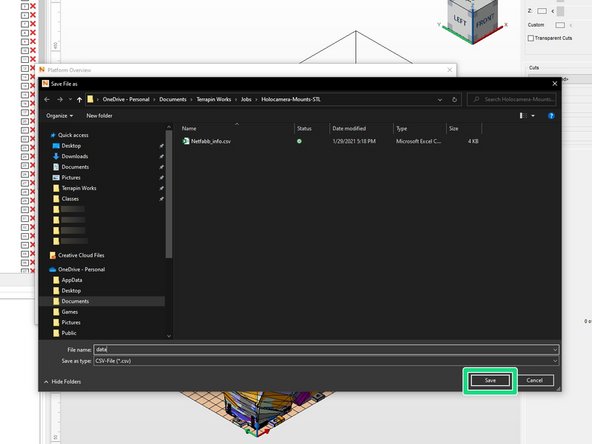
Save the file
-
-
-
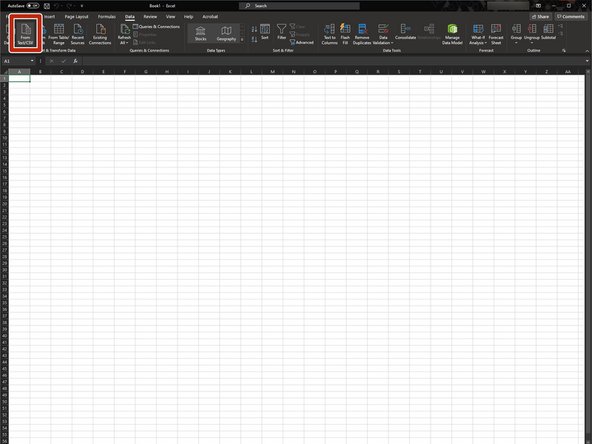
Open a blank workbook and navigate to the Data tab in the top ribbon
-
Click "From Text/CSV" on the left
-
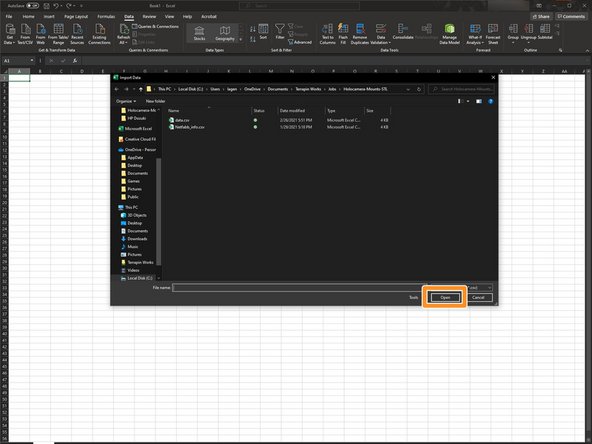
Find your data file and click "Open"
-
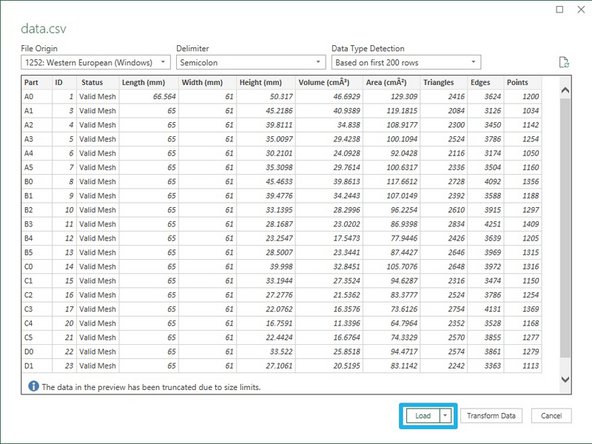
A new window will appear, Click "Load"
-
-
-
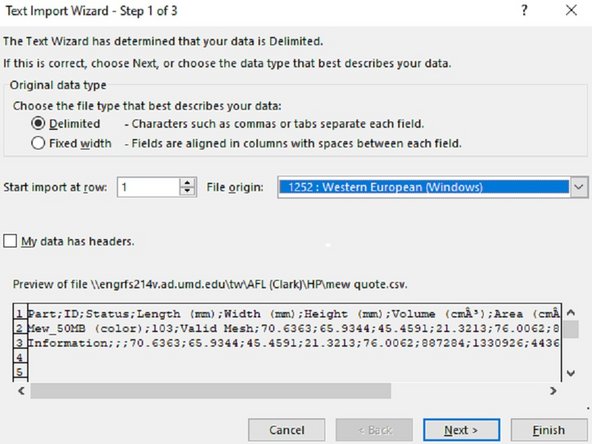
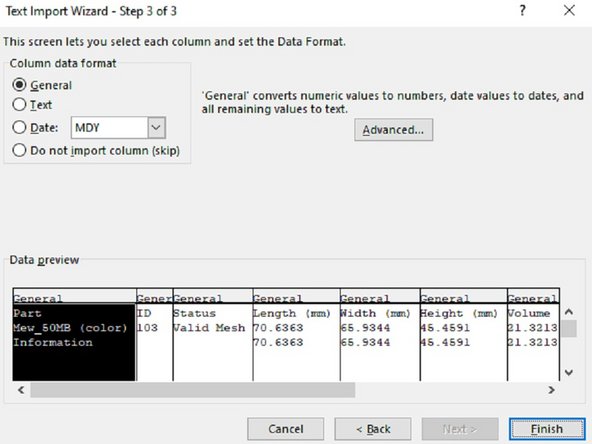
Select the file type as Delimited, and select the File Origin as 1252: Western European (Windows). Then click Next.
-
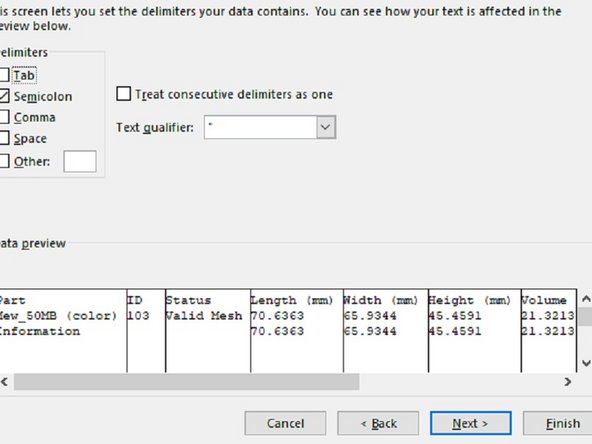
Select the Semicolon delimiter and then click Next.
-
Select the General column data format and then click Finish. Select cell A1 for where you want to put your data and then hit OK.
-
-
-
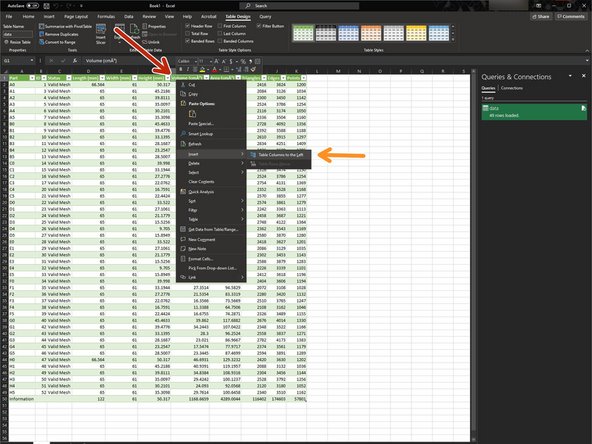
Once data is imported, right click the Volume column (H)
-
Then insert a new column in the spreadsheet
-
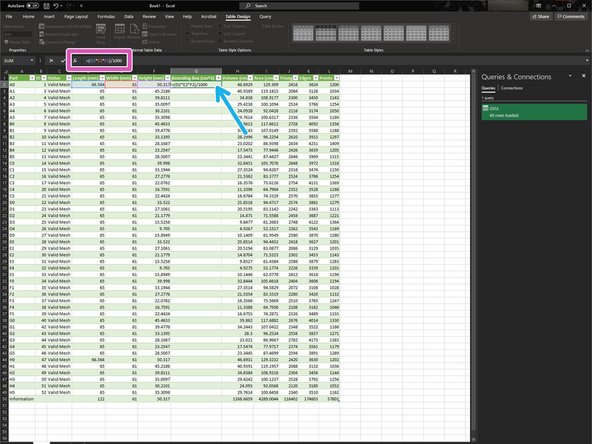
In the newly formed column which I've titled "Bounding Box (cm^3)" type the following equation
-
=((D2+5.5)*(E2+5.5)*(F2+5.5))/1000
-
Adding 5.5 mm to each of the sides of the bounding box accounts for the packing density needed on the machine
-
Excel will then automatically fill the column
-
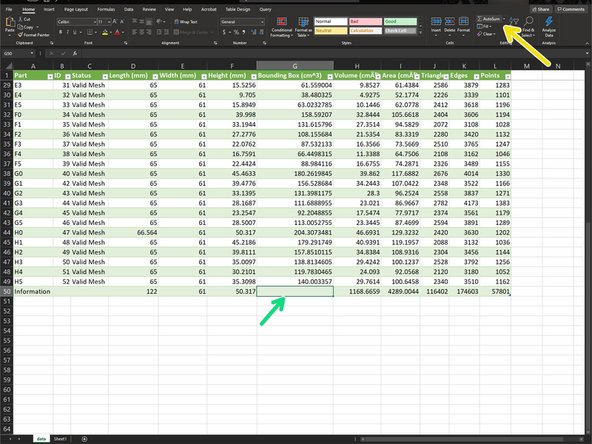
Scroll down to the last cell of the bounding box column and remove the number that is there
-
With the cell highlighted, Click "AutoSum"
-
-
-
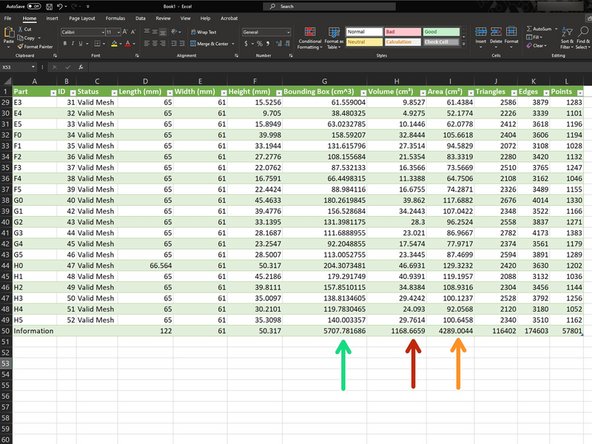
Scroll down to the last row of data where you'll see all the total data you need for PaperCut
-
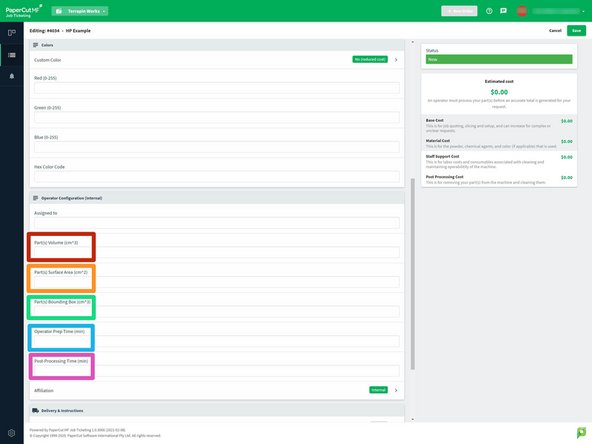
Part(s) Volume(cm^3)
-
Part(s) Surface Area (cm^2)
-
Part(s) Bounding Box (cm^3)
-
Operator Prep Time can be estimated between 15 minutes and an hour depending on the size of the job
-
Post processing time can be estimated to be 15 minutes to multiple hours depending on the size of the job
-
The last two metrics are not perfectly accurate upon quoting and can be updated as the job is processed
-