-
-
Geomagic Wrap is used to operate the scanning arm
-
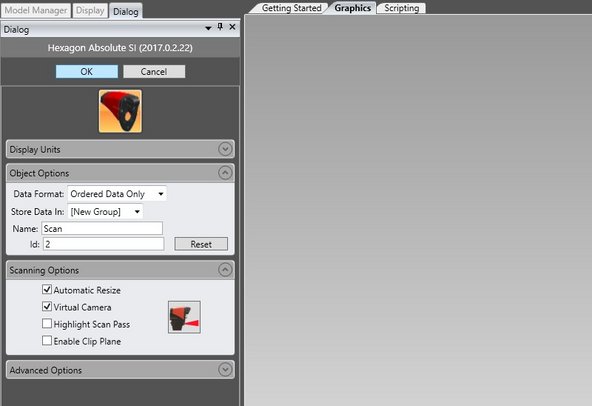
In the Capture tab, select Scan and ensure that the dialog box says Hexagon Absolute SI
-
When you are ready to begin your scan, press Start Capture to begin scanning
-
-
-
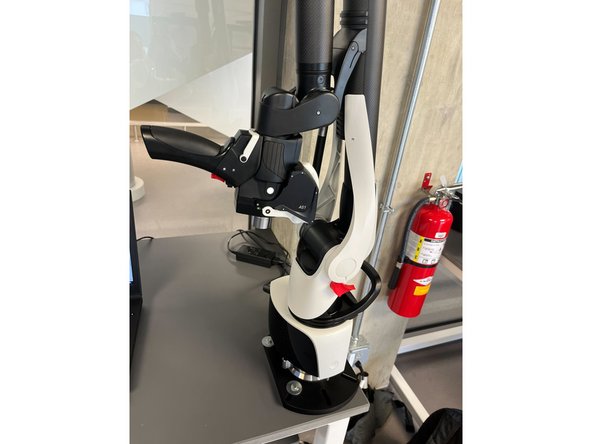
Flip the lock up to the unlock symbol to allow for full rotation of the top joint in the arm
-
When moving the arm, it is helpful to support it with two hands. One on the handle and another to maneuver the arm
-
To start scanning, push on the red button that looks like a trigger on the scanner handle
-
Push it again to pause the scan
-
Refrain from touching anything from the front of the scanner. That is where the laser and camera are
-
-
-
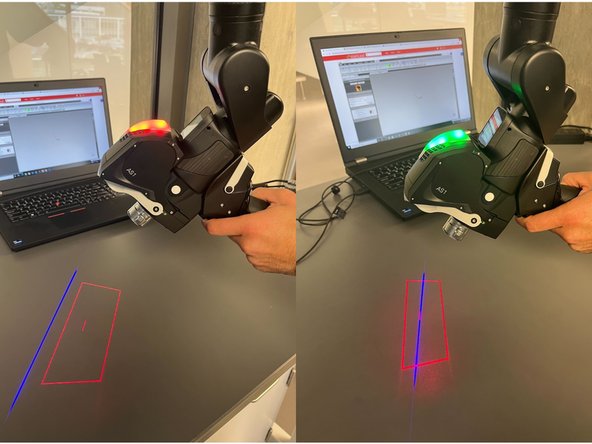
After pressing Start Capture the scanner will emit lasers: a red box and a blue line
-
When scanning, align the blue line inside the box (ideally to the middle) by moving the scanner closer/farther away from the object
-
The light on top will indicate whether you are in the right position
-
Do not move the object once you have started to scan
-
You can take multiple passes by pausing/starting to scan with the red button
-
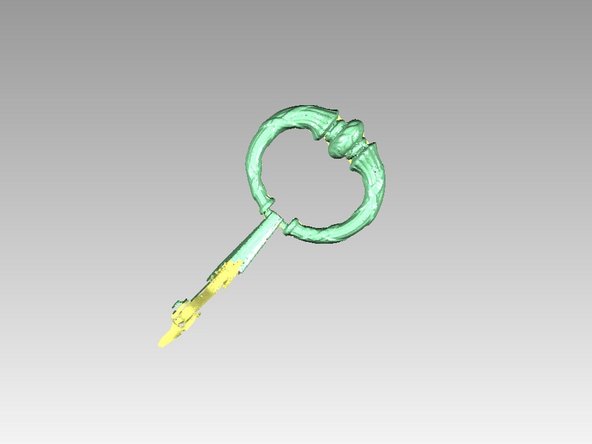
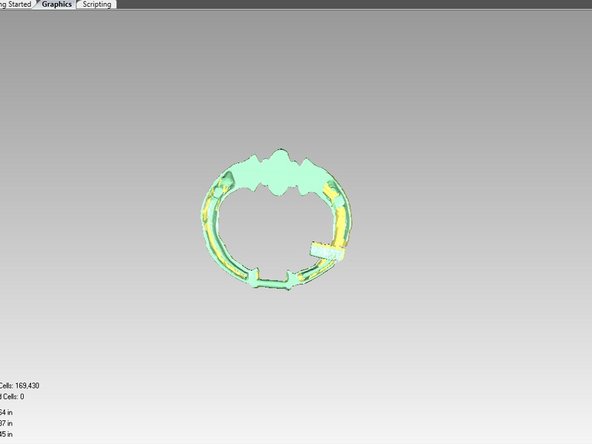
Your work will appear on Geomagic Wrap
-
-
-
Any parts you missed in the captured point cloud data will need to be scanned again in a subsequent pass
-
Repeat scanning passes until all visible surfaces of the target object are captured from the current object orientation
-
When you are done, push the black slider above the red trigger to finish scanning in this position
-
Press OK to store the data in a new group, which will represent one setup/position of the object
-
Proceed to the post processing guide to learn how to use Geomagic Wrap to put together your scans
-
-
-
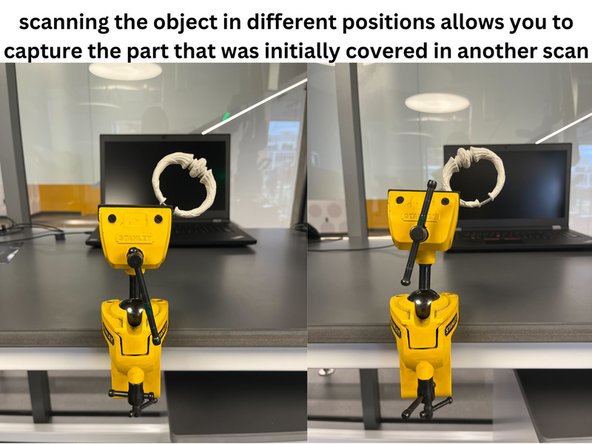
You will usually need to scan the part from different angles to capture the entire part
-
On many objects, you need to scan the bottom surfaces that are not possible to scan in the first orientation
-
Be sure to support the object well since if it falls or shifts the scan data would have to be merged and another pass would be needed
-
Any misc. objects used to prop up the desired object can be removed in post-processing
-
Before starting subsequent scanning passes, you can hide previous groups by right clicking them in the Model Manager
-
Since you will eventually be merging all of the scan data, your scans will need to have common areas to reference
-
-
-
These scanning passes require post processing to make a complete and manifold mesh
-
The scanner is not needed to do post processing once all scanning passes are complete, so it can be shut down
-
Hook the scanner back onto the arm
-
Flip the red switch to lock the arm's movement
-
Hold the power button to turn off the scanner
-