Introduction
- As part of your onboarding with the lathe, you will create a rocket from 1" aluminum stock. It consists of three separate pieces: a nose cone, a spacer, and the tail.
- The engineering drawings that you will follow to make the part are attached on the lathe. They will also be linked in this guide
- If you have any questions while completing the part, feel free to ask and SLM or LC in the lab!
-
-
The first stage will be completed in three checkpoints, pictures from each checkpoint are included for reference.
-
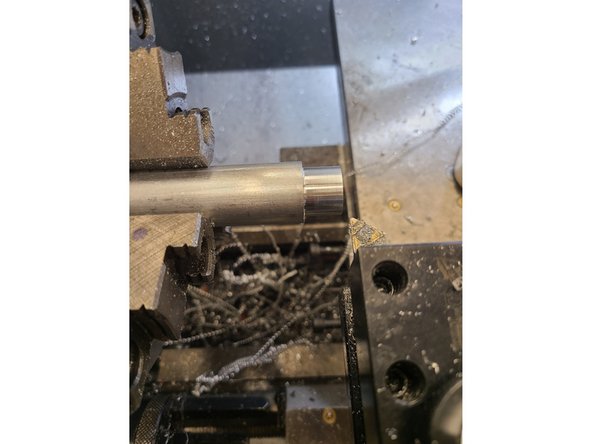
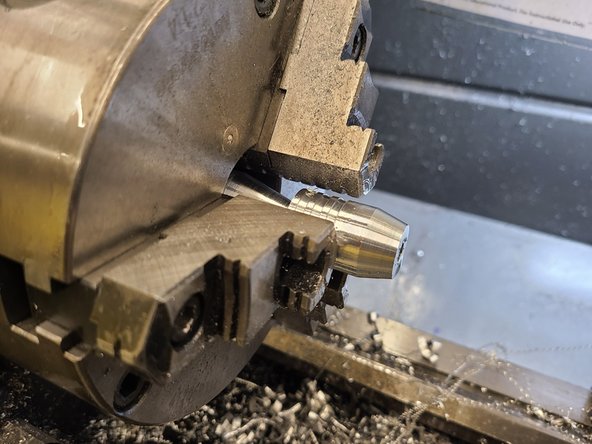
Checkpoint 1: Turning down the part of the stage that will be threaded and cutting it out (Pictures 1 & 2). This step requires the parting and face turning tools.
-
-
-
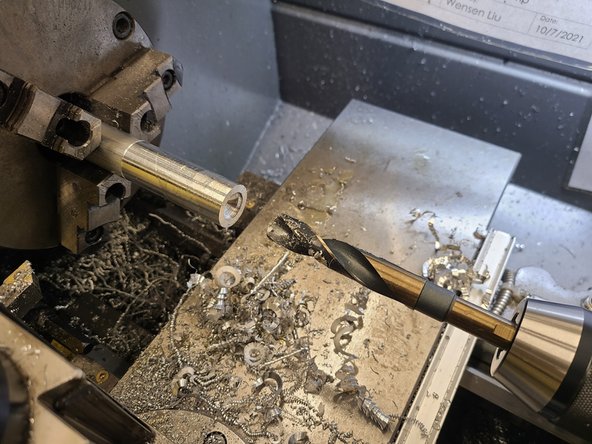
Checkpoint 2: Turning down the angled taper on the nose cone (Pictures 1 and 2). This step requires the face turning tool.
-
Checkpoint 3: Threading the end (Picture 3). This step requires the 5/16-18 die.
-
-
-
The second stage will be completed in two checkpoints, pictures from each checkpoint are included for reference.
-
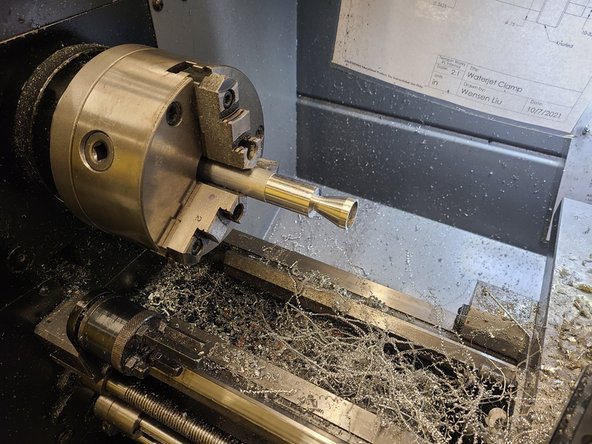
Checkpoint 1: Turning down part of the length to the diameter of the smaller end (Picture 1). This step requires a face turning tool.
-
If you turn down the entire length of the part to be the smaller diameter, you will have to restart the part.
-
Checkpoint 2: Turning the angle taper on the inside of the stage (Picture 2). This step requires the center turning tool.
-
-
-
The third stage will be completed in four checkpoints, pictures from each checkpoint are included for reference.
-
Checkpoint 1: Drilling the hole in the bottom in preparation for boring (Picture 1). This step requires the 5/8" drill bit.
-
Checkpoint 2: Boring to widen the hole in the base of the stage (Picture 2). This step requires a boring tool.
-
Checkpoint 3: Turning the internal taper at the base of the stage (Picture 3). This step requires the face turning tool.
-
-
-
Checkpoint 4: Parting the stage from the stock and turning down the taper (Pictures 1 and 2). This step requires the face milling tool and the parting tool.
-