-
-
Turn on chiller located at the bottom left of the machine.
-
Ensure that the chiller is set to 15 degree Celsius.
-
If the chiller is not set to 15 degree select "set = " and you will be edit the temperature.
-
Once you've entered temperature hit green check icon at bottom right corner.
-
-
-
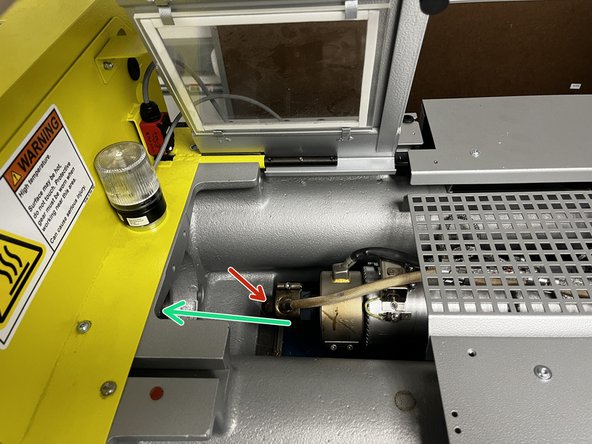
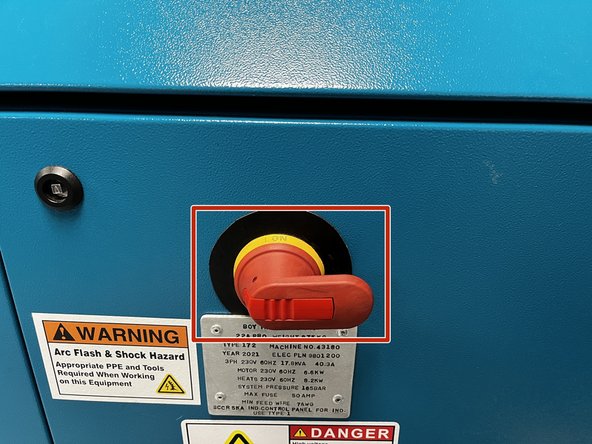
Turn main power on by rotating lever clockwise( currently in off state).
-
The Lever has some Resistance to it so it might be a little difficult to turn on, this is normal.
-
Once the lever is pointed downwards the machine is now on.
-
It is a good practice to turn on the chiller before the main power, but if you accidentally forget just make sure you turn on the chiller before turning on the screw heaters. Turning on the screw heater without the chiller could lead to damage in the screw housing from improperly controlled thermal expansion.
-
-
-
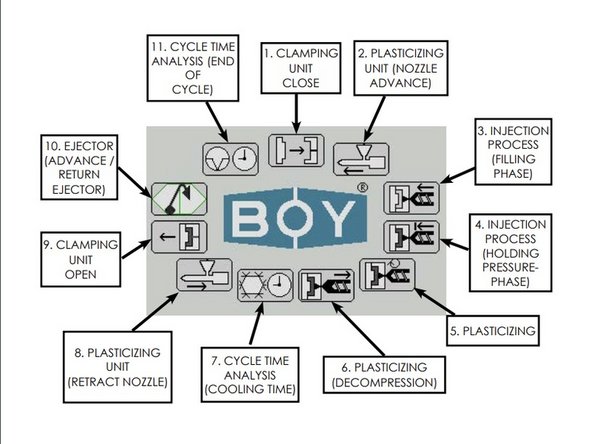
Manual, Automatic, and Semi-automatic Production modes
-
Plasticizing unit movement forward and backward
-
Screw movement forward and backward
-
Screw heater on/off
-
Oil heater on/off
-
Production cycle start button
-
Clamping unit movement forward and back
-
Ejector pin forward and back
-
-
-
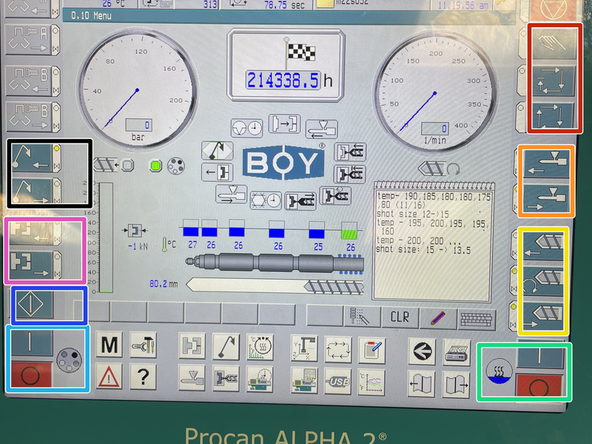
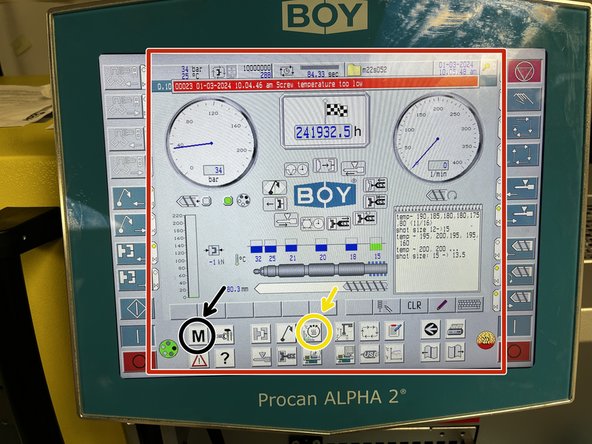
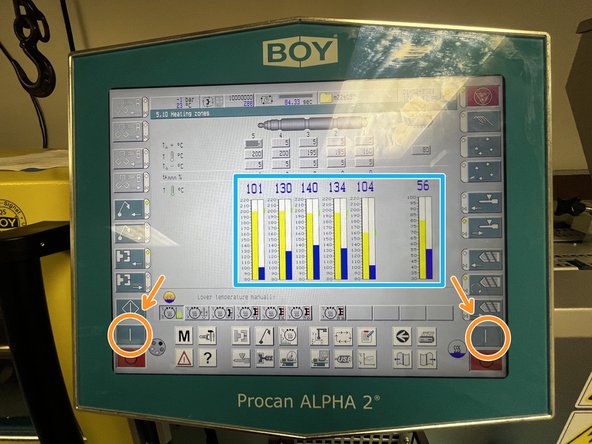
When the machine is on you will see the main display screen.
-
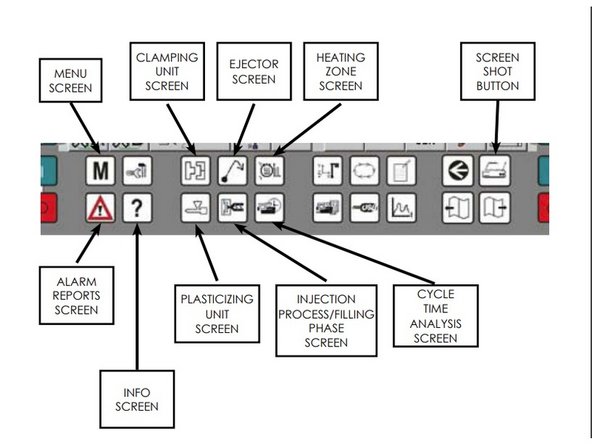
To get to the main display screen select the "M" icon.
-
To view temperature status select heating zone icon.
-
Turn on both heaters and wait for them to reach operating temperatures. this will take a couple minutes
-
The navy blue represents the actual zone temp of our screw, while the yellow is the set temp.
-
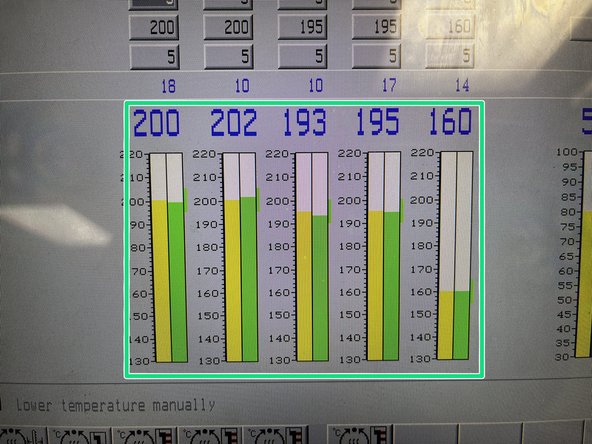
When the navy blue temperatures to the right match those of the yellow temperatures they will turn green indicating that the machine is at operating temperature.
-
Now that the navy blue temperatures have turned green the machine is now at operating temperature.
-
-
-
Turning on the Oil heater is very loud and can interrupt others tasks please ensure no one has a meeting/zoom call within the next 15 minutes to keep the noise level reasonable.
-
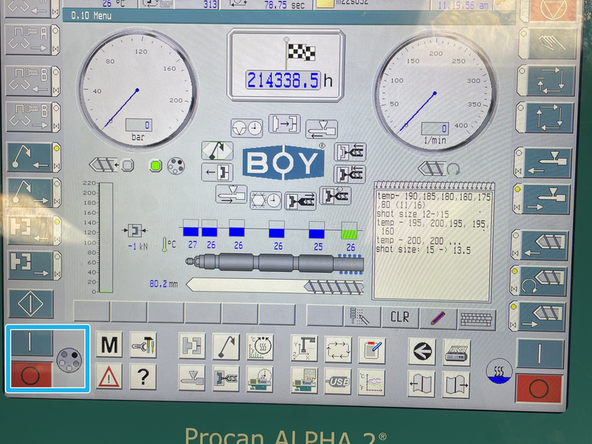
In addition to heating up the screw we need to get the oil temperature hot enough so the hydraulics will function properly.
-
Power up the oil heater and let the temperature rise to 40C to allow for hydraulic movement of the injection part of the boy.
-
The oil for our machine is set to be at 40C for hydraulic use.
-
-
-
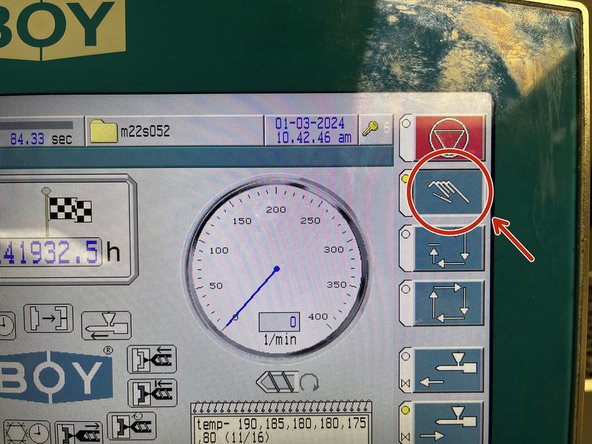
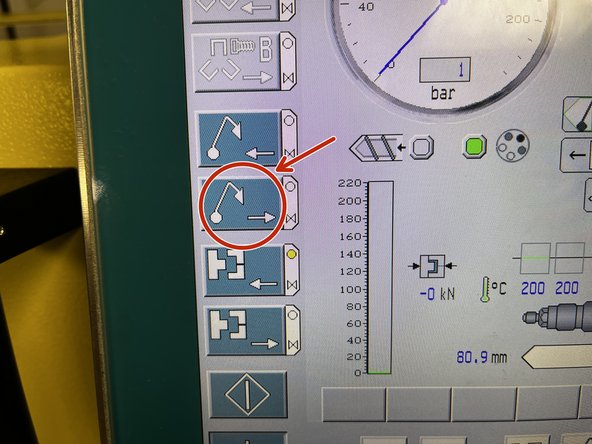
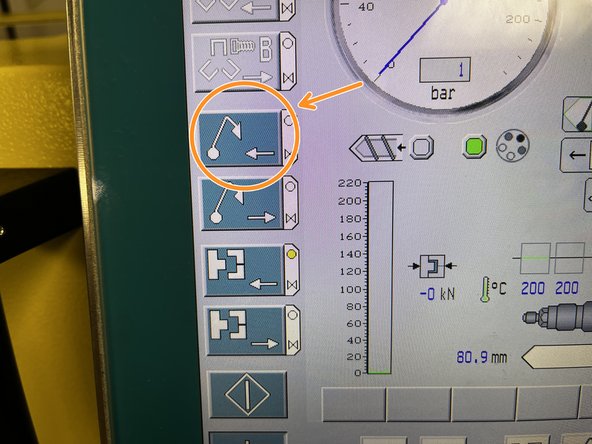
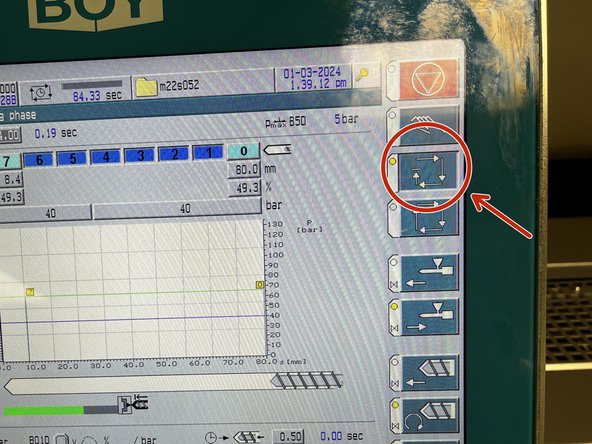
Select icon to enter manual mode.
-
Manual mode allows you to operate each competent of the injection molder without running a cycle.
-
-
-
While in manual mode there are certain functionalities that you need to check to make sure you don't run into any errors.
-
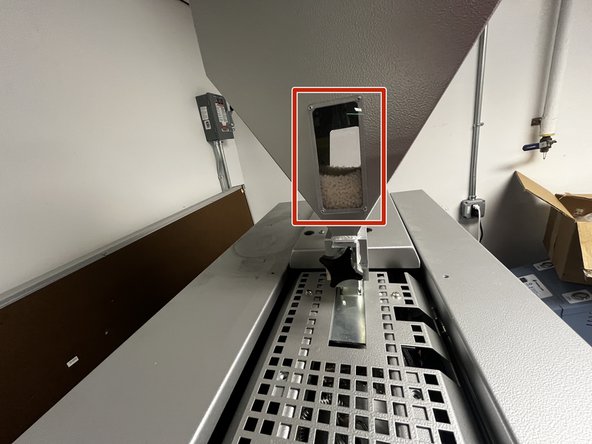
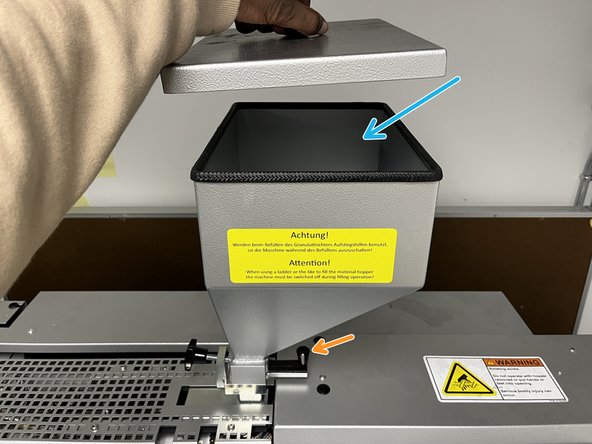
First thing is to make sure that there adequate plastic in the hopper
-
If there is not enough plastic insert more into the top of the hopper.
-
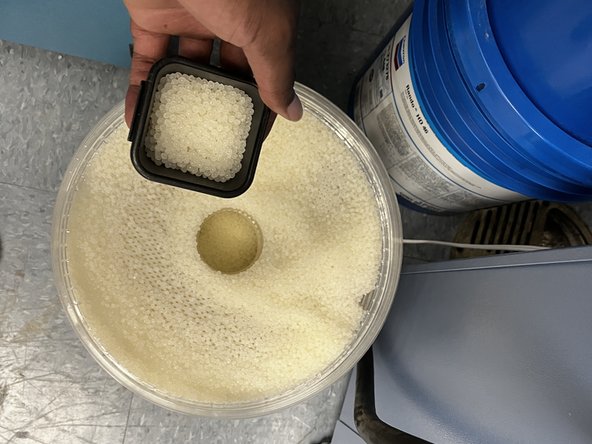
The plastic is in the dehydrator to the bottom right of the machine. use about 3-4 full scoops or until the plastic is visible.
-
Finally make sure that the stopper is pulled all the way to the right allowing the plastic to enter the injection unit.
-
-
-
The mud must be in the fully open position in order to operate the machine.
-
move the mud to the fully open position using the clamping movement buttons.
-
-
-
The next step is to make sure that the Ejector pins are functioning correctly.
-
Press the -> Ejector icon to ensure that ejector pins work.
-
Once you've confirmed that ejector pins work press <- Ejector icon to bring the pins to retract ejector pins.
-
Mould must be all the way back in order for the pins to eject properly
-
-
-
Finally open nozzle protection gate and wipe the nozzle with a cloth to ensure that no excess plastic from previous run is clogging nozzle
-
Make sure the plasticizer is all the way to the left and makes full contact with the front plate of the mud.
-
in order to move the plasticizing unit forward on the track the mould must be completely shut and have back.
-
The screw must also be in the fully back position in order to properly advance the plastic through the nozzle to inject the mould.
-
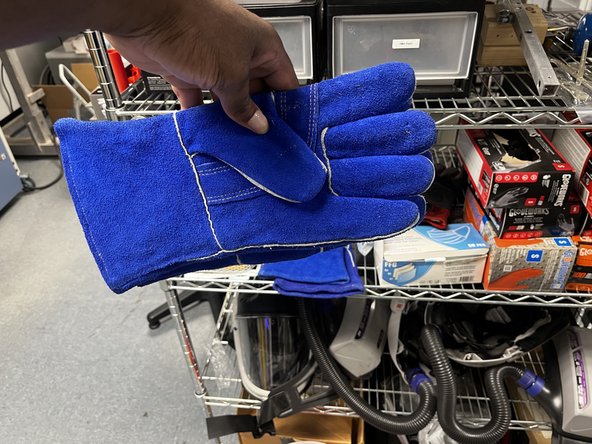
When operating around the nozzle make sure that you are wearing the correct PPE. the nozzle reaches temperatures over 200 degree celsius. make sure you are wearing heat resistant gloves.
-
If you see "not fully plasticized" error, do the steps mentioned above.
-
-
-
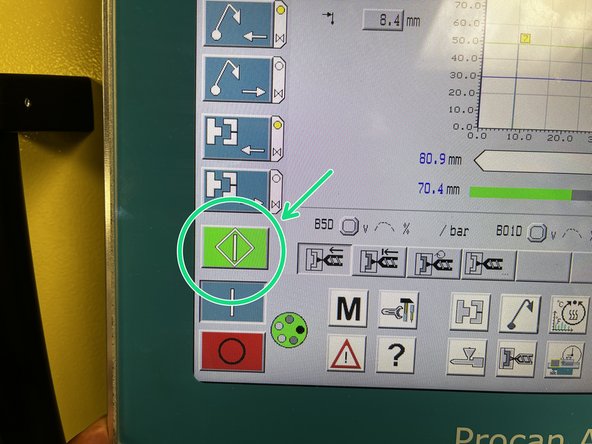
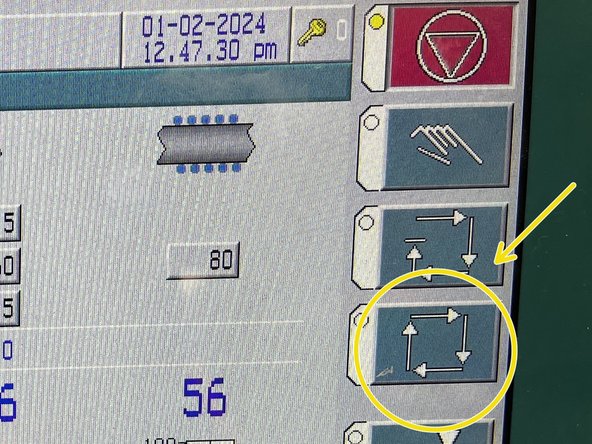
First step is to leave manual mode and enter "semi-auto" mode
-
Once in semi auto mode is on green start button will begin to flash press the start icon and 1 cycle will run
-
The icon below semi-auto mode is "fully auto" this mode allows you to run cycles consistently with no pause.
-
For the remainder of the guide make sure the machine is in semi-auto fo rthe rest of the video.
-
-
-
If ejection pin was not able to remove part completely. Open safety gate and manually remove material
-
Manual removal requires the following tools:
-
mallet
-
4mm hex head screw driver
-
This is the video of the dog bone being ejected out of the mold.
-
See the last step for a more detailed guide on this
-
-
-
Powering off the machine should be done at the end of the day. injection molders are capable of running multiple cycles.
-
Turn off the screw heater and hydraulic oil system
-
Turn main power lever counter clockwise to turn off main power.
-
Turn off chiller.
-
Order does not matter as long as they are done within the same time period.
-
-
-
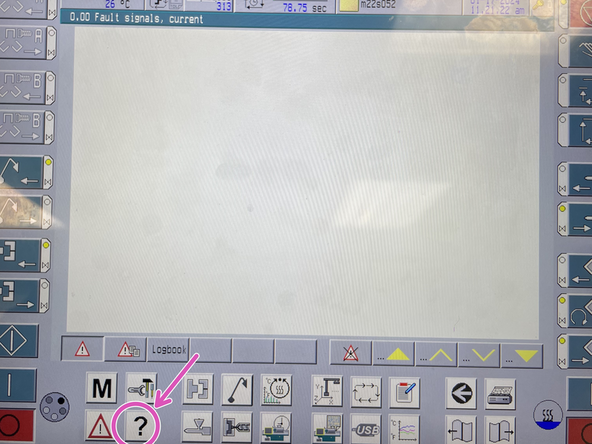
This is the error log/ action llog
-
It will read out any errors/ actions that occur while the machine is in use.
-
Common Errors include:
-
Screw head doors not fully shut
-
Mould door not fully shut
-
Mould not in correct position (all the way back)
-
If you don't immediately know what the error is pressing the "?" button after selecting desired message will take you to the manual reference page for that error.
-
-
-
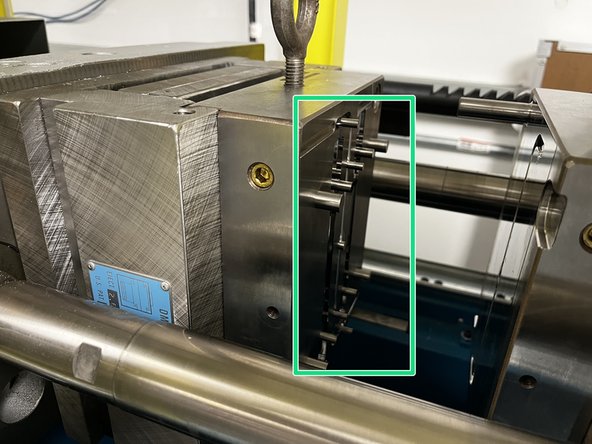
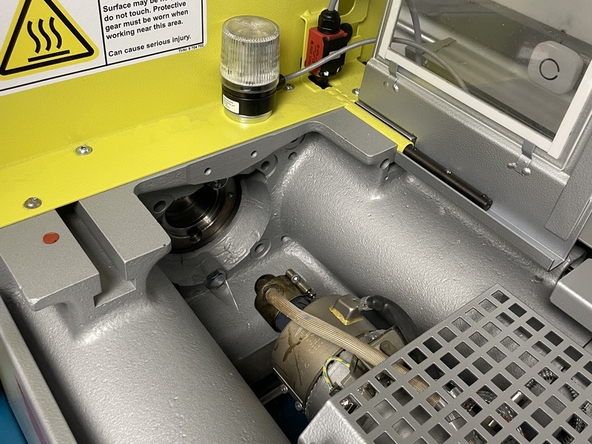
Back the screw up so that the access chamber is mostly clear
-
Open the top Screw chamber access hatch
-
taking the hex screw driver line it up with the Mud orifice
-
Tap the end of screw driver to gently knock the moulded plastic free of the mud/mould.
-
If none of these steps solve the issue back up the plasticizing unit and remove the front end of the mud
-
THIS PLATE WEIGHS ROUGHLY 50 LBS PLEASE PLEASE PLEASE EITHER GET THE ENGINE JACK OR ANOTHER LABMATE IF YOU ARE NOT CONFIDENT IN YOUR ABILITY TO LIFT THIS!
-
-
-
Some content was taken from MIT's guide
-
-