
Introduction
This is the first of a three-part sequence to using Kenny, the official 3D printer of R@M. This guide gives an overview of how to 3D print a model.
Tools
Parts
No parts specified.
-
-
3D printing is a process that involves a CAD model, a slicing software, and a 3D printer.
-
-
-
The first step is to create a model of the object you would like to 3D print with a CAD software such as Autodesk Fusion 360, Autodesk Inventor, or SolidWorks.
-
Refer to the Mini-Sub guide series for more information and practice with modeling.
-
-
-
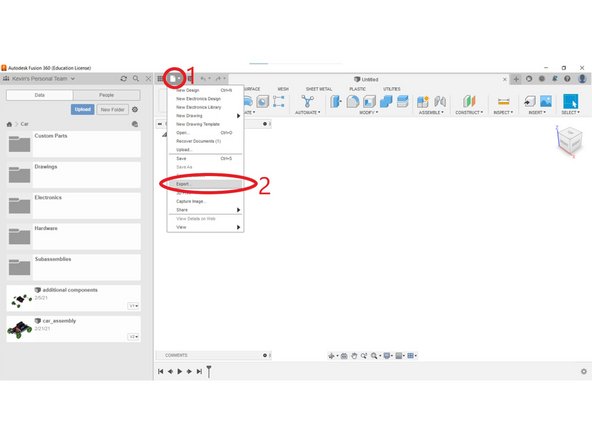
After you create your model, you have to export it as a .stl file, which stands for stereolithography file.
-
With your model open, locate and click on the "File "menu at the top of your screen.
-
Click on "Export"
-
A new window should appear. Give the STL file a name. Then, change the file type to .stl . Finally, give the STL file a location you want it to be exported to.
-
Click on "Export"
-
-
-
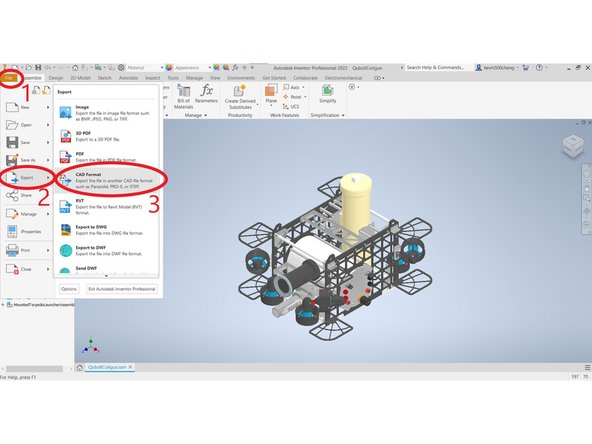
After you create your model, you have to export it as a .stl file, which stands for stereolithography file.
-
With your model open, locate and click on the orange "File "menu at the top of your screen.
-
Click "Export"
-
Click "CAD Format"
-
Select the folder you would like the STL file to be saved in.
-
Name the STL File.
-
Change the file type to "STL Files (*.stl)"
-
Click "Save"
-
-
-
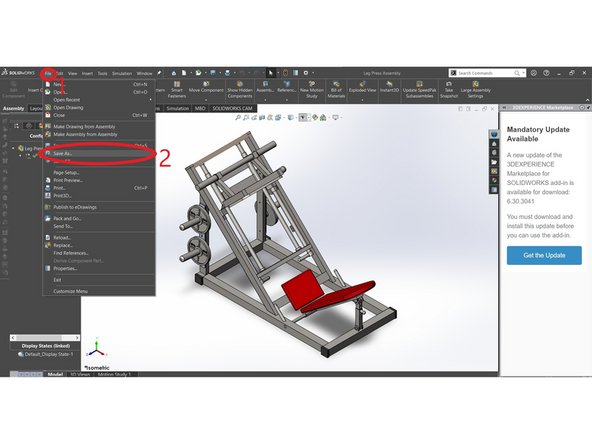
After you create your model, you have to export it as a .stl file, which stands for stereolithography file.
-
Locate and click on the "File" button at the top of the screen.
-
Click on "Save As"
-
Select the folder you want the STL file to be saved in.
-
Name the STL File
-
Change the file type to "STL (*.stl)"
-
Click "Save"
-
-
-
After you have created an STL file from your model, open the slicer you plan to use for your 3D printer.
-
Upload the STL file into the slicing software.
-
After adjusting the settings, slice the file. The slicer should then create a GCODE (*.gcode) file.
-
Please refer to the "Using PrusaSlicer" guide on more details for 3D printing with Kenny.
-
-
-
After getting the GCODE file to the 3D printer:
-
via USB Drive or SD Card:
-
Select the file you wish to print.
-
Start the print
-
via a printer communication software (Pronterface):
-
Connect your computer to the 3D printer
-
Select the file you wish to print and begin the print.
-
Please see the guide on "3D Printing with Kenny" for more information.
-
-
-
For the first few layers, watch the print as to make sure your print does not fail.
-
After the print has finished, remove the print from the printer.
-
Please see the guide on "3D Printing with Kenny" for more information.
-
Cancel: I did not complete this guide.
6 other people completed this guide.
