-
-
If you already have SolidWorks installed, ensure that your Solidworks is updated to the latest version.
-
To install Solidworks, visit https://terpware.umd.edu/Windows and head to the "Design & Production" tab, click on Solidworks and log in through UMD. (Only UMD Engineering students can install Solidworks)
-
-
-
CAD stands for Computer-Aided Design. It an essential skill and tool for all engineers and technicians to use and understand.
-
CAD allows you to create 2D sketches or 3D sketches, 3D models, and assemblies of basically anything you can think of.
-
Solidworks will allow you to export whatever you made in countless different file types that are used for different machines in Terrapin Works. For example, if you want to 3D print your CAD model, you will export it as a .STL. If you want to laser cut or waterjet cut a 2D face, you will export that face as a .DXF
-
CAD also lets you create engineering drawings, which are technical and detailed ways of portraying a 3D model on a 2D sheet of paper and including critical information such as dimensions.
-
-
-
Some basic features and tools you will find universally in any CAD program you use includes the following:
-
2D Sketch:
-
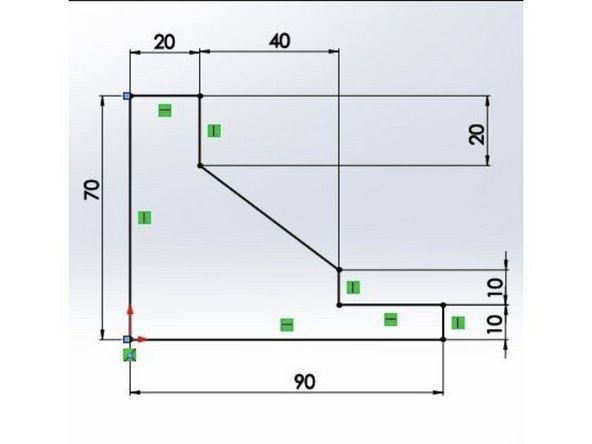
If you click the Sketch button, you can select a plane or a face to draw a 2D sketch on. In 2D sketch mode you can draw Lines, Rectangles, Circles, and more.
-
Extrude & Cut:
-
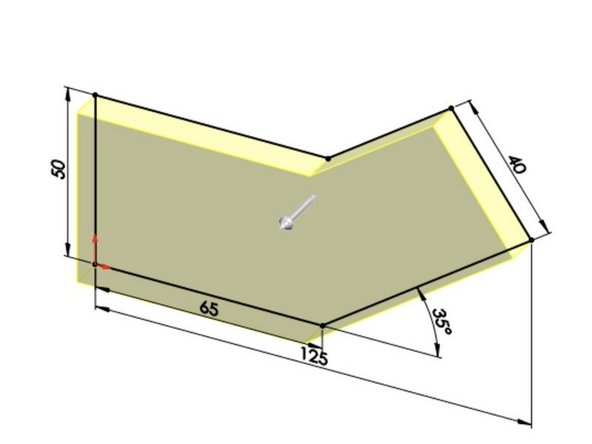
Once you have a fully defined sketch, as in you sketched a complete and enclosed drawing, you can Extrude that shape to make it 3D. Similarly, if you already have a 3D shape, you can create a sketch on that shape to Cut, which is to take away material from the 3D model (opposite of extrude).
-
Revolve & Cut:
-
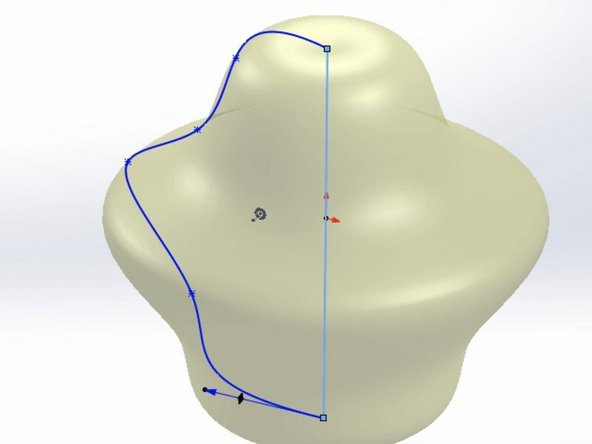
Once you have a fully defined sketch, you can draw a line that will be the axis you revolve your sketch around, and this will generate a revolved 3D body from your 2D sketch profile. Similarly, if you already have a 3D body, you can revolve a 2D sketch profile to cut and remove material from that 3D body.
-
-
-
Fillets and Chamfers
-
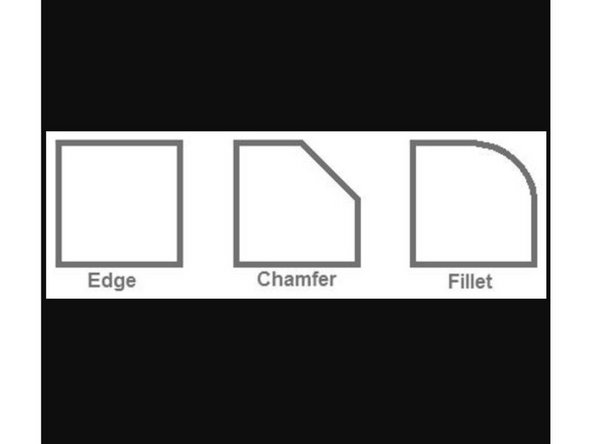
You can select an edge of a 3D model to make a fillet (a rounded edge), or a chamfer (a slanted edge).
-
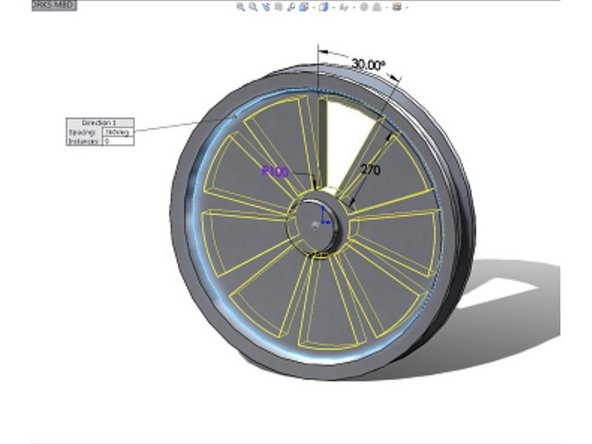
Mirroring and Linear/Circular Patterns
-
You can mirror or create patterns of both 2D sketches and 3D features, rather than taking time to draw those sketches or features again and again.
-
-
-
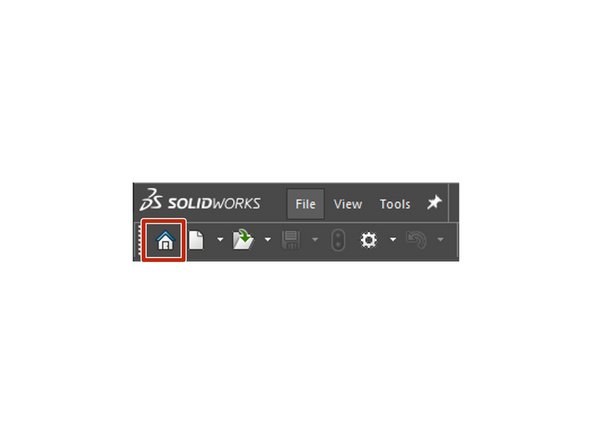
Click on the House Icon
-
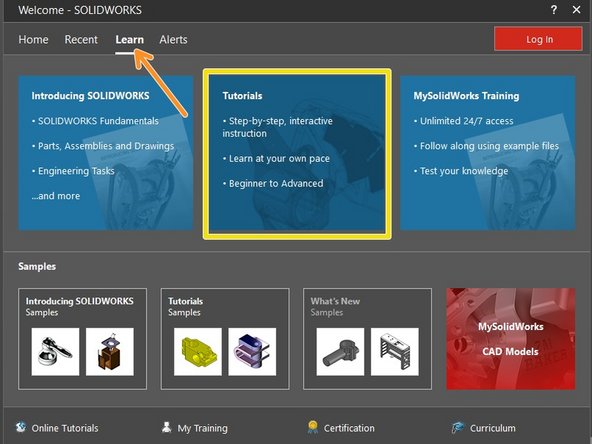
This should open the Welcome to SOLIDWORKS window
-
Switch to the Learn tab
-
Click on Tutorials with Step by Step instruction
-
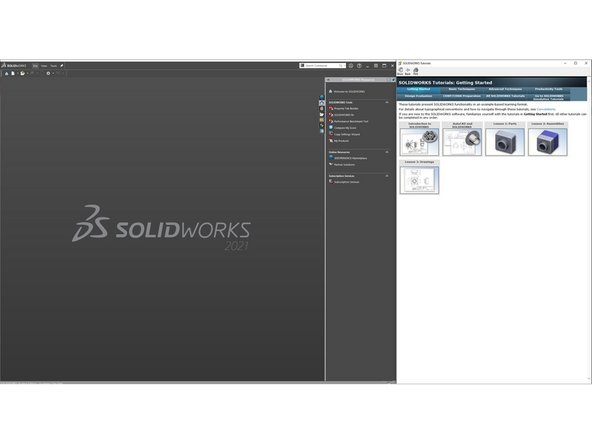
You should now see the SOLIDWORKS Tutorials window on the right.
-
-
-
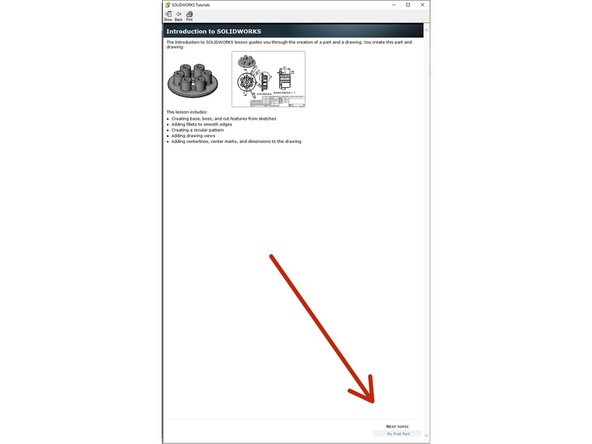
Please complete the following built-in Solidworks tutorials. Your SolidWorks window will remain active on the Left Side. The tutorial will run on the right side.
-
Introduction to Solidworks
-
Lesson 1 - Parts
-
Lesson 2 - Assemblies
-
Lesson 3 - Drawings
-
As you go through, be sure to advance to the next page by clicking Next Topic in the lower right corner.
-
-
-
Congrats! You've completed your Design Team SolidWorks training.
-
We do offer Solidworks certification through the University of Maryland. If you are interested, speak with Lauren Rathmann.
-
If you want to continue to further hone in your CAD skills on your own time, this is a great resource: https://academy.titansofcnc.com/category...
-