
Introduction
Before using a rough board for your project, it is vital that the board be flat and the faces are 90° to each other. The jointer allows you to square a face and an edge, ensuring that you’ll have two flat surfaces to use as reference when you use the planer.
Tools
Parts
No parts specified.
-
-
Ensure all proper PPE is worn.
-
Goggles
-
Ear Protection (optional but HIGHLY recommended)
-
Gloves should NOT be used around the jointer.
-
-
-
Ensure you have done the following:
-
Tied back any loose hair
-
Removed any jewelry from wrists or hands
-
Rolled back any long sleeves
-
Wore closed toed shoes
-
Secured any and all loose and baggy clothing
-
-
-
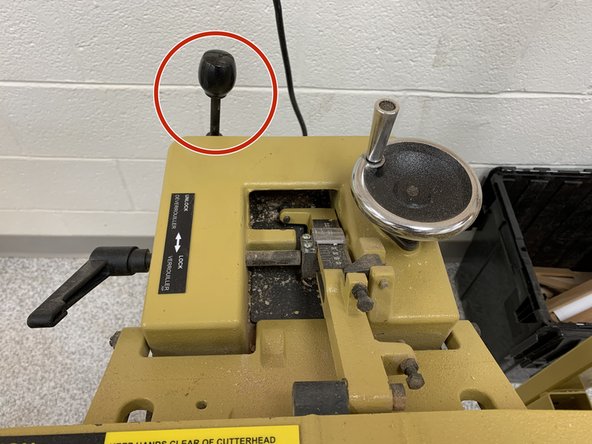
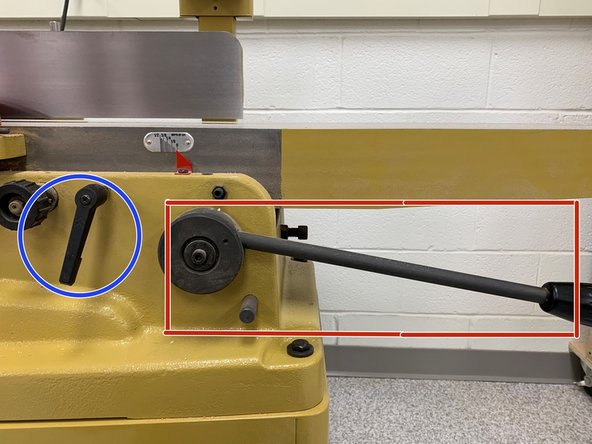
Unlock fence adjustment lever
-
Use both hands to push or pull fence to desired distance
-
Lock fence adjustment lever
-
The jointer can only joint a board with a max width of 8 inches. If your board is wider than that and needs milling before use, check the guide for the planer.
-
-
-
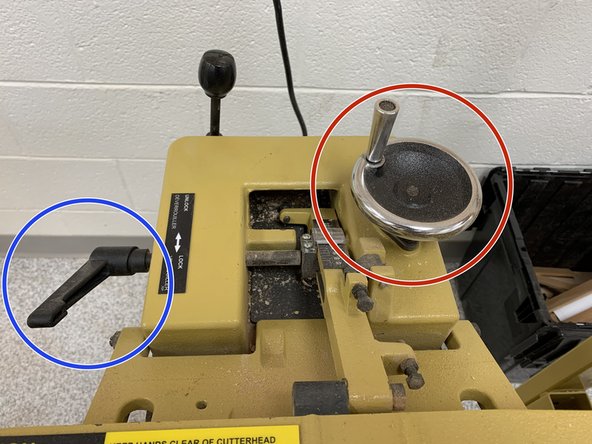
Unlock adjustment lever.
-
Adjust angle by turning adjustment wheel, checking angle with a machinist square for 90° or a protractor for any other angle.
-
Lock adjustment lever.
-
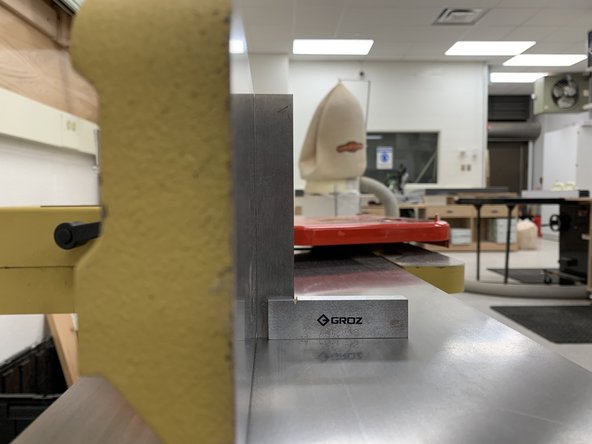
Second picture shows machinist square against outfeed table and fence. Note how there are no gaps between the fence and the square. Do this before every use.
-
Using the jointer for any angle aside from 90° is not recommended, but doable. Any cut other than 90° should be done on a table saw or other saw
-
-
-
Depth of cut should not be adjusted without approval from an LC or Ted Baker.
-
Unlock adjustment lever knob by turning counter-clockwise.
-
Move adjustment lever down to increase the depth of cut.
-
Lock adjustment lever knob by turning clockwise.
-
Note: Assume the jointed and planed dimensions remove AT LEAST half an inch of material. Ensure you have enough material leftover to complete your final project
-
-
-
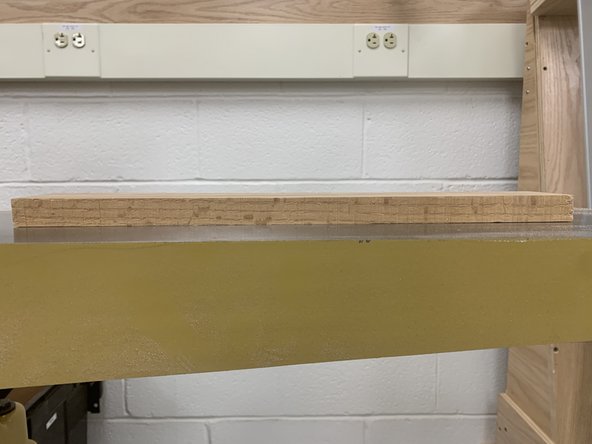
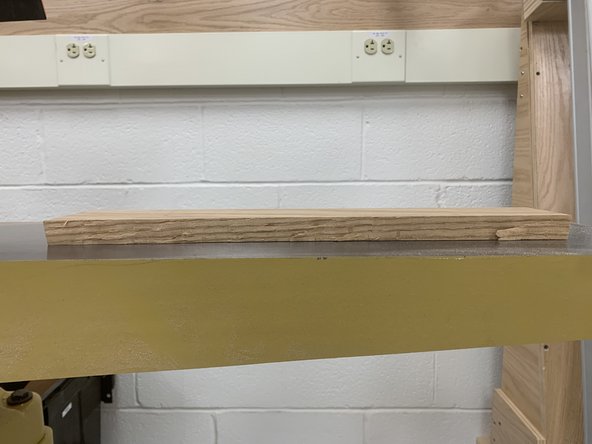
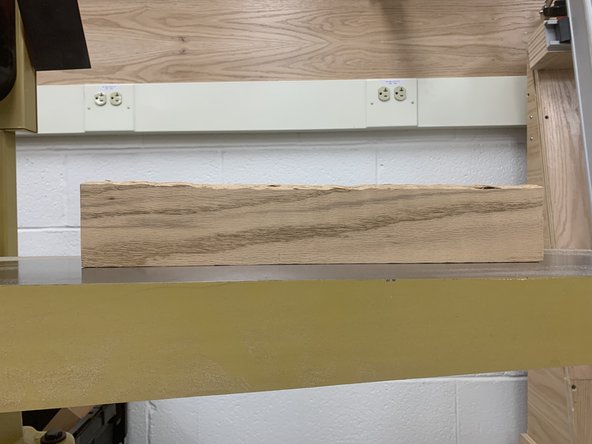
Choose a face and an edge to joint (face is the wide side, edge is the narrow side).
-
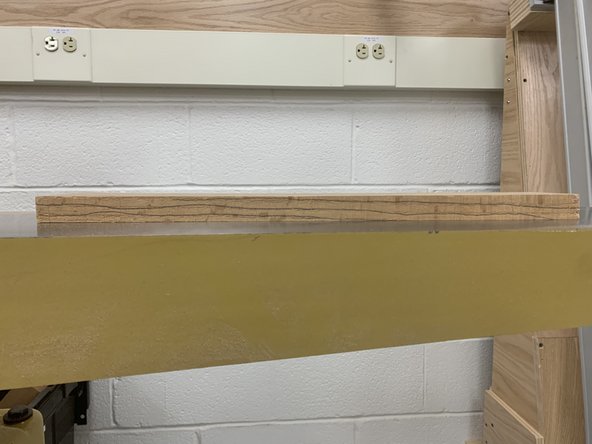
Lay the board on a flat surface and check each edge and face for flatness.
-
If the board itself is bowed, choose the concave side to joint.
-
Check the edges to see how the board curves. If light shows between the board and table at the edges, the face/edge is convex. If light shows in the middle board, the face/edge is concave.
-
Note how first picture shows a face that is relatively flat. Upon physical inspection, it does not rock back and forth. In the second picture, there is a gap in the middle, showing that that face is concave. Joint the flatter side. The third pic shows the edges. Note how the top edge slants from left to right. The bottom edge is flat enough.
-
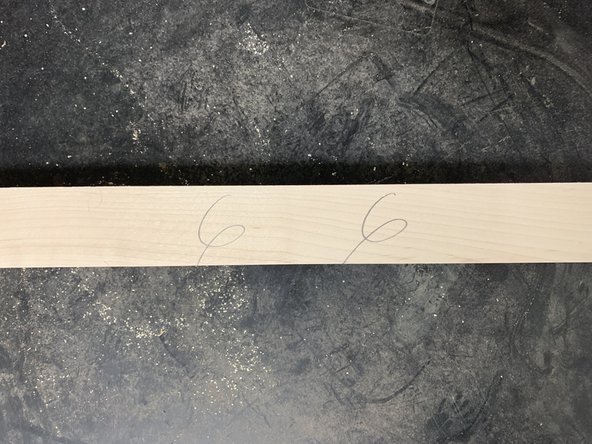
Mark face and edge to be jointed by drawing a wavy line along the face and edge to be jointed.
-
-
-
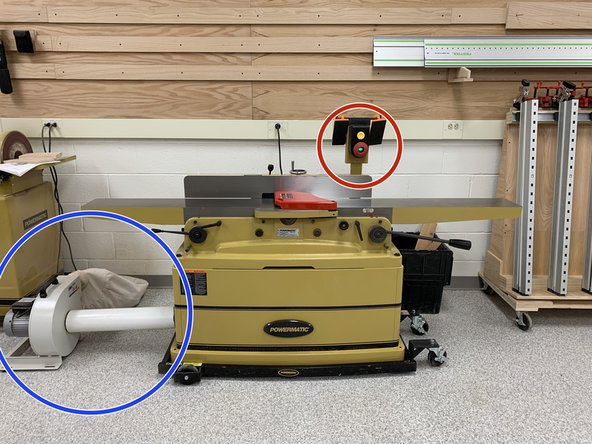
Ensure red blade guard is attached properly before starting the machine.
-
Turn on vacuum.
-
Press green button to turn on jointer.
-
-
-
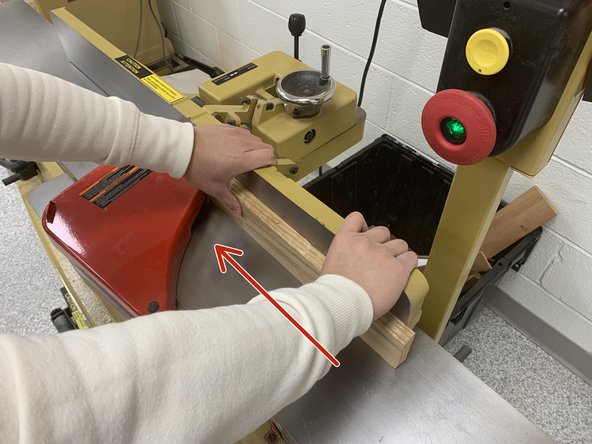
Recommended: Orient board such that the grain runs "downhill" (refer to picture for clarification). Note how the lines run down towards the cutting blade.
-
Run board at an even speed across the cutter head.
-
Running board too fast will result in an uneven, scalloped cut.
-
Running board too slow will result in marking and gouging the board.
-
-
-
Push board into cutting head.
-
Apply weight onto outfeed end of the board once board passes cutting head.
-
Use a hand over hand motion to keep force approximately 1-2 inches from the outfeed end of the cutting blade.
-
Repeat this process until the face is flat. Check for flatness by placing the face against the outfeed table and checking for gaps between the face and table.
-
If you marked the face with pencil marks in step 4, joint until marks have disappeared.
-
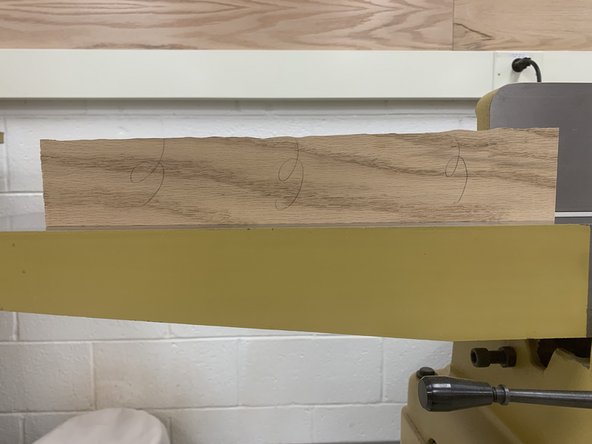
Mark jointed face using a curlicue (picture 2).
-
-
-
Place jointed face against fence.
-
Begin pushing board across cutting head. Apply pressure both down into outfeed table AND into the fence to ensure a perfect 90° cut.
-
Use two push blocks with one on the top edge pushing down into outfeed table and the other along the face pushing into the fence.
-
Alternatively, you can use your hands and rest your weight on the top of the edge to push down and your thumbs to push into the fence.
-
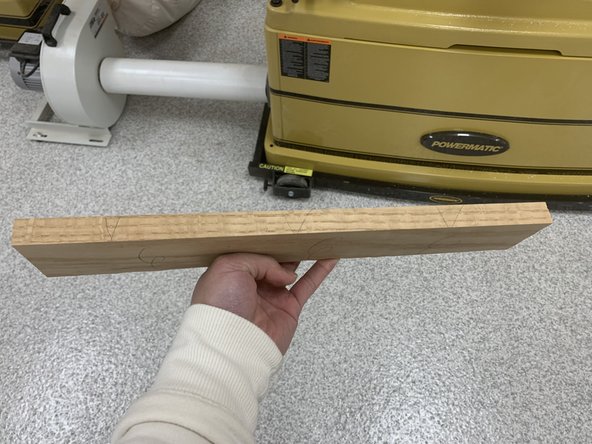
Continue jointing until the marks from step 3 are gone and the edge is flat. Mark flattened edge with an arrow or carrot pointing to jointed face.
-
-
-
Turn off jointer and dust collector.
-
Clean any large loose piles of sawdust.
-
Move board over to planer to finish prepping the board for use.
-


Using the jointer is only half the battle for prepping a board for use. Go to the planer dozuki to learn how to prep the board for use.
Using the jointer is only half the battle for prepping a board for use. Go to the planer dozuki to learn how to prep the board for use.
Cancel: I did not complete this guide.
One other person completed this guide.
Team
