
-
-
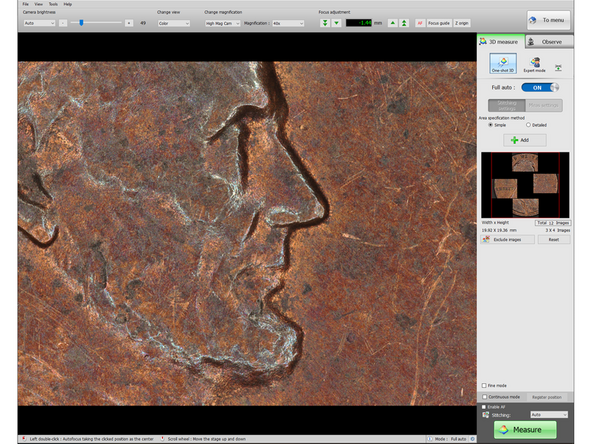
The magnification can be adjusted by selecting between low mag and high mag (detailed in step 4)
-
Low mag is capable of scanning up to 1 cm depth, allowing for 12x, 25x, 38x, and 50x magnification
-
High mag is capable of scanning up to 1 mm depth, allowing for 40x, 80x, 120x, and 160x magnification
-
The camera brightness can be adjusted depending on the color and luster of the sample (see step 2)
-
The focus can be adjusted manually or automatically, and should be done before any scans (see step 3)
-
To move the view around, either use the movement window or right click and drag on the viewing window
-
The movement window has arrows that can be clicked and held, a "step" tab that allow specific transverse movements, or a small sub-window that can be clicked on to move the stage.
-
-
-
Color settings can also be modified
-
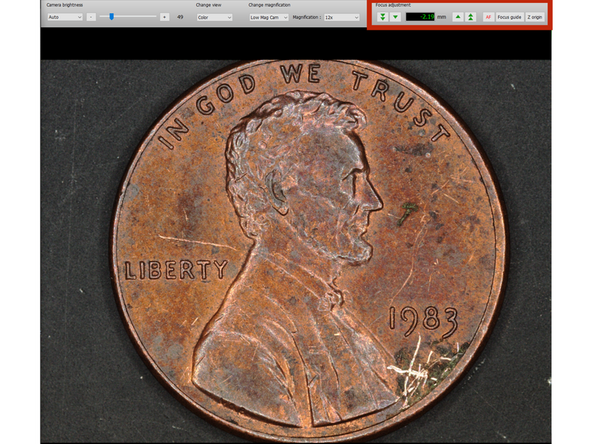
Brightness can be edited with the leftmost settings under "Camera brightness"
-
The dropdown has "manual" and "automatic" options, which allow brightness adjustment via exposure time and average pixel brightness.
-
"manual" ranges from 0.1ms to 20ms, and "automatic" ranges from 0 to 255.
-
Image 2 shows an example of over-exposure, and image 3 shows an example of the correct exposure level.
-
Correctly choosing an exposure level can affect the accuracy of the following scans and images.
-
-
-
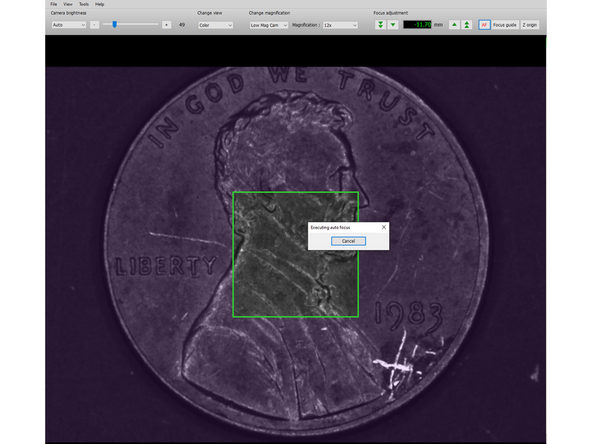
When a new sample is placed on the stage, the focus needs to be adjusted
-
"AF" stands for "Auto Focus", and when clicked will focus on the center of the screen
-
It can also be focused to a particular level by double clicking anywhere on the viewing image
-
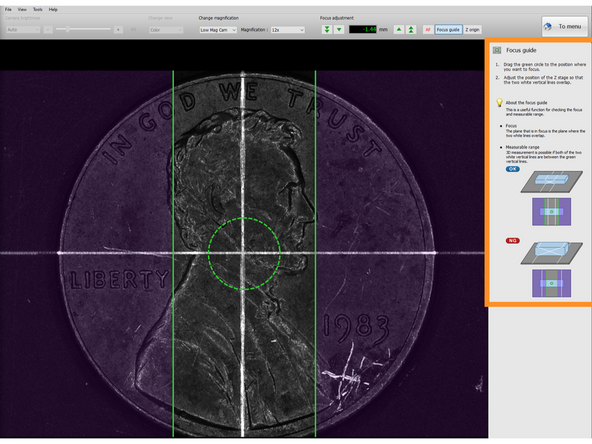
Manual Focusing takes a little bit more time, but can work better on materials that are very small, have a large height range, or are shiny/translucent.
-
The focus level can be controlled with the mouse scroll wheel or the dial on the side of the Keyence with "Up <--> Down" markings (scroll wheel is recommended)
-
The instruction set on the right side does a good job of showing how to properly focus using the lights, but it boils down to changing the Z level until the lines meet in the middle.
-
-
-
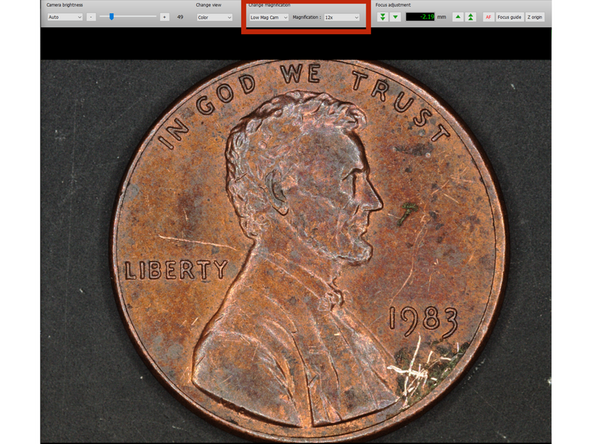
Physical and Digital Zoom levels can be controlled under "change magnification"
-
Physical zoom options are simple "low" and "high" magnification
-
Low magnification has 12x, 25x, 38x, and 50x magnification options
-
High magnification has 40x, 80x, 120x, and 160x magnification options
-
Low and High magnification levels change the accuracy and potential height range of scans.
-
Low Mag: 10mm scan height, 1um repeatability, 5um accuracy
-
High Mag: 1mm scan height, 0.5um repeatability, 3um accuracy
-
Focus must be adjusted when changing physical magnification levels
-
-
-
In order to scan samples larger than the viewing field, stitching must be utilized
-
There multiple stitching configurations available, but this guide will cover "Auto" mode only, as it is far easier to use.
-
The "Area specification method" section has "simple" and "detailed" options.
-
"Simple" mode allows scanning of images
-
Click Measure when done setting the boundaries so the software runs the scan
-
The Viewer will automatically import the scan into the Analyzer software after the scan in complete
-
-
-
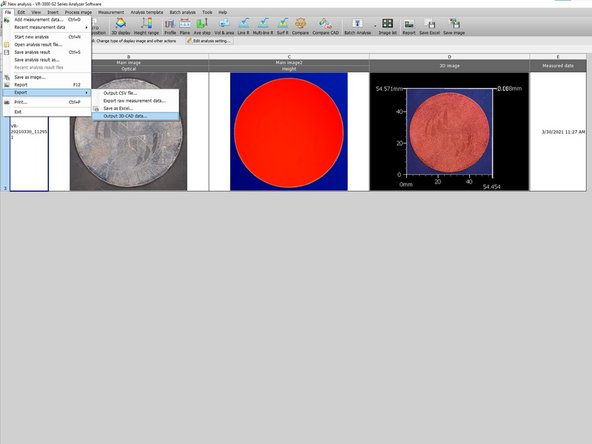
There are multiple ways to export the data of an individual scan (image 1)
-
A ".zon" file can be saved with raw measurement data to be analyzed later.
-
A ".csv" or ".xlsx" can export all images in the sheet as well as measurement data (not yet defined if the data is just imported). There are a few sub-options to change what data is captured in the output.
-
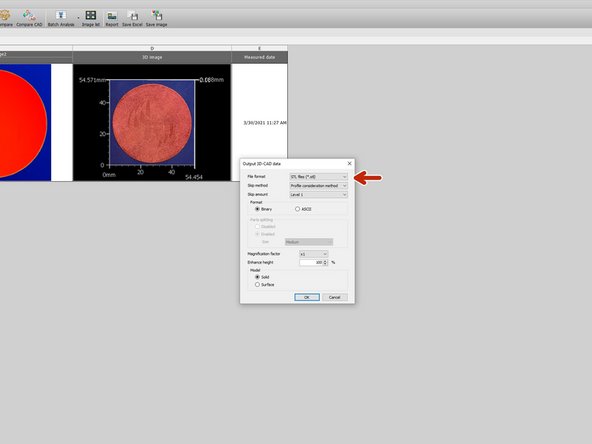
Selecting "Output 3D CAD" data will allow exporting of ".stl", ".step", or ".asc" files. There are a few sub-options to customize the exact output.
-
Individual images can be exported if just a pretty picture is desired as well.
-


Cancel: I did not complete this guide.
8 other people completed this guide.
