
-
-
In this guide we will complete one of your first Fusion 360 projects, the design of a 3D printable planter.
-
We'll create a sketch that we will then revolve to create the planter
-
Start by making a line from the origin to the right.
-
Use the dimension tool to set this line as 20 mm long. For this project, we won't worry too much about perfect dimensional precision, but we still do need to specify a few key dimension.
-
Make an arc from the end of the line you just made. Select the three point arc tool, and place the first point at the endpoint of the line. Place the second point approximately 40 mm above the first, then place the third point to create a curve.
-
Use the offset tool to create the thin wall and floor of the pot.
-
Click on the line and curve you just made, then set the offset dimension to -2.00 mm
-
-
-
Connect the inner and outer curves with a line at the bottom. This will serve as our axis once we use the revolve tool later.
-
Connect the inner and outer curves at the top with another arc. This will create a closed profile.
-
Hit "Finish Sketch" to exit the sketch workspace
-
-
-
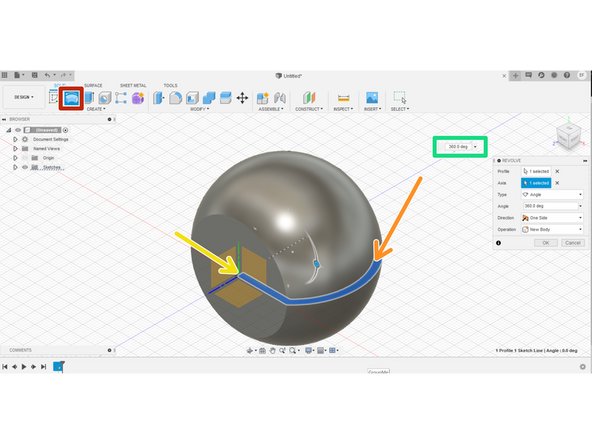
Open the revolve tool from the Toolbar
-
Select the closed profile we just made indicated by the orange arrow
-
Select the line near the origin as the axis of rotation
-
Set the degrees of the revolution as 360 to make a complete planter
-
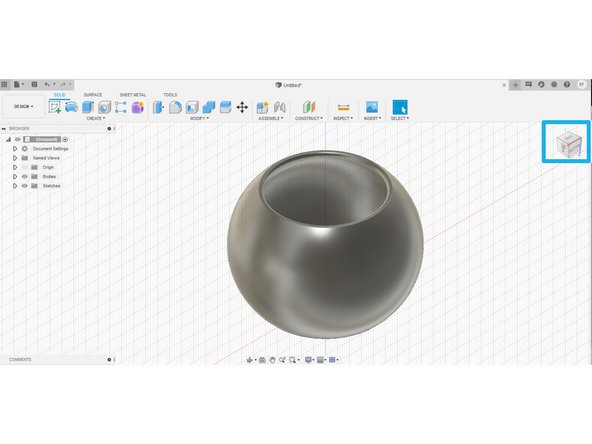
Use the cube in the top right of the window to view different angles on your planter
-
-
-
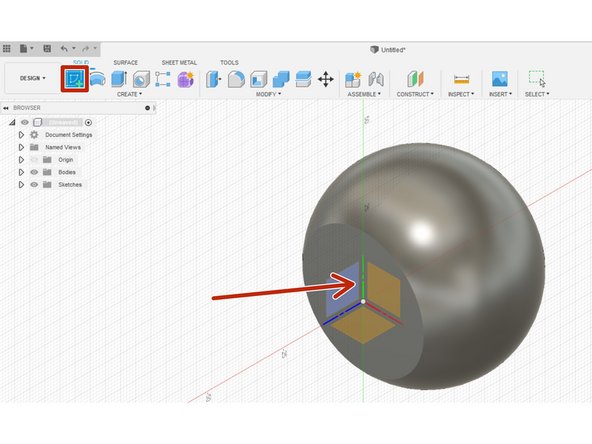
To add drainage holes into the planter, we will made another sketch and extrude it as a cut through the bottom.
-
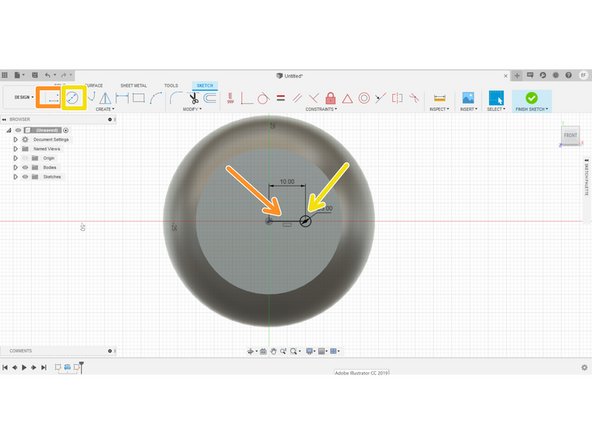
To create this sketch, click the sketch icon on the toolbar, then select the flat face on the bottom of the planter.
-
Once the sketch workspace opens, create a 10 mm line from the origin point.
-
Create a circle using the center point tool from the endpoint of the line just created.
-
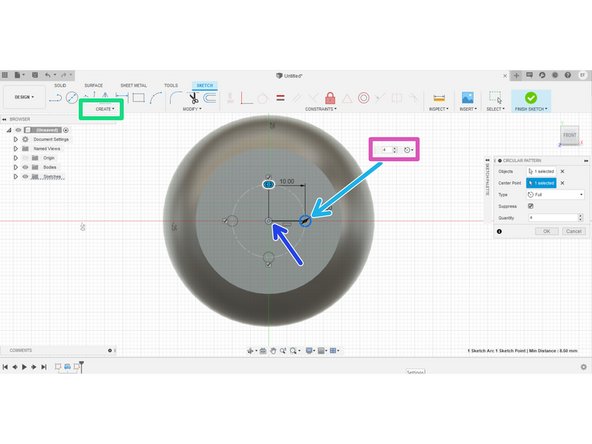
To create a pattern of circles, click the circular pattern tool in the "Create" drop down menu
-
Select the circle as the object to pattern.
-
Select the origin point of the sketch plane as the point around which to revolve.
-
Set the number of instances of to create to 4
-
-
-
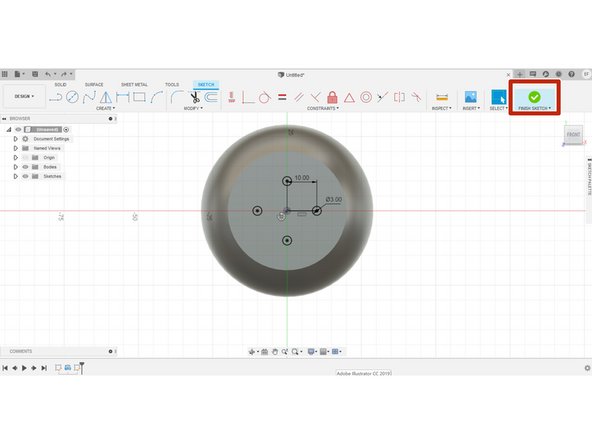
After finishing the circular pattern, hit the button on the task bar to finish the sketch.
-
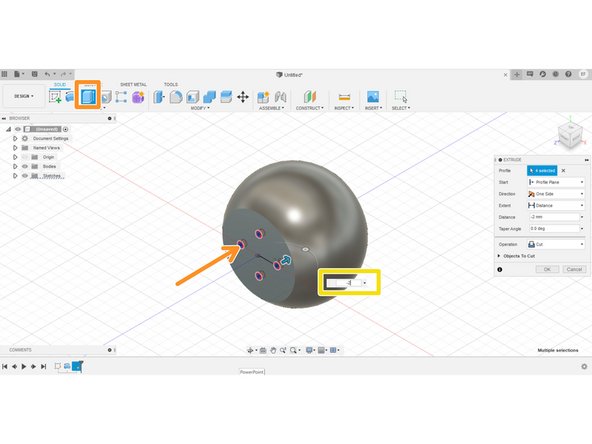
Open the extrusion tool and select the four circles you made as the profiles to extrude
-
Set the extrusion distance to -2.00 mm. This makes the resulting extrusion cut through the bottom of the planter.
-
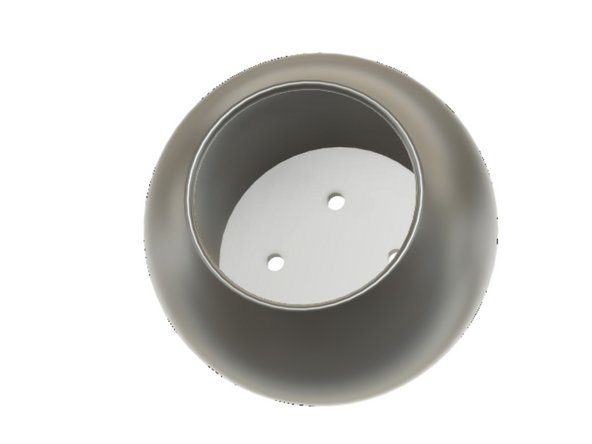
Now we have a planter with four drainage holes!
-


Cancel: I did not complete this guide.
2 other people completed this guide.