
-
-
BEFORE GOING TO THE WOODSHOP, Open up the model in Eiger and have the TS/Tech verify the material volume used to ensure the guidelines were followed.
-
Don't forget to take the Onyx base with you. Bring it back to the AFL when the test is completed.
-
-
-
Press the power button on the monitor to turn on the PC connected to the tensile tester.
-
Log in using the credentials given in the supporting document.
-
On the desktop, click on the “Horizon” program icon to launch the software.
-
Once the software is running, if an error message appears about updating the firmware, click “OK.”
-
-
-
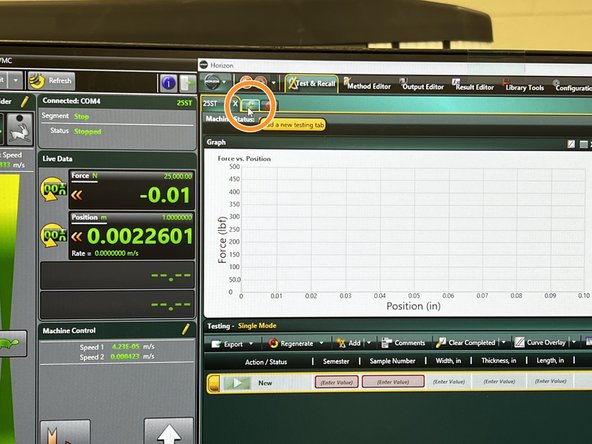
Click the “X” button to delete the current tab. Click “OK” on the warning.
-
Click the “Add a new testing tab” button
-
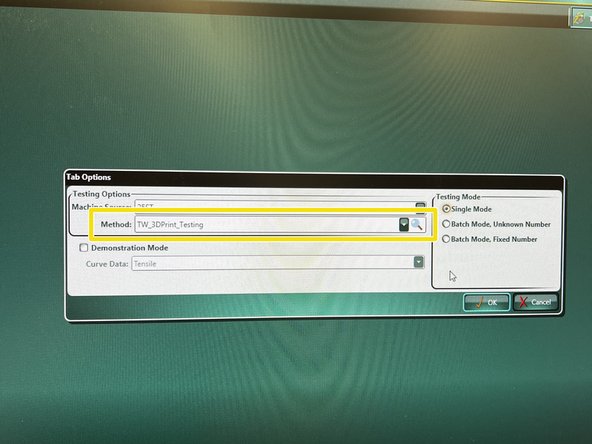
Change the method to “TW Material Testing” from the menu (it is at the bottom of the dropdown), then select “OK.”
-
If you get a message about the firmware, just click “OK.”
-
-
-
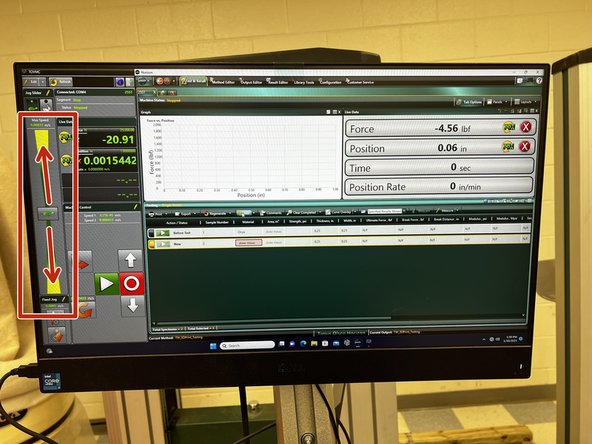
Use the speed slider to move the jaws of the machine up and down.
-
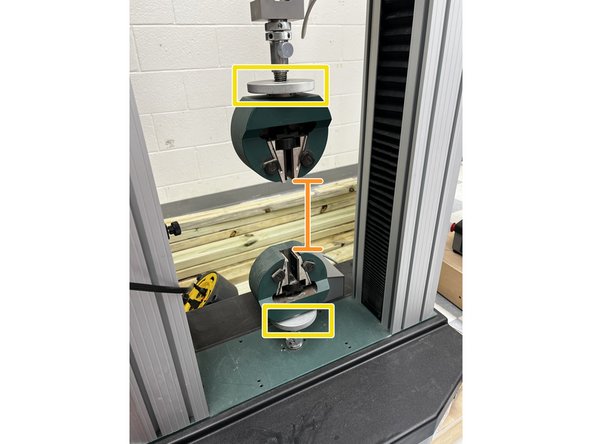
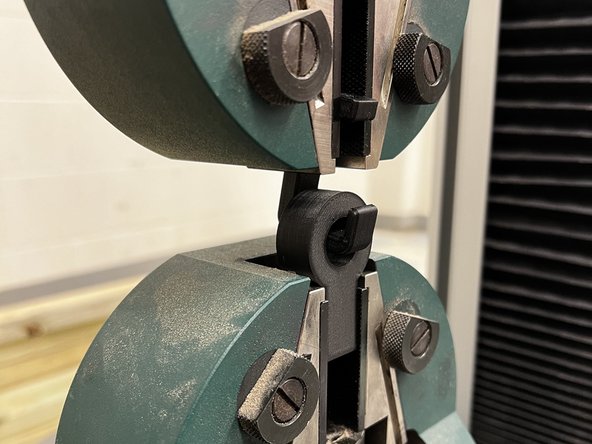
Move the jaws to a position with enough space between both jaws for your hook and base to fit.
-
Turn the large silver knobs to clamp the test hook and base in the jaws. You may need to use the jog slider again to move the jaws during this process.
-
-
-
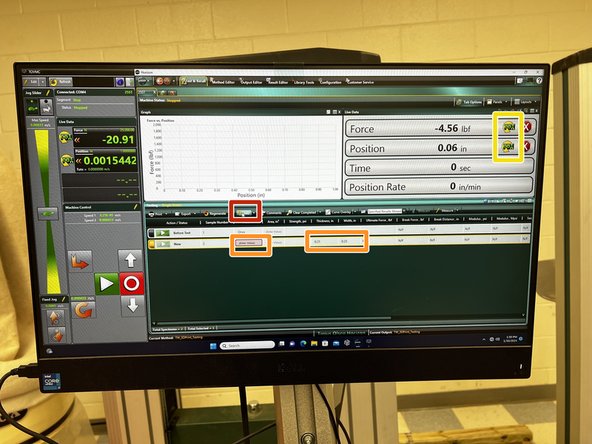
Click the Add button on the screen. A new entry with some red boxes will appear.
-
If there are now two entries on the screen, that’s okay, just pick one to use.
-
Enter the material as "Onyx (w/ carbon fiber)" and the thickness and width of the smallest cross-section of your hook. The thickness and width can be rough estimates.
-
Click the buttons to zero the position and the force in the top right corner.
-
-
-
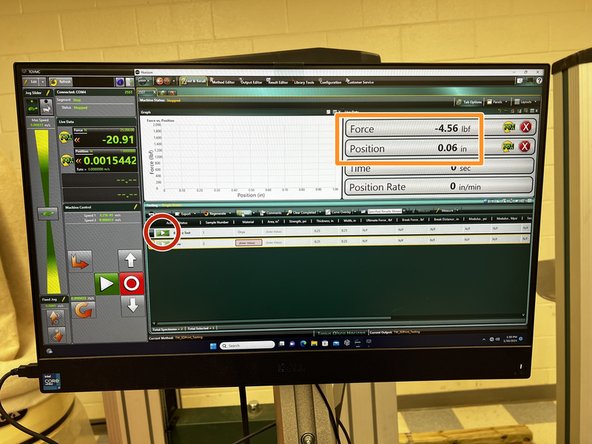
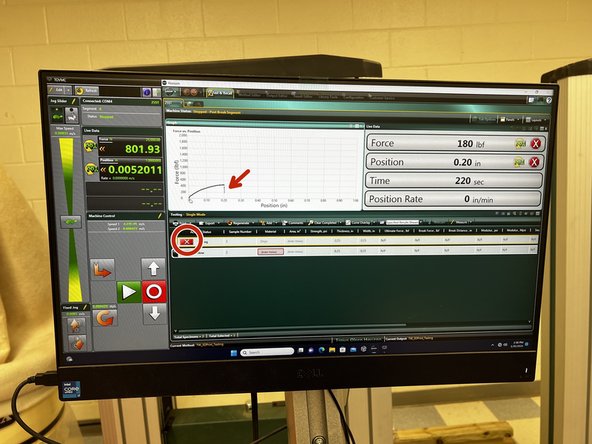
Once you are ready, click the green play button to run the test. It may take a few minutes.
-
You can monitor the live force at the top right of the screen, and data will begin to populate the graph.
-
If the force and position begin to show negative results, stop the test immediately by clicking the red “X”
-
-
-
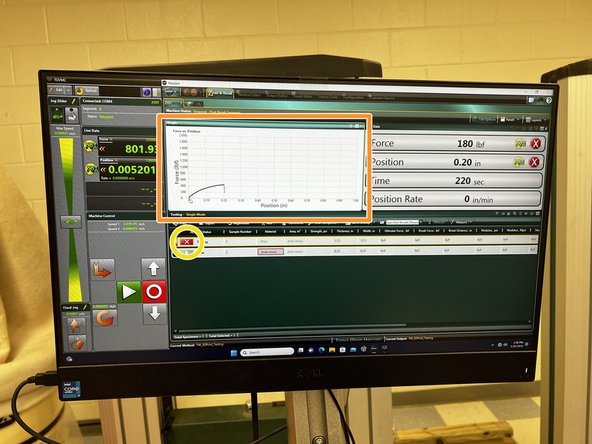
If you see a graph with a steep drop off in force, that means the test piece has failed and you can stop the test by pressing the red “X.”
-
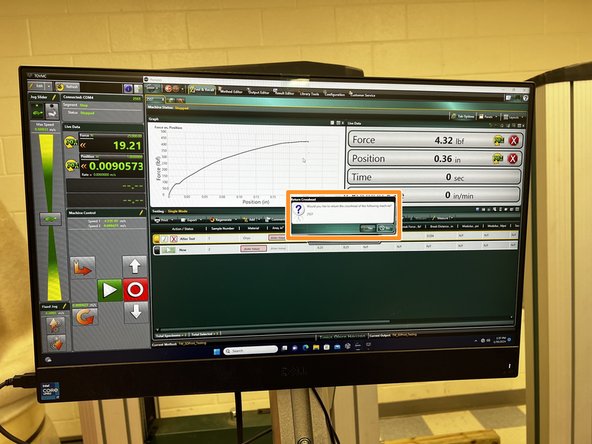
Once the test is stopped, a message will appear asking to return the crosshead. Select “No.” and remove the hook from the jaws.
-
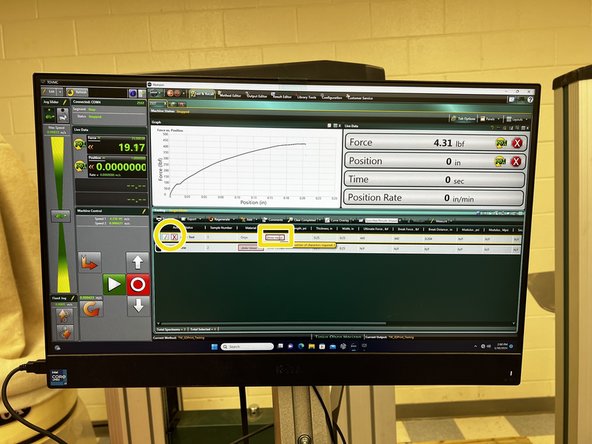
Enter the area using the width and thickness. Again, this can be a rough estimate. Then click the green check mark.
-
-
-
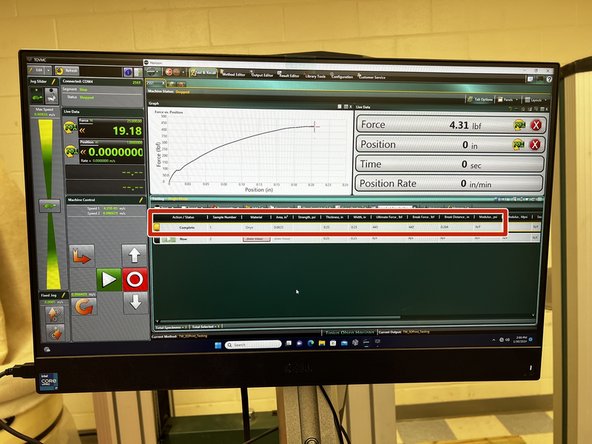
The test is now complete. Take note of the break force and record it on the tracking sheet in the AFL along with your name
-
Don’t forget to close out of the software, and turn the computer off.
-


Cancel: I did not complete this guide.
5 other people completed this guide.