
Introduction
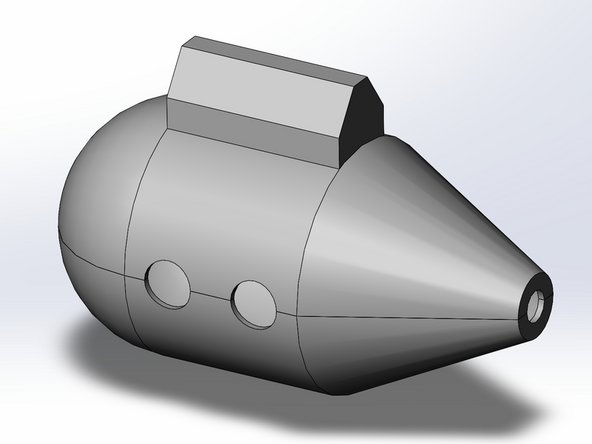
Your sub now needs windows, a Sail, and some better curves. It also needs to be split into 2 pieces, and be able to store weights so you can make it float correctly.
This is going to be more hands-off than the first tutorial. If you run into any issues, try Google to search for a forum, then email me or ask me at our meetings!
Remember, this is an open-ended project, meaning as long as you meet the requirements, you can design as you like. If you’re struggling, though, i’d recommend sticking with these tutorials.
-
-
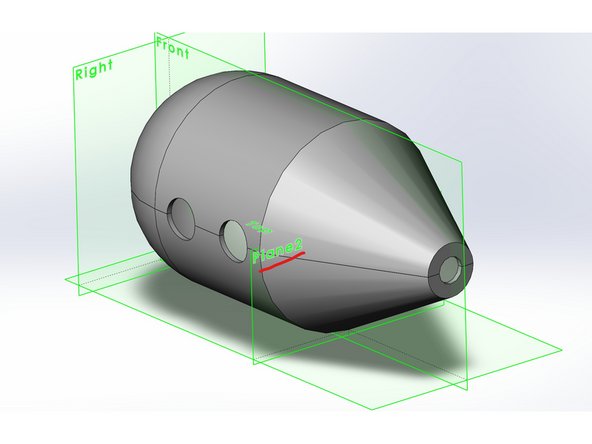
For this, we can sketch some circles and extrude-cut them through our body.
-
Create a sketch on the plane dividing the submarine vertically (YZ plane, as before).
-
Create circles on the middle of the body, and use the Cut tool.
-
Here, you can add a second direction and add enough length so it goes entirely through your body.
-
If you're struggling to find the center of your body, use the Convert Entities tool and select the sub's faces to get them placed on your sketch. Then, you get a midpoint!
-
-
-
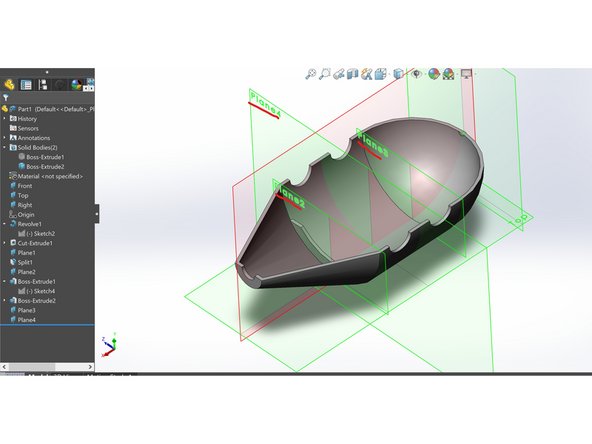
To create 2 pieces, we need to define a plane that tells SOLIDWORKS where to split.
-
For this, I chose to unhide our first sketch by clicking the dropdown for Revolve1, right clicking the sketch, and hitting unhide.
-
Then I used Reference Geometry to create a plane. I selected the line we used before to revolve, since that's in the middle of the sub, and the bottom origin plane and set that as Parallel to the plane.
-
I found the Split tool under Insert > Feature > Split, then chose the plane and hit "cut". You'll now see 2 bodies.
-
To select your plane, make sure you open the drop down for all of your entities (top left of model view, starred in photo)
-
-
-
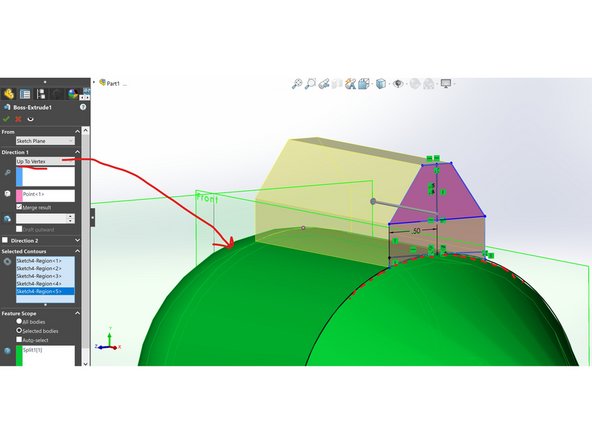
The Sail of a submarine is just the extension at the top that first surfaces when the sub goes up.
-
I encourage you to make this as you like! I gave you 1" of freedom to work with.
-
For the general shape, make a sketch perpendicular to the cylindrical body of the sub. Use another reference plane!
-
Use Convert Entities again to get the curve at the top. Create the shape connecting to it, and extrude it out.
-
-
-
Your sub needs internal storage for nuts, quarters, etc. that can help it float right when in the water.
-
In general, since the tube enters in the back, the sub loves to tilt forward. So, make sure there's plenty of room in the back!
-
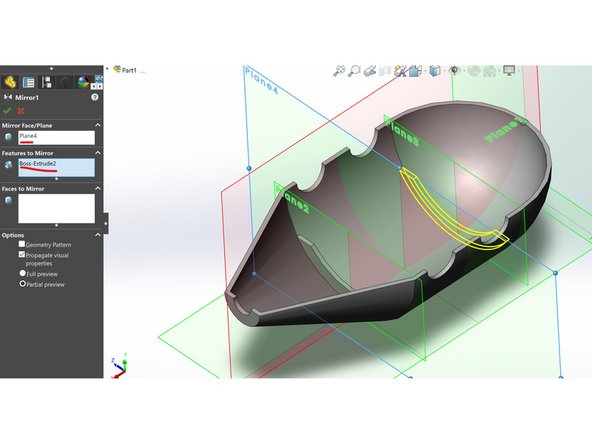
Simply add small walls on the lower portion of the sub. You can hide the top portion by right clicking on its body in the timeline on the left, so you can see better.
-
Make it as thick as the external walls: .075". it doesn't take much to make a study wall.
-
Use the Mirror tool to take one wall and easily put it on the other side of the body.
-
TIP: use the Eye icon at the top middle of the model view to hide all of your planes. They can get overwhelming!
-
-
-
Good work! Feel free to add details as you want. Remember, this submarine is yours!
-
All that's left is connecting the two bodies.
-


Now it's your turn. Your sub needs to be able to open and close, so we can take the balloon in and out.
There are many ways to do this: hinges, clips, latches, etc. I challenge you to do this with only 3D prints, but you can always buy something for it or print something separately and attach it.
Tape, glue, or zip ties are not allowed! Glue is fine when attaching your hinge or other mechanism. But your solution should be easily repeatable and functional each time.
Cancel: I did not complete this guide.
6 other people completed this guide.
