
Introduction
While it may take some getting used to, SOLIDWORKS is the most commonly used CAD software out there and it extremely valuable to engineering companies. And for those of you who haven’t taken ENME272 yet, this will be a huge head start for you!
In this tutorial, we’ll go over how to make the basic shape of the submarine. Remember, this is an open-ended project! So if you want to make yours unique go for it. But if you’re new, i’d recommend sticking with what I show you.
Enjoy making your sub’s body!
-
-
We're going to work with Inches here. To change units, hover over the top left icon to view the options tree.
-
Find "Tools", then hit the arrow until you see " * Options".
-
Go to Document Settings > Units
-
Change your units to IPS.
-
-
-
The simplest way to create something in 3D is to make a sketch, or essentially a drawing on 2D space. Then you can take that shape and move it into the 3rd dimension - just like the movies!... but not as cool.
-
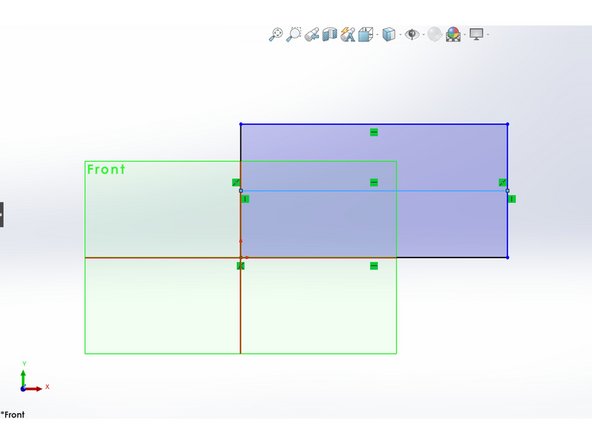
Click on the "Sketch" tab and "Create Sketch".
-
You now have to choose where you want to draw. Place your sketch in an upward position, or the YZ plane.
-
-
-
To create the body of the submarine, we want to use the Revolve feature. This takes the sketch we'll make and rotates it around an axis.
-
To make our sketch, start with lines and circles. We want to create the outline of our submarine.
-
The size of our body should be 6"x3"x3", so make a rectangle with those dimensions. All of the shape tools are in the upper left!
-
Since we're revolving around an axis, the outline we make should be half the total size we want. That way, when it's flipped around it will total to the size we want.
-
Add a line breaking the rectangle in half.
-
-
-
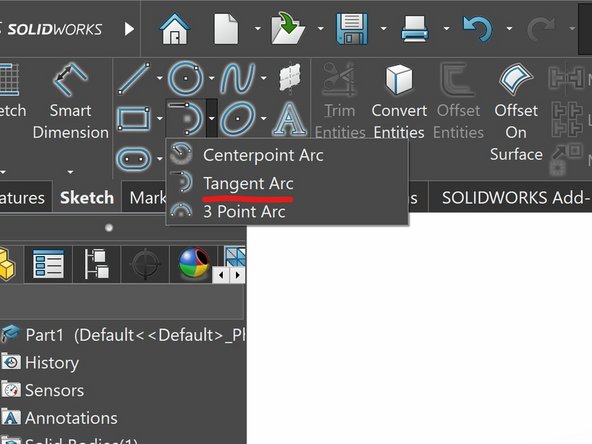
Let's carve out our submarine! We're going to have 3 main shapes: a dome front, a cylindrical body, and a taper till the end.
-
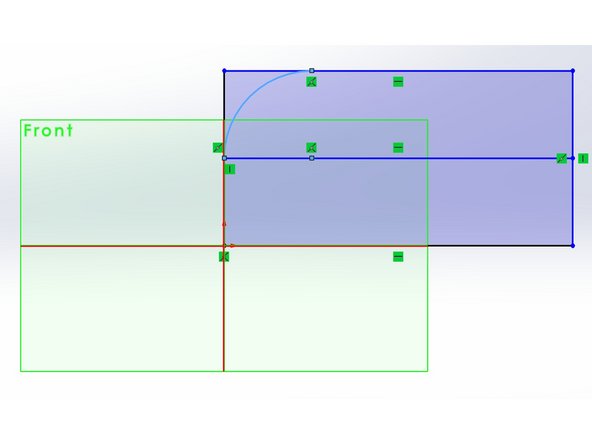
Remember, you're making half of the full shape here. So start with a quarter circle by using the Tangent Circle Tool (find the semicircle icon, hit the down arrow, and select Tangent Circle).
-
We use this tool because we want the arc to start and end flush with the rest of the body. Start your arc on the left middle point, and finish it on the top of the rectangle as in the photo.
-
-
-
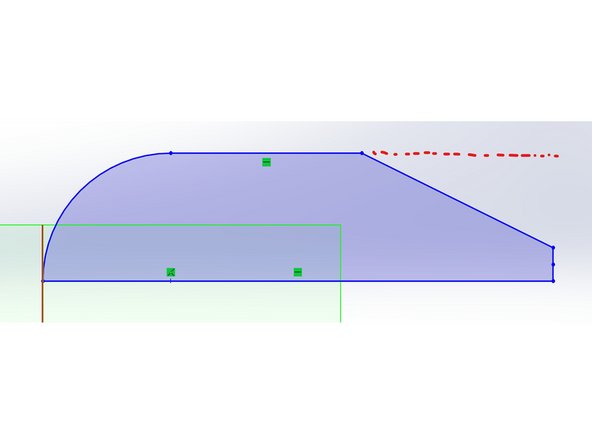
To use the rest of the space, we want to have an even length between the body and the taper. Draw a line from your arc to the end of the rectangle.
-
As you go to make a second line, hover over the midpoint of that first line. You'll notice your mouse locks into place. That's the middle of the line!
-
The second point will be 10mm above the right point of the rectangle. 5mm for the tube opening, and 5mm for the rest of it. See the photo.
-
Connect those 2 points and boom! You've done it.
-
-
-
Now, we're going to trim and offset our shape.
-
Delete the whole rectangle we started with, by clicking on the line and hitting delete.
-
Find the "Trim Entities" Tool near the shape tools we've been using. With this tool, you literally slice through what you no longer want in your sketch.
-
Trimming, unlike simply deleting lines, removes the selection up to its next intersection. Click and drag *through* the extra part of the line we don't need.
-
SOLIDWORKS should now recognize the shape you have and shade it in blue!
-
-
-
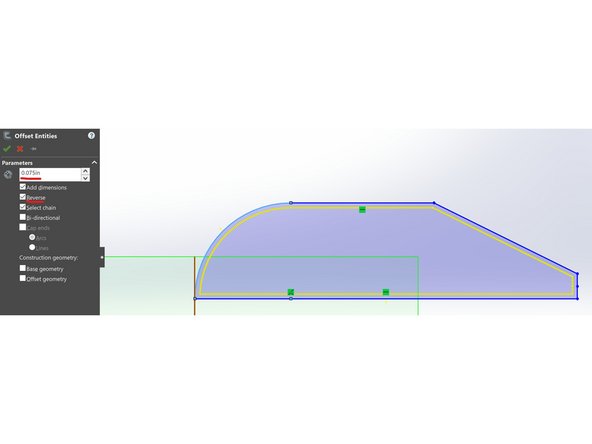
Now it's time to give the walls some thickness. Find the "Offset Entities" tool right next to the Trim Tool we just used.
-
When you click on your outline with this, you'll see a yellow outline pop up. We can use this to give the submarine .075" thick walls.
-
Hit the "reverse" option to put the offset inside our current outline. We don't want a sub bigger than the maximum dimensions!
-
See the photo. Now you should have 2 outlines! You will also see a dimension. We'll get to that next.
-
-
-
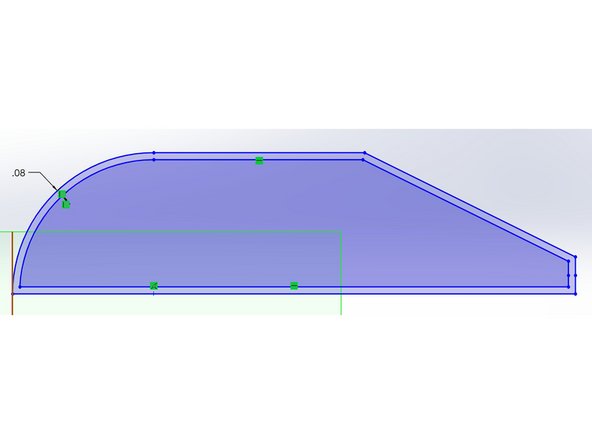
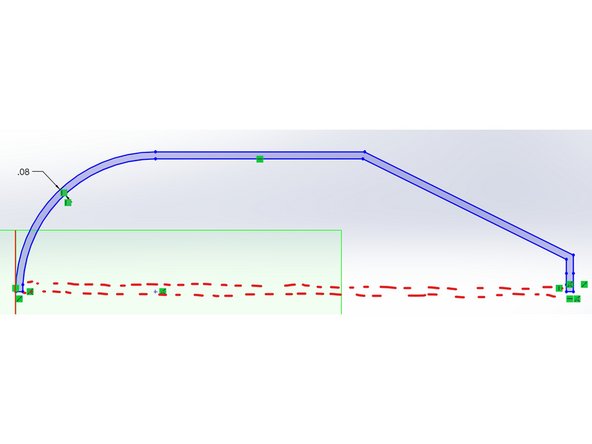
To finish up, we need to close the offset, trim again and add dimensions.
-
Use the Line tool to connect the offset with the exterior, so that it forms a full wall. Make sure they're vertical lines.
-
Add a line 5mm above the back section. That way, when we revolve it, we're left with a hole for the tube.
-
Trim away the bottom lines so we're just left with the walls.
-
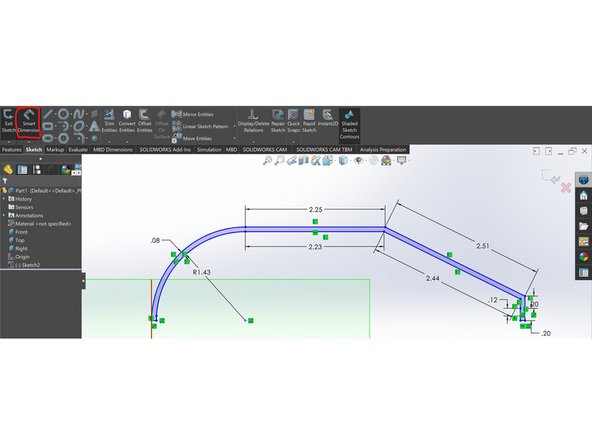
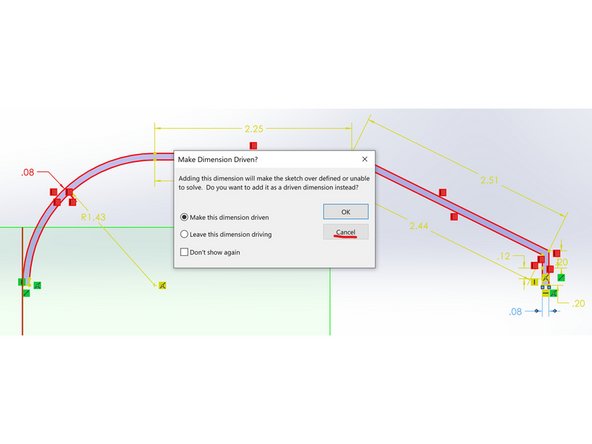
SOLIDWORKS allows you to modify past features if you make a mistake or need to change something. To prevent errors during this, use the Smart Dimension Tool in the upper left to add measurements to your drawing.
-
All you have to do is click on each curve and hit enter and it'll add it for you!
-
When SOLIDWORKS has enough information on a certain section, it'll warn you that an extra dimension will create a Driven Dimension. This means it won't do anything. Hit cancel and avoid those.
-
-
-
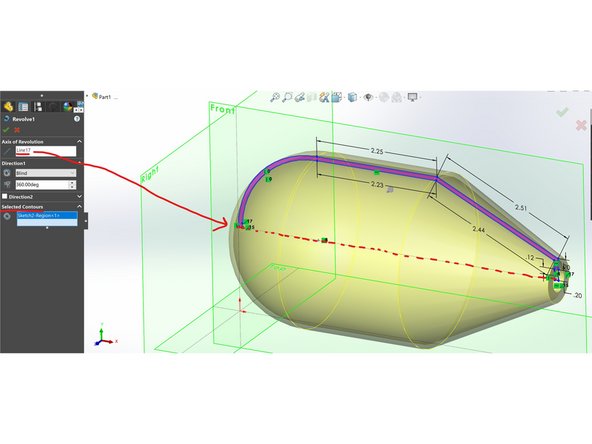
Exit your Sketch. Find the "Revolved boss/base" feature under "Features".
-
Select your axis by clicking on the part of the outline that was on the middle axis of the sub. All that's left is the horizontal line at the front.
-
You should see a preview, or if not, click under "select contours" and select the blue highlight of the sub wall. Hit OK.
-
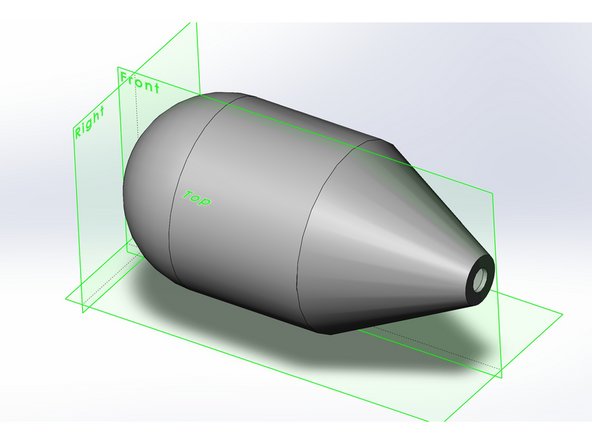
There is the start of your sub!
-
For troubleshooting: adding too many dimensions can also mess with the Revolve. Try removing the ones on curves if you're running into issues.
-


Cancel: I did not complete this guide.
10 other people completed this guide.
