Introduction
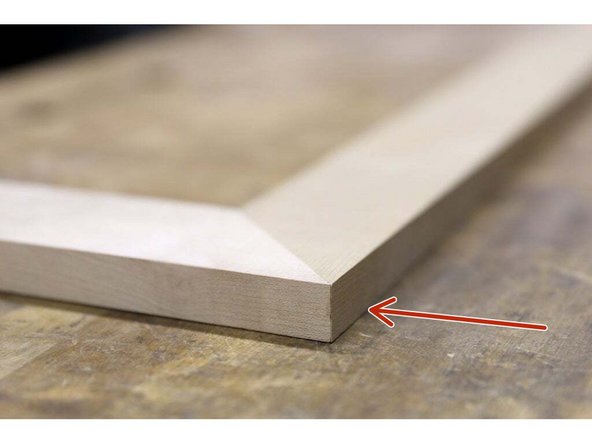
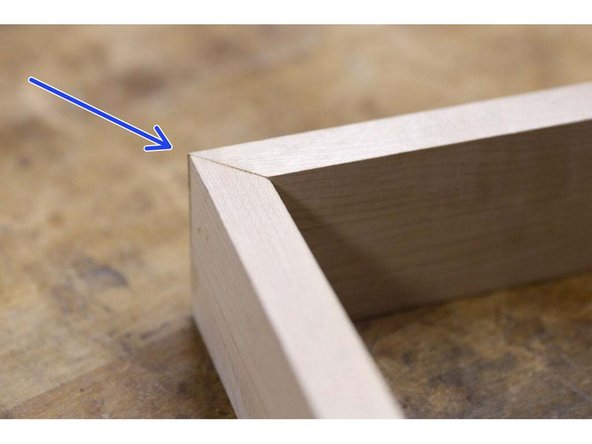
Miter Cuts and Bevel Cuts are both commonly used in many woodworking projects. A typical example of a miter cut is seen in wood picture frames, where the cut is relative to the square side of the material, and a bevel cut is when the angled cut is along the entire face of the material.
-
-
Ensure all proper PPE is worn
-
Goggles
-
Ear Protection (optional but HIGHLY recommended)
-
Gloves should not be used around the miter saw.
-
-
-
Make sure to do the following:
-
Tied back any loose hair
-
Removed any jewelry from the wrists or hands
-
Rolled back any long sleeves
-
Wore closed toed shoes
-
Secured any and all loose and baggy clothing
-
-
-
Miter cuts are when the cut is relative to the square side of the material.
-
Bevel cuts are when the angle is relative to the face of the material.
-
Compound cuts are when both a miter and a bevel is used.
-
-
-
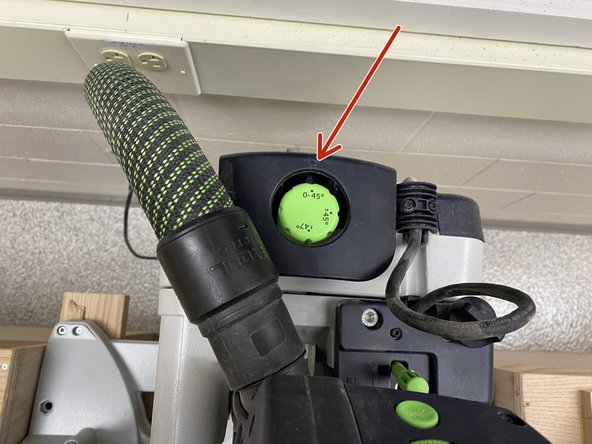
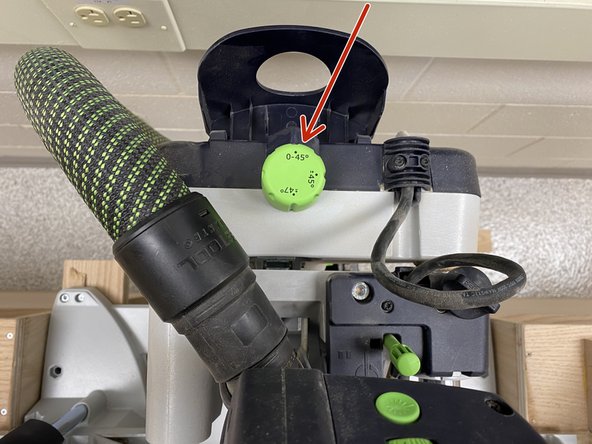
The miter saw is locked into place at a 0 degree angle when not beveled.
-
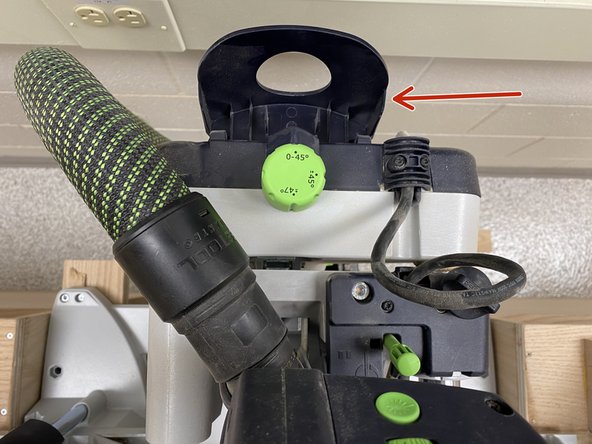
To angle the miter saw, flip up the cover on the back of the saw.
-
Then twist the handle on the front of the saw to move the saw to the desired direction and angle.
-
Angle readouts are seen on the protractor on the back mount of the miter saw.
-
-
-
Once the cover on the back is flipped up, the saw will move freely.
-
To set it into place, just flip the cover back down.
-
The green knob with the different angle readouts gives the ability to preset where the miter saw will automatically stick.
-
In its usual position, (0-45) the 0 degree mark is where the miter saw will stay at automatically.
-
Turning this knob to 45 or 47 allows the saw to "stick" at those angles once they are reached, similar to how it "sticks" at the 0 degree mark in the usual position.
-
-
-
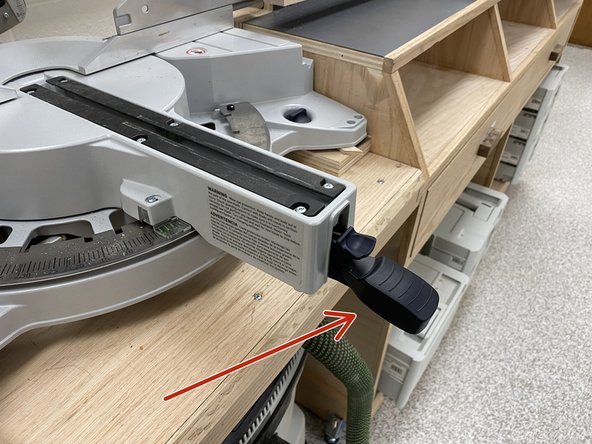
Similar to bevel angles, the miter saw is locked at a 0 degree angle when not angled for miter cuts.
-
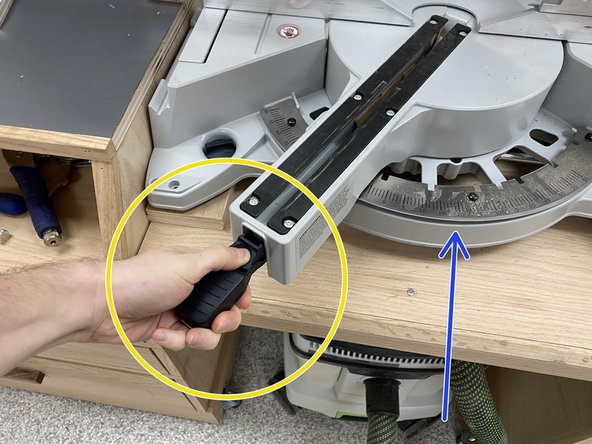
To angle the miter saw, push up on the black handle.
-
Then while holding the handle and thumb hold together, slide the miter saw to the desired angle.
-
If the thumb hold is not pushed down, the saw will automatically click into place at the first common angle stop at 15 degrees.
-
Angle readouts are seen on the giant protractor on the base of the saw, and are read on the left side of the saw well.
-
To set a specific angle, push down on the black handle.
-
Some common angles have stops set in the miter saw already. They are at: 0, 15, 22.5, 30, and 45 degrees.
-
Due to the constraints of the miter saw bench, any angle past 47 degrees is currently impossible.
-
-
-
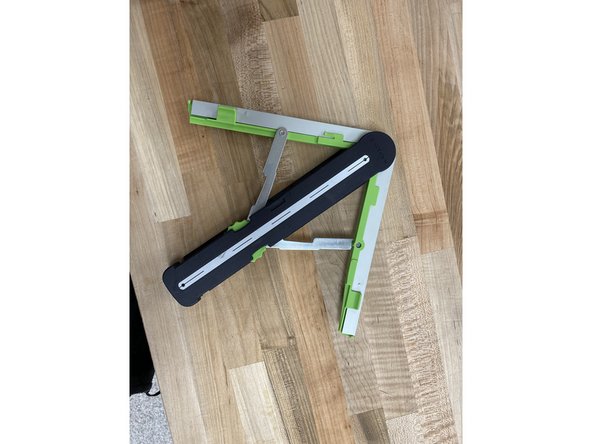
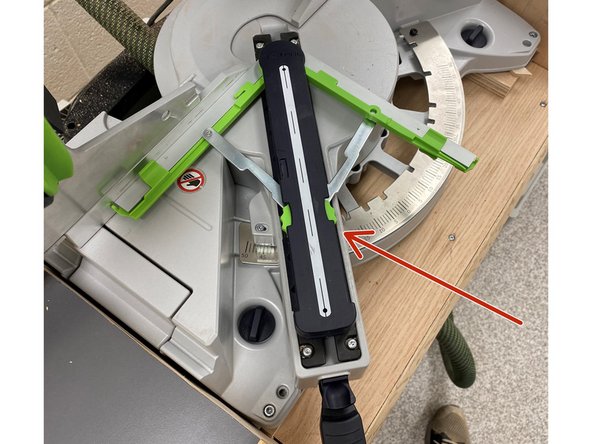
Despite the name, this tool is technically used for miter cuts.
-
When lined up correctly, it sits on the saw well fairly snugly to show that the angle is correct for the saw.
-
The most common use for the bevel scale is molding and trim in a house.
-
Attached is a video from FESTOOL that shows a common use case for this tool: https://www.youtube.com/watch?v=tptROppS...
-
-
-
Once done cutting, please:
-
Return the miter saw to the original angle, 0 degrees for both beveling and mitering
-
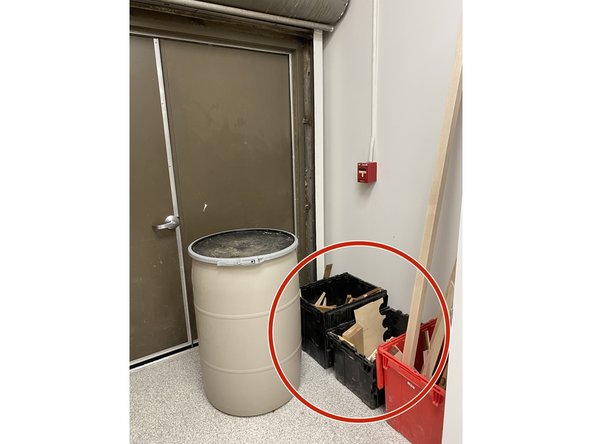
Clean any scrap pieces from the miter saw bench to either a scrap bin or keep for personal use.
-
Scrap bins are located in the back of the woodshop by the brown metal doors and by the DEWALT power tool wall.
-