
Introduction
This tutorial is for editing the scan scan result for reverse engineer. The tutorial assume that the users have completed the beginning tutorial and have sufficient skill to operate the scanner and have basic knowledge about Geomagic Design X software.
-
-
Geomagic Design X can be used for modifying scan result such as:
-
Scale up or scale down a geometry
-
Creating a shell on a structures
-
Create a surface mesh of a structure
-
Adding a new structure on top of an existing structure
-
Remove a portion of a structure
-
-
-
First, download the Hand.xrl file from (https://drive.google.com/open?id=1dj88Qp...) and open it using Geomagic Design X
-
Use offset feature (Under Polygons) for scaling up or scaling down a geometry
-
Under Method select Surface
-
Select (+) for scale up or (-) for scale down then enter the offset distance
-
The new offset surface is shown as the green mesh in the window. Select ok (Check mark) to accept the change
-
-
-
The offset feature can also be used to create a watertight mesh
-
Under Method select Volume
-
Select (+) for scale up or (-) for scale down then enter the offset distance. Zero offset equal no change in geometry
-
The new offset surface is shown as the green mesh in the window. Select ok (Check mark) to accept the change
-
-
-
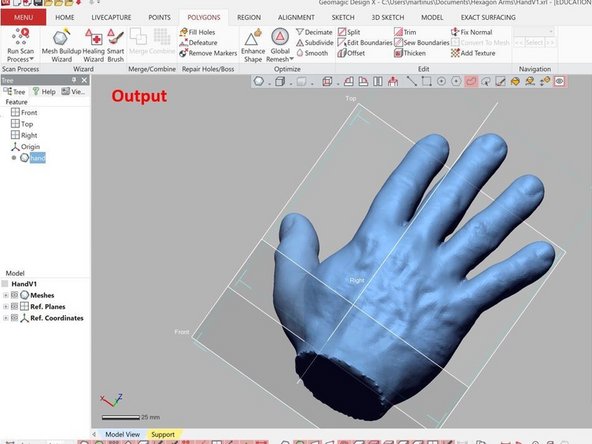
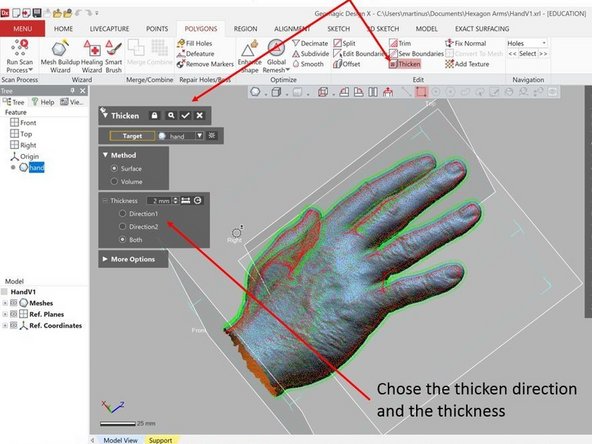
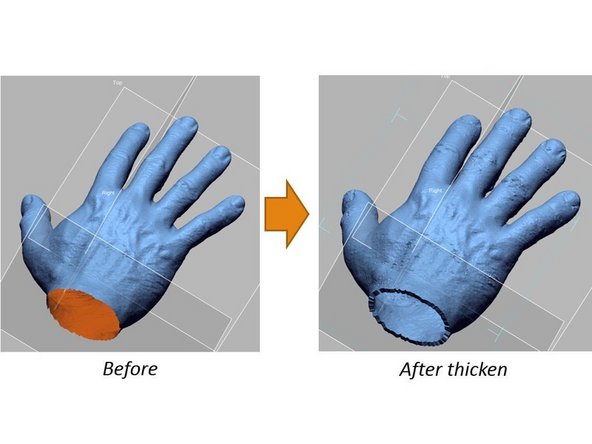
Use thicken feature (Under Polygons) to add a shell on a surface
-
Chose the thicken direction and the thickness
-
You can add the thicken inward, outward, or in both direction
-
If you are applying the thicken into a surface scan, you will end up with a watertight volume (See figure)
-
-
-
First, download the Block.xrl file from (https://drive.google.com/open?id=1-TS8sX...) and open it using Geomagic Design X
-
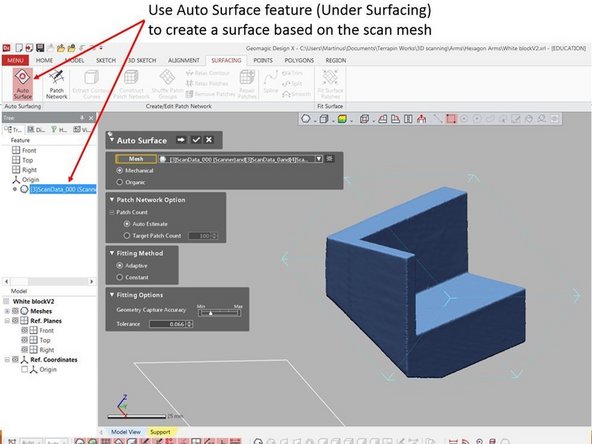
A surface approximation can be created to cover the scan mesh
-
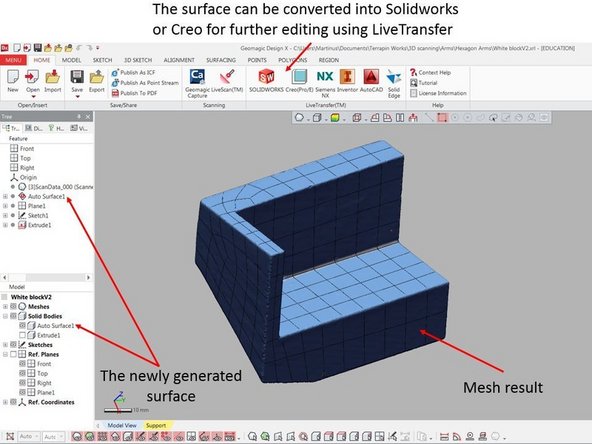
Use Auto Surface feature (Under Surfacing) to create a surface based on the scan mesh
-
The created mesh will match the point cloud data as shown in the figure
-
The surface can be converted into Solidworks or Creo for further editing using LiveTransfer
-
The newly generated surface should be listed under mesh in the left window (See figure)
-
For a structure with complex geometry, the surface mesh may not working well
-
-
-
Geomagic Design X can be used for adding a new structure on top of an existing structure
-
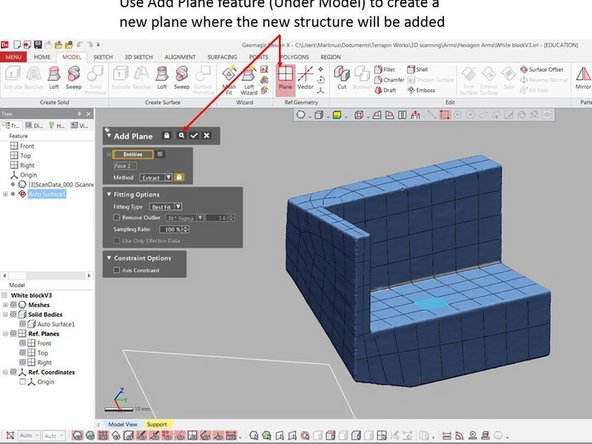
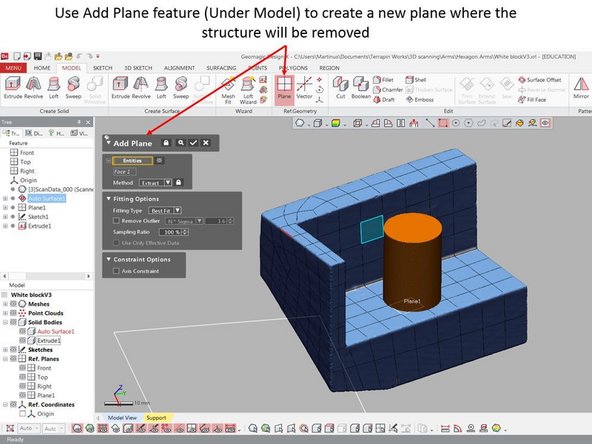
Use Add Plane feature (Under Model) to create a new plane where the new structure will be added
-
You can use the mesh as reverence to create the plane
-
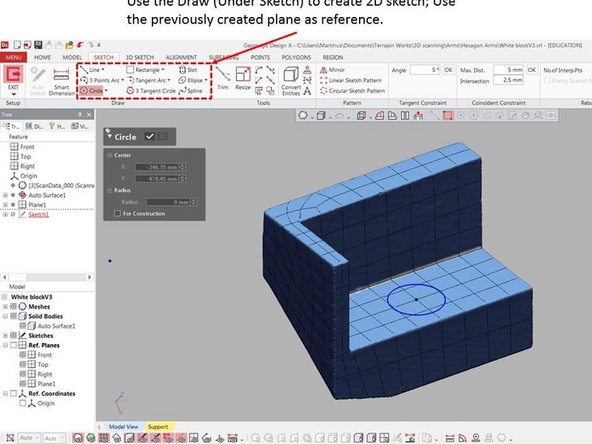
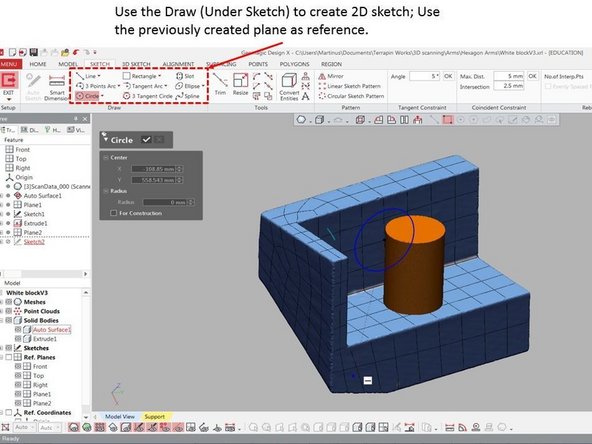
Use the Draw feature (Under Sketch) to create 2D sketch
-
Use the previously created plane as reference
-
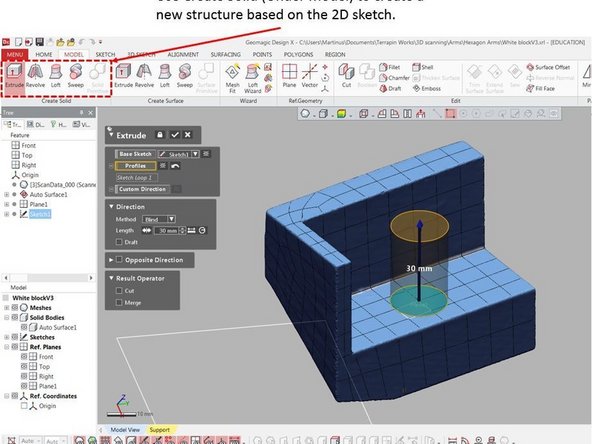
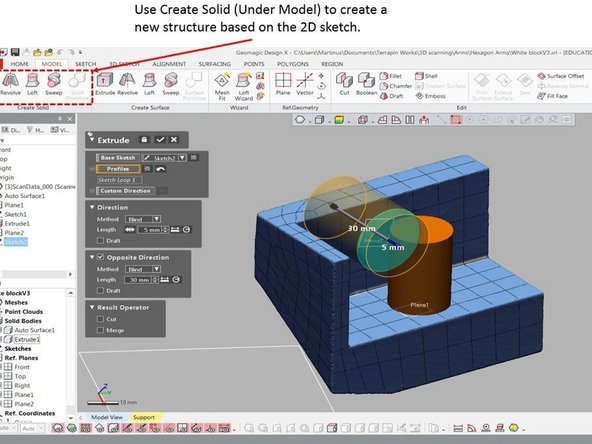
Use Create Solid feature (Under Model) to create a new structure based on the created 2D sketch
-
In addition to extrude, the solid structure can be created using revolve, loft, or sweep.
-
-
-
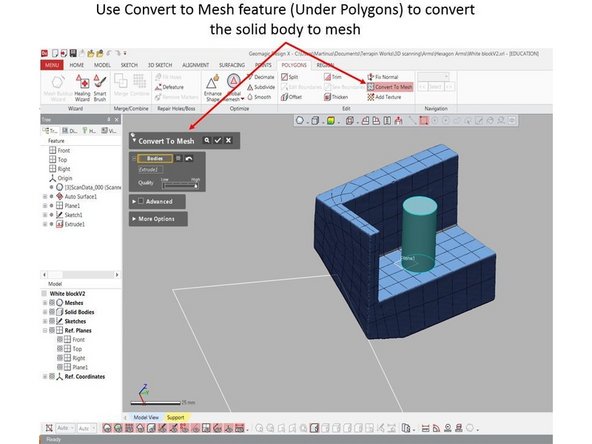
The newly created geometry is a solid object. In order for it to be combined with the mesh, it needs to be converted into mesh
-
Use Convert to Mesh feature (Under Polygons) to convert the solid body to mesh
-
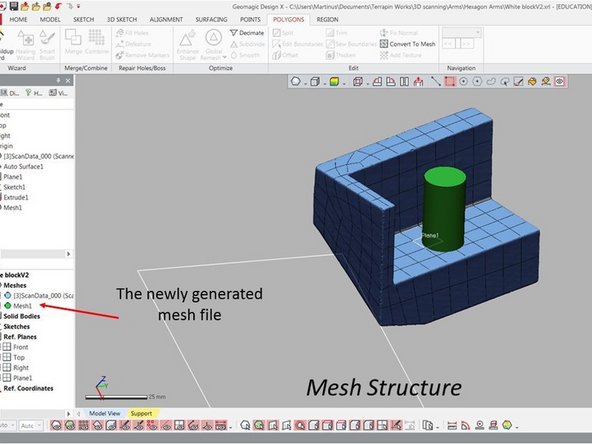
Once converted, the newly generated mesh should be listed under mesh in the bottom left window (See figure)
-
-
-
Geomagic Design X can be used for subtract a portion of an existing structure
-
Use Add Plane feature (Under Model) to create a new plane where the new structure will be subtracted
-
You can use the mesh as reverence to create the plane
-
Use the Draw feature (Under Sketch) to create 2D sketch
-
Use the previously created plane as reference
-
Use Create Solid feature (Under Model) to create a new structure based on the created 2D sketch
-
In addition to extrude, the solid structure can be created using revolve, loft, or sweep.
-
-
-
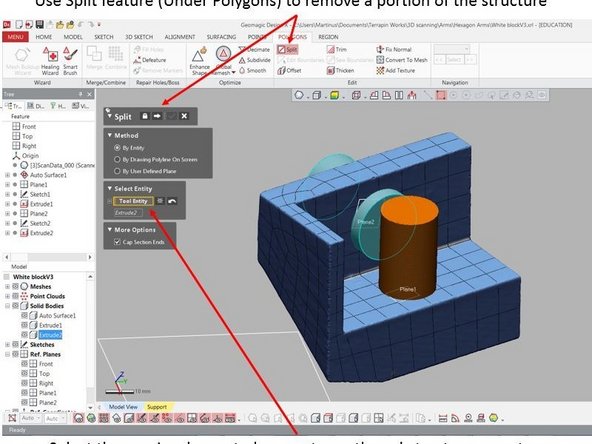
Use Split feature (Under Polygons) to remove a portion of the structure
-
Under Method select By Entities
-
Select the previously created geometry as the subtractor geometry. Then hit the next arrow and accept
-
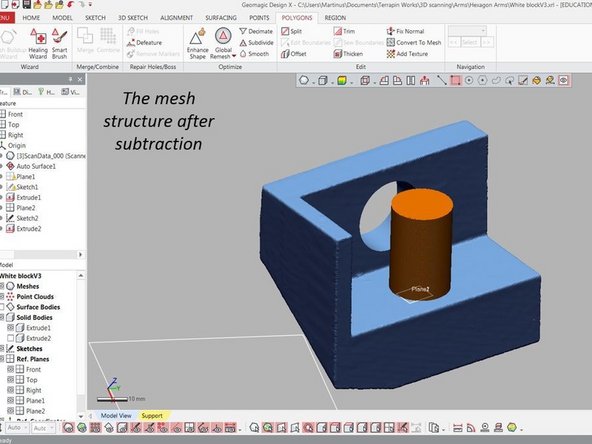
You will see a closed hole in the place you subtract (See figure)
-
-
-
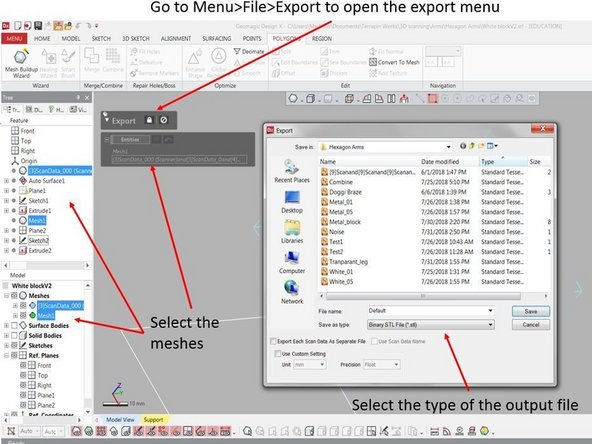
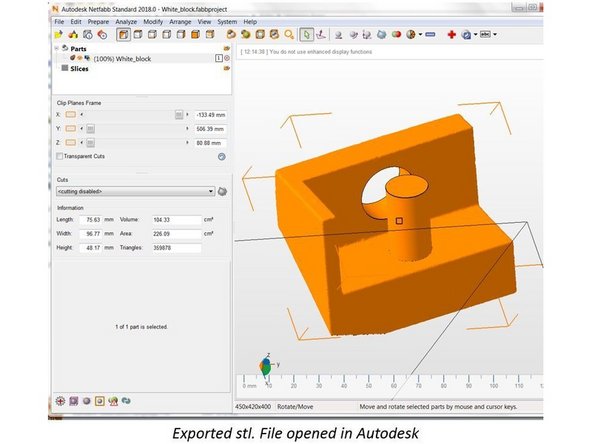
The updated mesh file can be exported into stl file by using Export feature
-
Go to Menu>File>Export to open the export menu
-
Select the meshes to be exported from the left windows
-
The newly generated mesh is not combined with the main one. You need to select both mesh (See Figure)
-
Select the type of the output file and hit save
-


Congratulation you have learn the skill needed to perform mesh data modification for reverse engineering.
Congratulation you have learn the skill needed to perform mesh data modification for reverse engineering.
Cancel: I did not complete this guide.
One other person completed this guide.