
Introduction
This guide will go through the process of exporting multi-material .stl files for 3D printing.
-
-
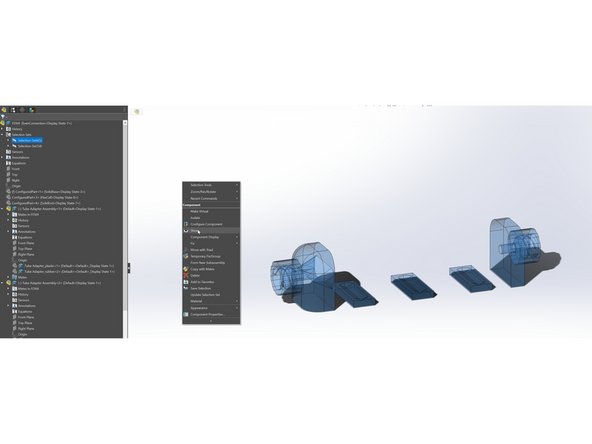
Create a Solidworks Assembly that only has the parts you want to print.
-
If a non-printed part is needed to align or setup the assembly then hide the part before continuing
-
-
-
Select all parts which will be the same material.
-
Save the currently selected parts
-
Select and then save the selection for each additional material you will be printing in.
-
-
-
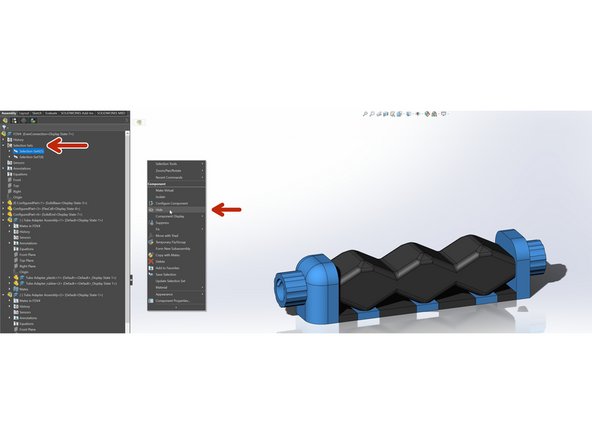
Open up selection sets and then select and hide all of them except for one.
-
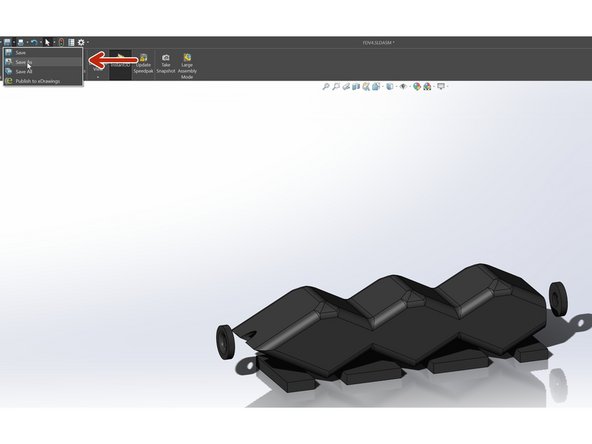
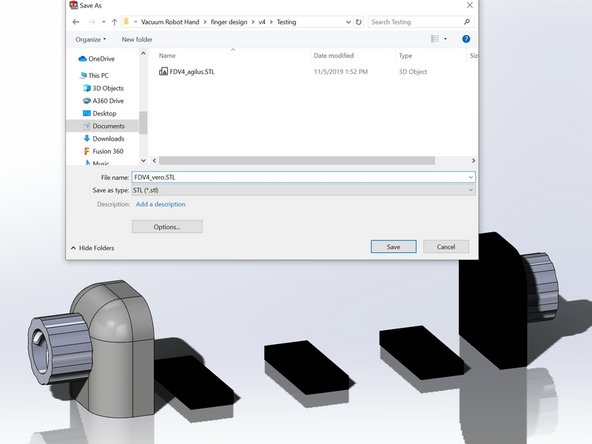
"Save As" the assembly.
-
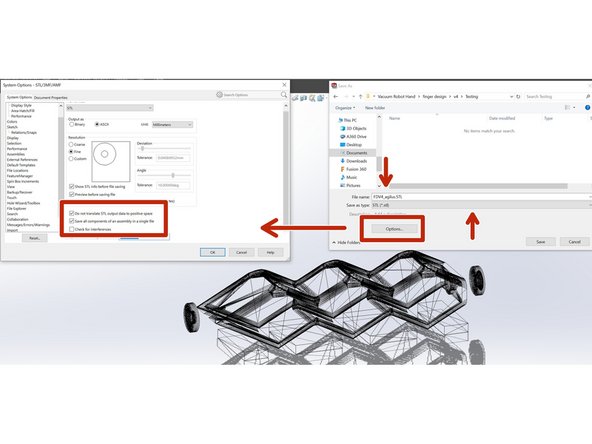
Select .stl file type and include the material name as a suffix to the file name.
-
Open Options and make sure "Do not translate..." and "Save ... in a single file" are both checked.
-
-
-
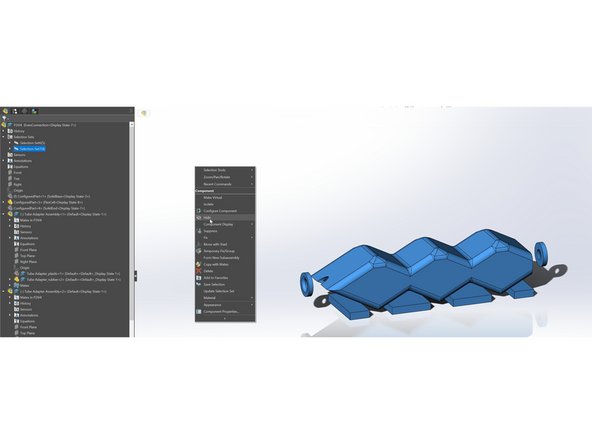
Hide the material selection set that was just exported.
-
Show the next material selection set to be exported.
-
Repeat the "Save As" process.
-


Cancel: I did not complete this guide.
One other person completed this guide.