
-
-
The printer has a safety precedence sequence (SPS) that keeps the top hatch locked in place and prevents you from printing when the hatch is open. You will need to disengage this measure to access the printing cabinet.
-
If NanoWrite is running, ensure that the exchange holder window is open.
-
This will place the piezo into a safe state and turn of the green "Process" light on the SPS panel that indicates the printer is in use.
-
When the "Process" button is off, press the "Open button" on the SPS panel to disarm the top hatch lock.
-
Open the top hatch and gently guide it into a 90° upright position.
-
Failure to do so may result in damage to the hood hinge
-
-
-
Turn the peizo clamps outwards.
-
Gently pull the pin on the right side of the piezo stage (it should NOT come out).
-
Lift the piezo flap, using the white handle, until the stage is at a 90° upright position.
-
Release the pin when you feel it begin to lock into place.
-
-
-
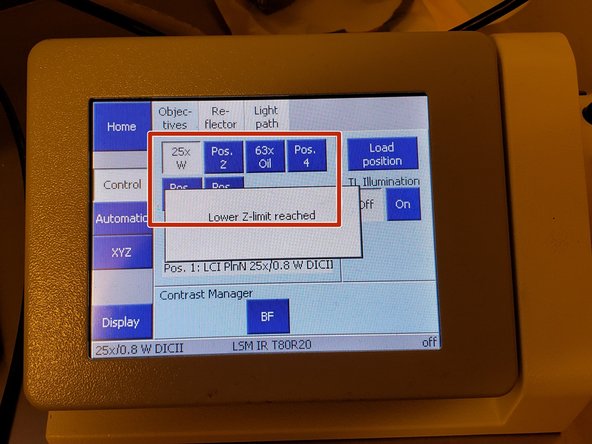
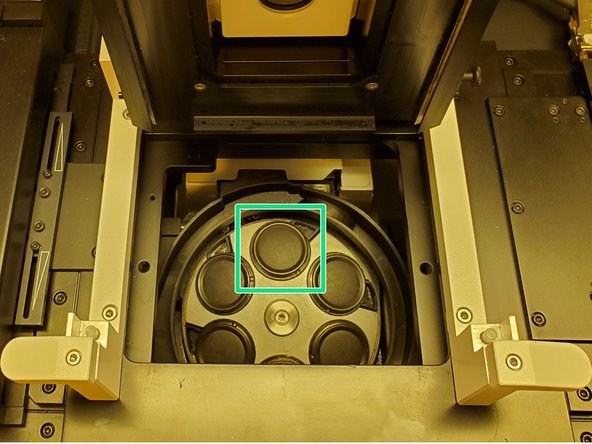
Choose the correct objective position on the microscope dock (e.g. select 63x oil if you are inserting the 63x objective).
-
You will place the objective in the 12 o'clock position.
-
-
-
Do not use the 10x objective with other objectives. Changing the objective positions while the 10x is mounted in the Nanoscribe may harm both the printer and the objective.
-
Secure a felt ring (25x and 63x) or silicone resin stop (10x) around the top of the objective.
-
Unscrew the objective from its black cap.
-
Remove the small cap from the objective carousel.
-
Screw the objective in at the correct position (determined in the previous step).
-
-
-
Grasp the white piezo flap handle.
-
Gently pull the pin on the right of the piezo stage (it should NOT come out).
-
Lower the piezo flap until it's in its default position.
-
Release the pin and reset the clamps.
-
-
-
Open the piezo flap as in Step 2 of this guide.
-
Unscrew the objective from the objective carousel and screw it into the cap for the objective container.
-
Place the small protective cover piece into the objective carousel.
-
Close the piezo flap as in Step 5 of this guide.
-
Clean the objective (see this guide).
-


Cancel: I did not complete this guide.
One other person completed this guide.