Introduction
This guide is intended as a brief introduction to using the microscope located in the Nanoscribe room. If you already know how to use a microscope and the CaptaVision software, you can skip this guide and continue with the course.
-
-
Use the microscope eyepiece to directly view the print.
-
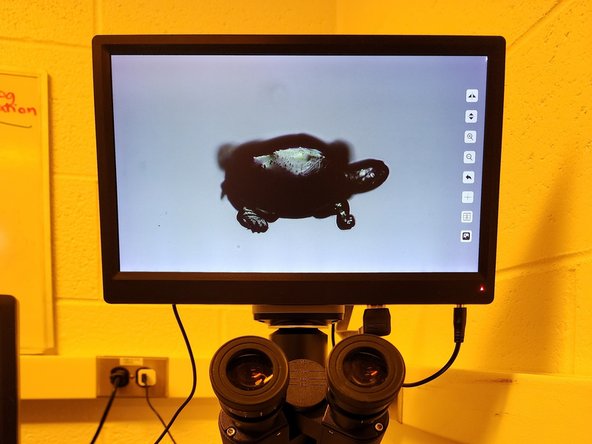
View the print on the monitor attached to the microscope.
-
View the print on the computer monitor to easily save images of the part.
-
-
-
Follow these steps if you will be using either of the two monitors to view your print.
-
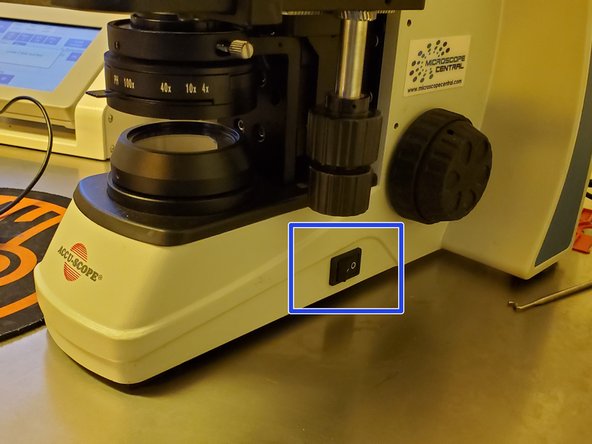
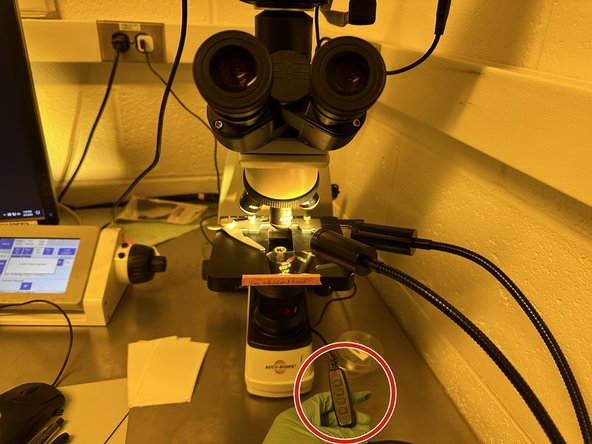
Press the camera's "On/Off" button, located behind the microscope monitor.
-
To view images on the monitor attached to the microscope, press the button on the side if the monitor is not already on.
-
To view images on the computer, open the CaptaVision software located on the Desktop.
-
The microscope screen and the computer can not be used simultaneously. Captavision will turn off the microscope monitor.
-
-
-
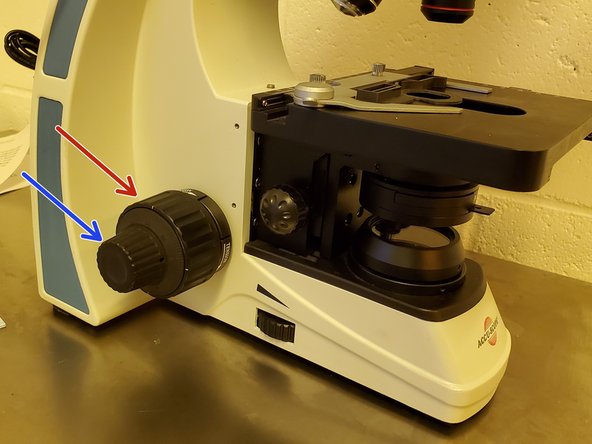
Turn the coarse adjustment knob (the bigger one) until the stage reaches its lowest point.
-
Rotate the objectives until the appropriate objective for your sample is pointing downwards.
-
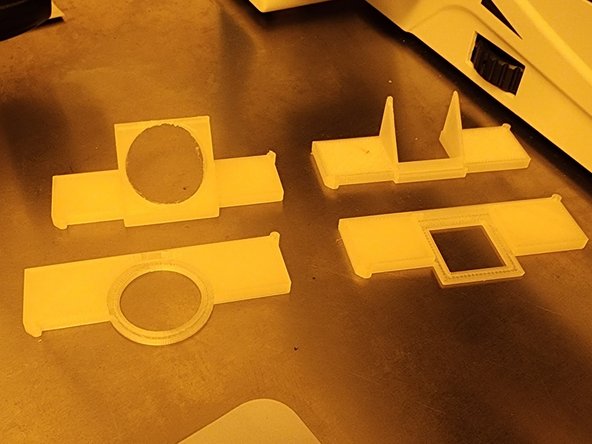
Place your print into the 3D-printed slide holder.
-
There are multiple sample holders available, depending on the kind of substrate and desired viewing angle.
-
Use the switch on the side to turn on the light.
-
Transparent substrates need no additional steps
-
For opaque substrates, refer to step 7
-
-
-
Use the coarse adjustment knob to bring the stage and the slide closer within range of the objective.
-
Use the fine adjustment for more controlled movement to bring the slide into focus.
-
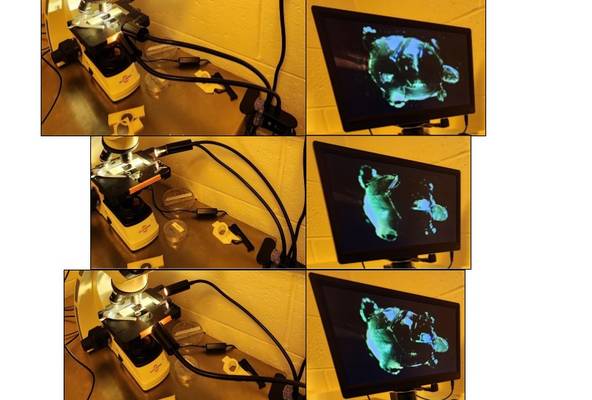
Note that you don't need to find the sample immediately, focusing on the substrate is a good start.
-
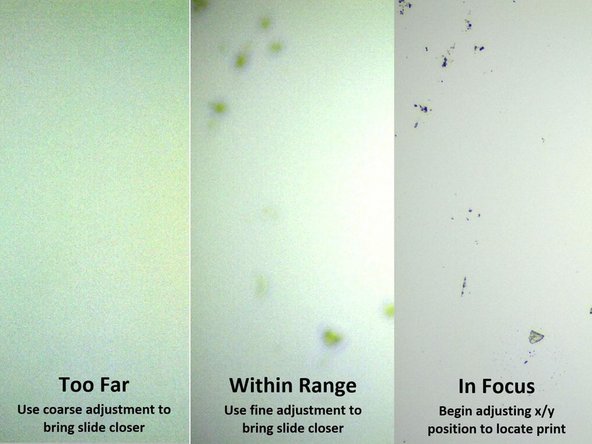
See the second picture for examples of the different views you might encounter.
-
The third image shows a good focus. Due to the narrow focusing range, the entire part may not be perfectly clear at once.
-
The view may be entirely blurry if the sample is too far OR too close. Be very careful to not run the substrate into the objective.
-
-
-
Use the stage controls to move the slide until the print is in view.
-
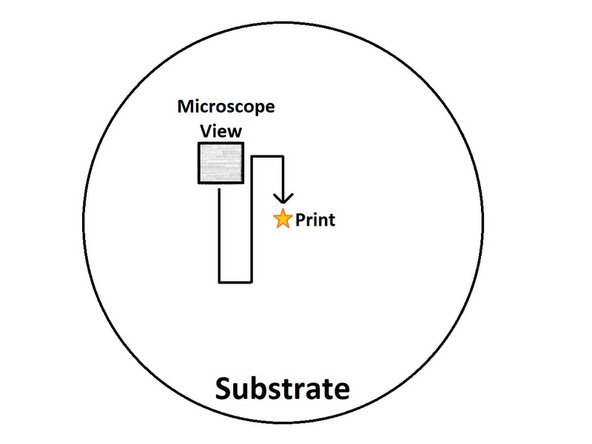
If you're having difficulty finding your print, start looking at an off-center location and methodically move your field of view across the slide (see the second image as an example).
-
For very small parts, it may be difficult to distinguish between debris and the print. Look for a crisply defined shape with regular features; alternatively, use a higher-powered objective.
-
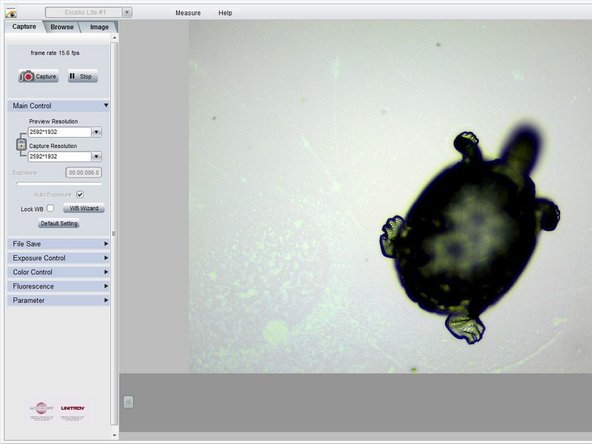
Use the fine adjustment knob to view different layers of the sample in focus. An example of a print viewed in CaptaVision (focused on the bottom of the sample) is shown in the third picture.
-
-
-
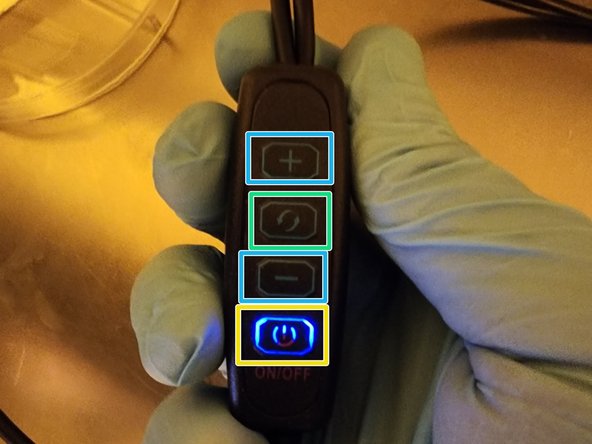
For samples that are opaque or difficult to see through, use the adjustable lights
-
Use the buttons on the right to turn on the lights and configure them as needed.
-
This button powers both lights on and off at once.
-
This button toggles the active light
-
These buttons control brightness
-
The lights can be freely positioned to get the best lighting angle for the sample in question.
-
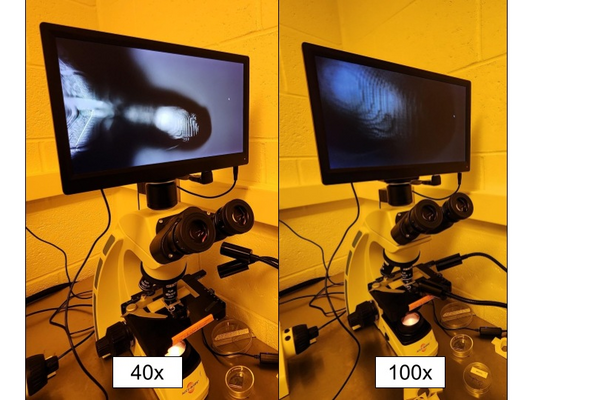
40x and 100x objectives do not work well with external lighting, due to the extremely small working distance of those objectives
-
-
-
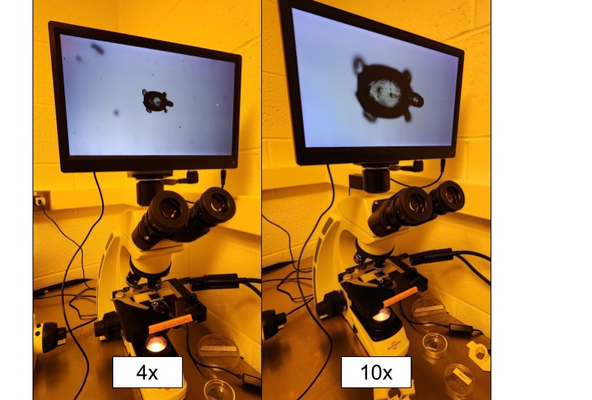
Changing to a more powerful objective will allow you to better see your print.
-
Rotate the objectives clockwise, one at a time.
-
Adjust the stage position as necessary to refocus on the slide and find your print.
-
The slide holder impedes the path of the larger objectives; when switching to the 40x or 100x objectives, first move the stage down slightly.
-
Using the 100x objective is not recommended because it usually requires additional steps to obtain a high-quality image.
-
-
-
Adjust the focus of the microscope so you can clearly visualize the feature(s) of interest.
-
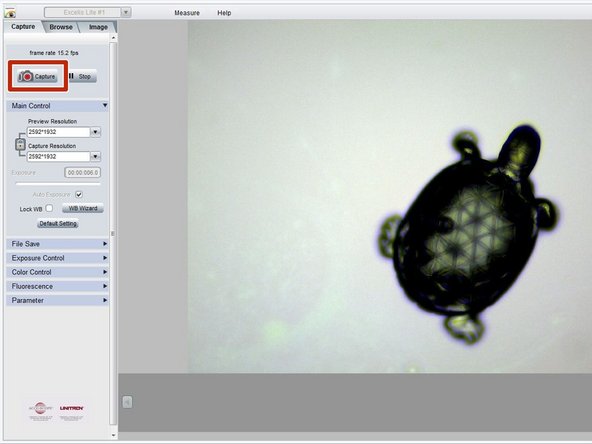
Select the "Capture" button in the CaptaVision sidebar.
-
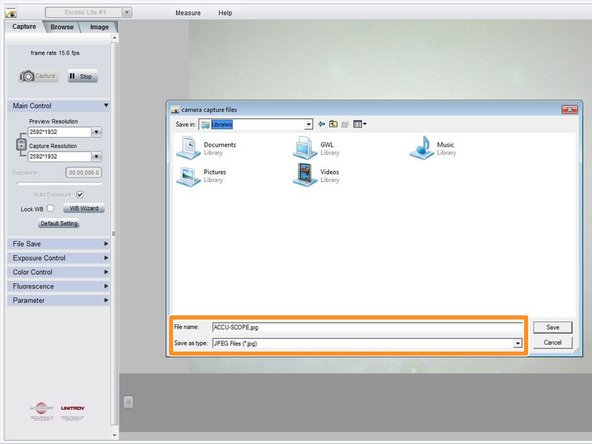
Name your file, select the file type, and save it in a location you will be able to access later (e.g. a flash drive or network drive).
-