Introduction
The CleanStation CSII is used to aid in the removal of Soluble Release support material from Fortus prints. It uses heat and agitation, along with an added solvent, to dissolve compatible support materials.
This guide includes instructions on the basic operation of the machine.
-
-
Steel Tank - This is where the STEEL BASKET is located as well as where the DISSOLVING process takes place
-
Steel Basket - HOLDS all the parts so they don't clog any holes in the STEEL TANK during the dissolving process
-
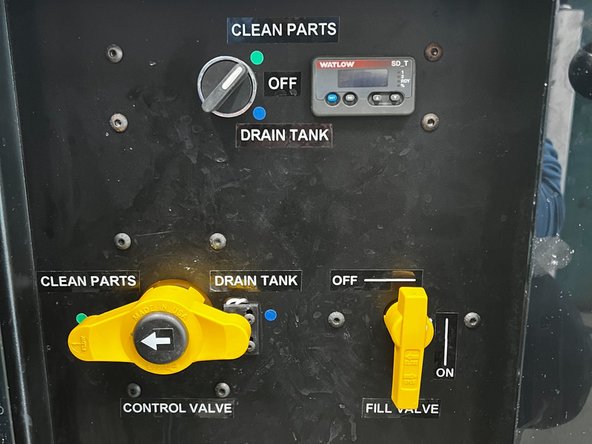
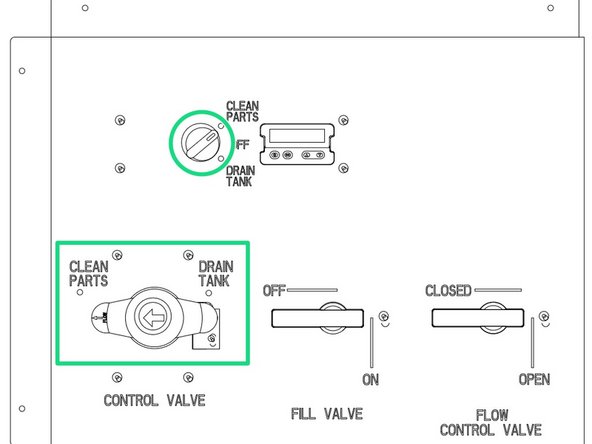
Right Cabinet - Houses all the VALVES, SWITCHES, and DISPLAY
-
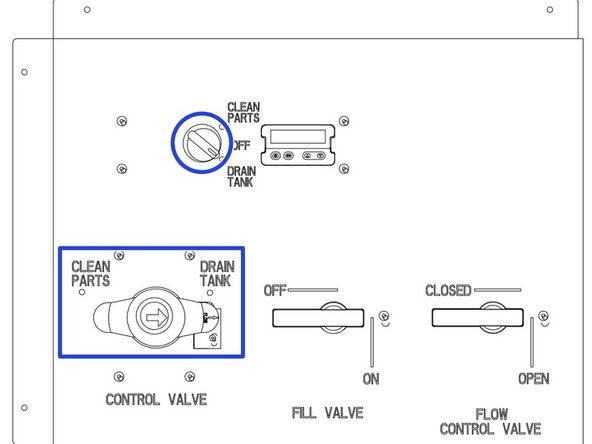
Control Valve - Has two different options to either CLEAN or DRAIN the tank
-
Fill Valve - Allows water pressure to build if switched ON (Should ALWAYS be left on)
-
Flow Control Valve - Allows water to FLOW or NOT too
-
Selector Switch - Will start the process of DRAINING or CLEANING (The control valve MUST be set to the SAME option in order for it to run)
-
Display - Sets the DURATION for the dissolving process
-
-
-
Open the cabinet beneath the integrated sink to reveal the controls and display
-
Refer to this diagram for the button layout and instructions on time/temperature control and turning the machine on/off
-
-
-
Turn the Fill Valve knob to the "On" position (vertical) and wait for the water level to reach 1-2 inches below the top of the tank
-
Do not leave machine unattended while filling; there is no automatic shutoff to prevent overfilling
-
Add the WaterWorks solvent to the tank, following the ratio listed on the solvent container. For a full tank, this is about half a container per tank
-
The solvent is primarily sodium hydroxide. An N95 mask is recommended when adding the solvent to prevent inhalation of any particulates, and avoid contact with skin
-
Wait 3-5 minutes for solvent to completely dissolve
-
-
-
Place part(s) in the basket, ensuring that the lid can still close and latch
-
Turn both the Selector Switch and the Control Valve to "Clean Parts"
-
Press the Infinity key and the down arrow at the same time to start the cleaning cycle
-
Close the tank lid and wait for cycle to finish
-
-
-
When the cleaned parts have been removed and the solution needs to be disposed, turn the Control Valve and then the Selector Switch to "Drain Tank"
-
Once the tank is empty, turn the Selector Switch to "Off" - note that there is usually still some solution left in the bottom of the tank that the drain cannot remove
-