Introduction
Requests for the MakerBot Series 3D Printers are now accepted through Papercut at ter.ps/papercut
Please follow the instructions within this guide to learn how to submit a print request to the MakerBot Innnovation Center [MIC] through Papercut.
-
-
Access the Landing Page at https://go.umd.edu/submit
-
Scroll down to “Choose a Product” and hover your cursor over the MakerBot 5th Generation Printer
-
Click on the green “Start Order” button to proceed
-
-
-
Clicking “Start Order” summons a pop up with prompts
-
Click the gray “Attach File” button and upload the 3D model you intend to print
-
Only .stl, .3mf, and .print files are accepted. File types such as .makerbot and .gcode are not accepted.
-
If desired, you can additionally attach a screenshot of the intended orientation of your part(s)
-
Select the Material and Color choice
-
-
-
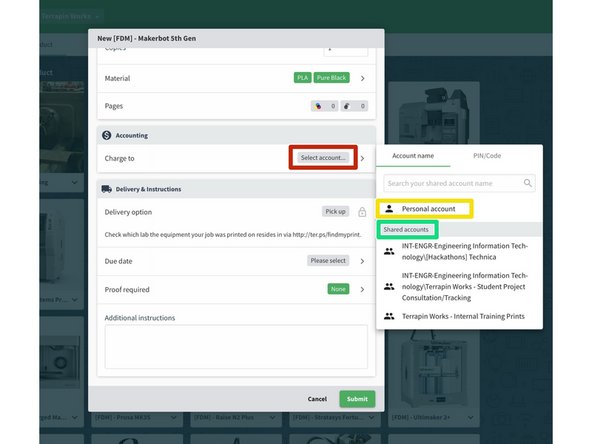
Scroll down to the account section and click the gray “Select account...” button
-
Select “Personal Account” to charge to your Papercut Webcashier Account
-
[KFS] Alternatively, select a shared account from the “Shared Accounts” category to charge your department’s Papercut Webcashier Account
-
In order to select this shared account, your supervisor must grant you access after you fill out the form at http://ter.ps/pcutKFS
-
The account will be charged upon pickup of the part(s)
-
-
-
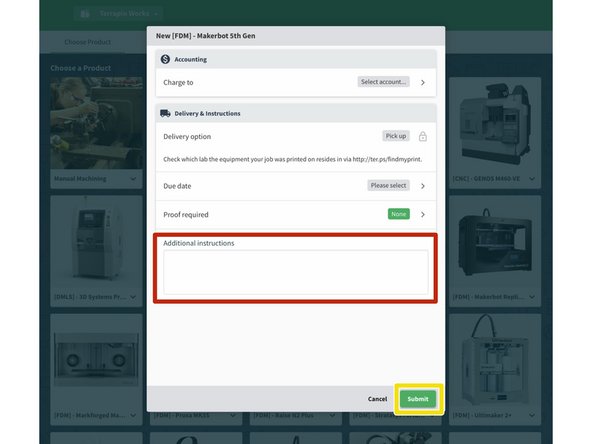
If necessary, include relevant details in the “Additional Instructions” section such as outer box dimensions or quantity of individual parts
-
Click the green “Submit” to finalize the request
-
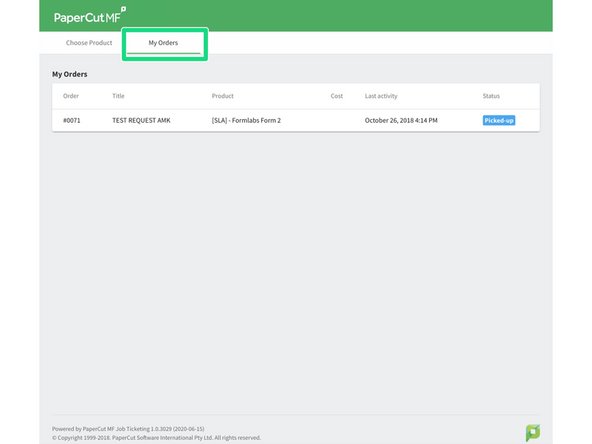
Review the order in the “My Orders” section of the Landing Page
-
-
-
You will receive updates about the status of your print request and pickup instructions via email
-
Cancel: I did not complete this guide.
One other person completed this guide.


