Introduction
This guide will walk you through how to process payments for customers in the MIC. By the end of this guide, you should know how to process payments with credit card, Terrapin Express, and KFS.
-
-
-
You can do this on your personal laptop, but processing the payment on the front monitor will allow the customer to view the transaction as well
-
-
-
Ask the customer how they will be paying. They can pay with either:
-
Credit Card
-
Terrapin Express
-
KFS
-
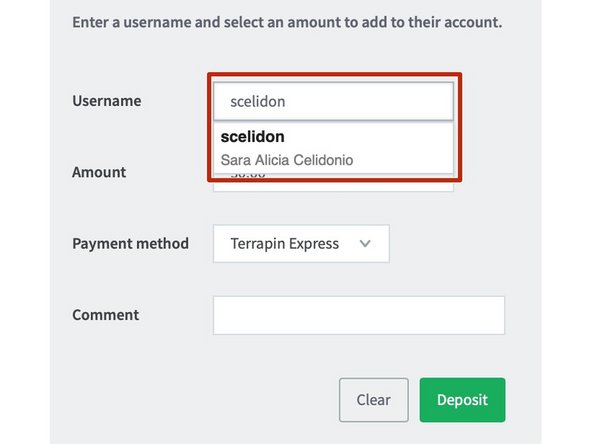
If they are paying with Credit Card or Terrapin Express, select the appropriate option from the "Payment method" dropdown on the Deposit page
-
If the customer is paying with KFS, skip to step 6
-
-
-
Enter the customer's name or Directory ID and select their name from the "Username" drop down
-
If the customer is not affiliated with the University, they will have to make a guest account to make a payment
-
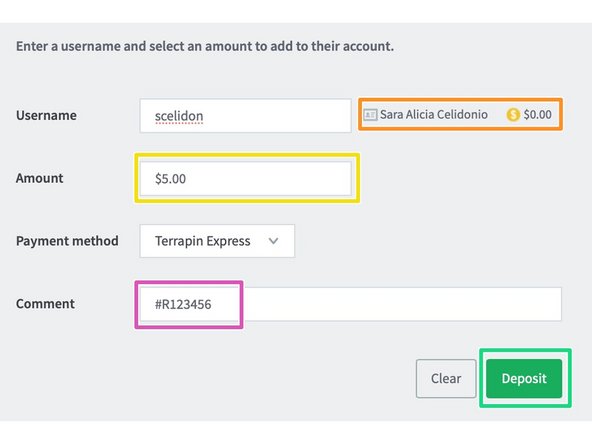
The customer's name will appear to the right with their account balance. This should be $0.00.
-
Enter the cost of the print under "Amount"
-
If the customer is paying with credit card, calculate 6% sales tax (multiply cost by 0.06) and add it to the total cost
-
Add the request number for the print under "Comment"
-
Hit "Deposit"
-
-
-
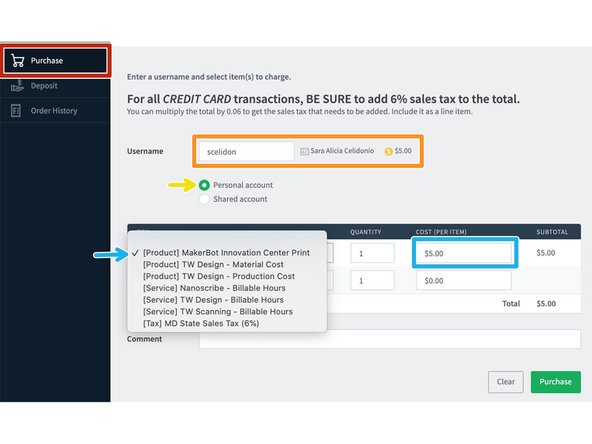
Go to the "Purchase" tab
-
Select the customer's name again under the "Username" drop down (the amount that was deposited in the previous step should show up here)
-
Select "personal account"
-
Select "MakerBot Innovation Center Print" under the "item" drop down and enter the cost of the print
-
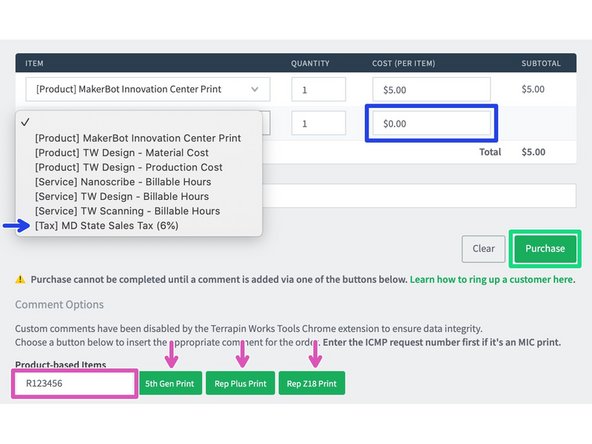
For credit card transactions, select "MD State Sales Tax" from the second drop down and enter the tax for the print
-
The amount under "Total" should be the same as the amount that was deposited (shown above)
-
Enter the request number under "Product-based Items" and select the correct printer
-
Hit "Purchase
-
-
-
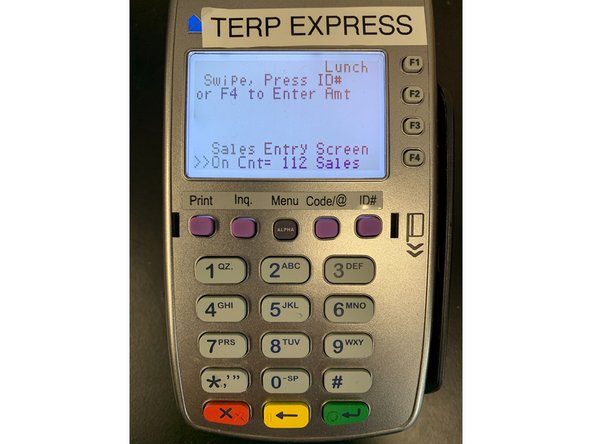
Press the F4 button
-
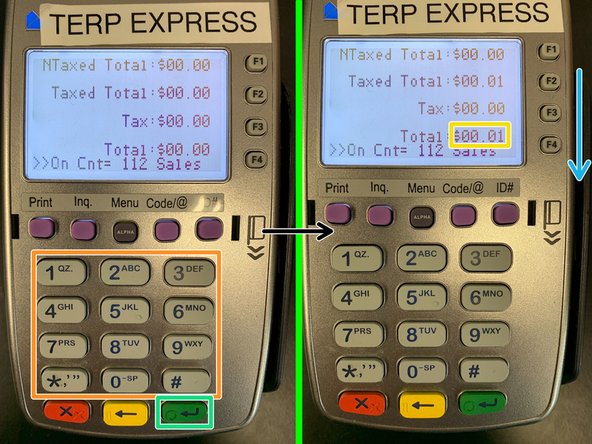
Enter the cost of the print
-
No need to enter the decimal point, e.g 1¢=1, 10¢=10, 1$=100, 10$=1000 etc.
-
Press the green button
-
Swipe the customer's terrapin express card
-
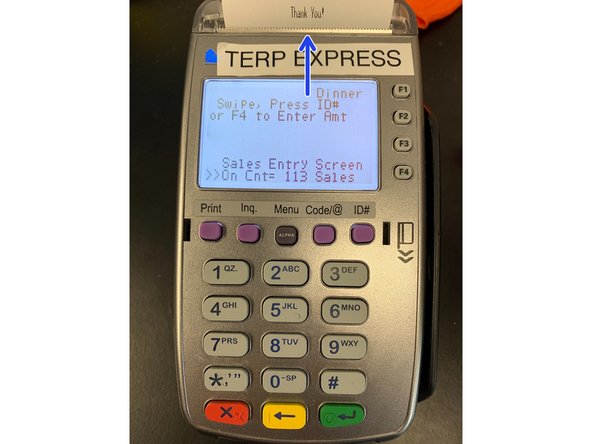
Take the receipt and give to customer
-
-
-
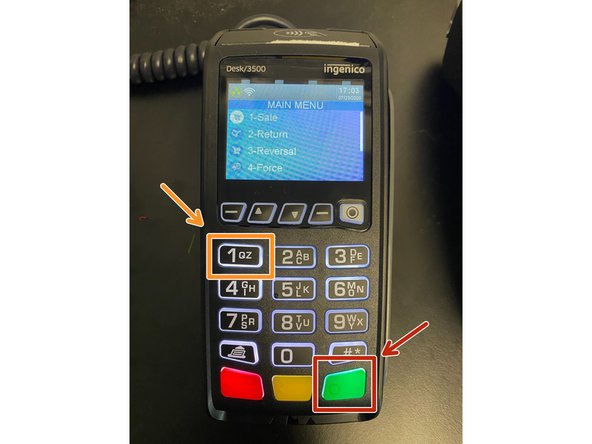
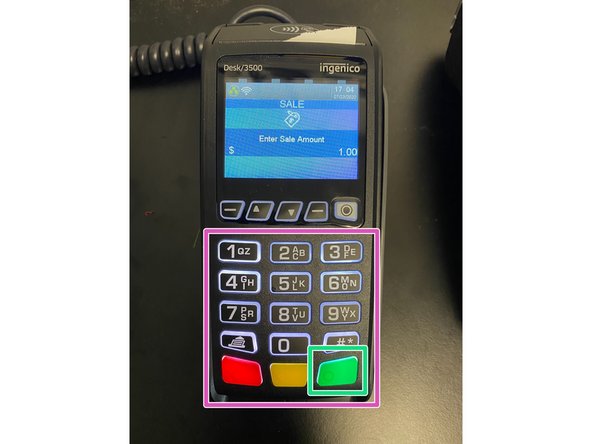
Press the green enter button on the keypad to bring up the actions menu.
-
Press the "1" key on the keypad to initiate a sale.
-
Enter the sale amount using the keypad. There is no need to type decimal places, the terminal will insert them for you.
-
Press the green enter button on the keypad to confirm the amount.
-
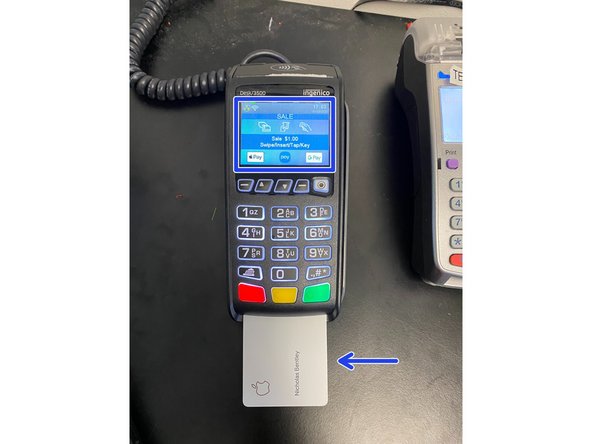
For credit cards, insert the chip. The terminal also supports contactless payments from cards that support tap to pay, Apple Pay, and Android Pay. Under no circumstances should swipe be used unless the card does not have a chip or the terminal asks for it.
-
When the transaction goes through, a merchant copy of the receipt will be printed. This goes into the receipt box next to the credit card reader.
-
The terminal will prompt you to print a customer receipt. By default it is configured to print one. If the customer does not want a receipt, simply press the "1" key on the keypad to prevent it from printing.
-
Do not accept a card number over the phone or in person without the physical card, as this is a credit card fraud risk. If the chip or swipe is not working, this is the only time it is acceptable to manually enter the card number.
-
-
-
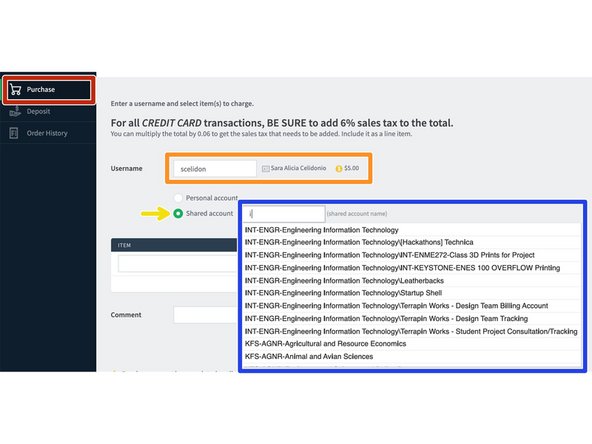
Go to the "Purchase" tab
-
Select the customer's name under the "Username" dropdown
-
Select "shared account"
-
Select the KFS account name from the "shared account name" drop down
-
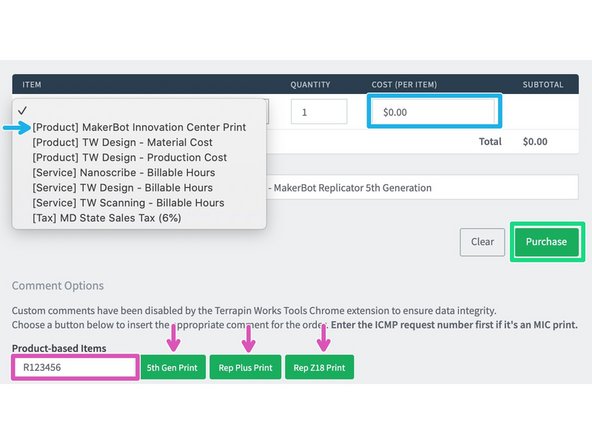
Select "MakerBot Innovation Center Print" under the "item" drop down and enter the cost of the print
-
The amount under "Total" should be the same as the amount that was deposited (shown above)
-
Enter the request number under "Product-based Items" and select the correct printer
-
Hit "Purchase"
-


