
Introduction
Photogrammetry consists of processing a large number of photographs of an object from a variety of angles into a 3D mesh. This guide provides a basic introduction to the use of Meshroom, a free and robust photogrammetry software.
-
-
Photogrammetry is far less accurate and precise than any of the other scanners available at Terrapin Works
-
If another scanner is available and the object fits within its appropriate use-case, use a designated 3D scanner.
-
Objects not reasonable to scan with designated 3D scanners, like buildings, trees, or other large objects may fit within the use case for photogrammetry
-
Photogrammetry also works for objects with textures not amenable to the other 3D scanning technologies, like plants.
-
-
-
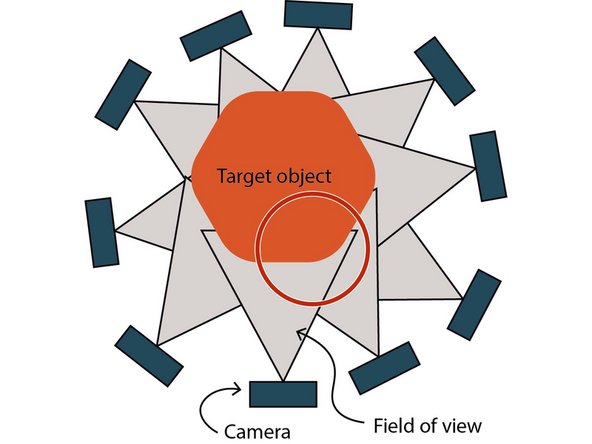
Successfully constructing a 3D mesh of an object from photogrammetry requires capturing dozens of pictures from all relevant angles.
-
The term all relevant angles typically means a 360 view of the object, but for a target where all the important features are on one side - like a human face - only focus on that area.
-
The field of view for adjacent photographs should overlap by at least 50%
-
Make sure you have access to take a picture of the object from all relevant angles
-
Try to keep the lighting on the object as uniform as possible
-
Keep the background as featureless as possible
-
Try to reduce deep shadows on the object
-
-
-
Take photographs across the range of relevant angles on multiple planes
-
Make sure each photo overlaps by about 50%
-
Take pictures on a maximum depth of field
-
Attempt to reduce photographic aberrations, including motion blur, lens flares, over/under exposure, and poor focusing
-
Save all photos as high resolution images. Compressed photos can create artifact features that Meshroom may mistake for real objects.
-
-
-
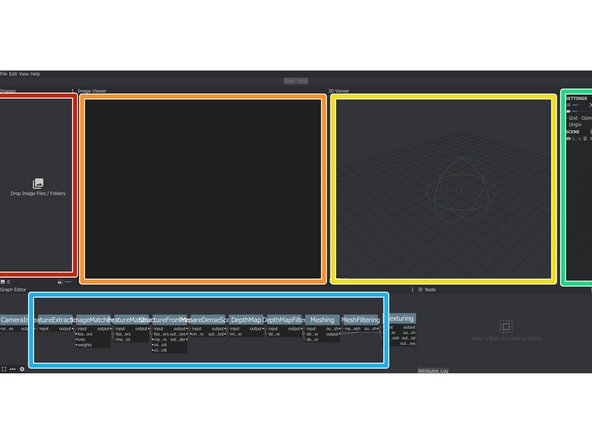
Catalog of all images taken
-
Display of selected image
-
Display of generated mesh
-
Mesh settings
-
Processes used to convert images to mesh
-
-
-
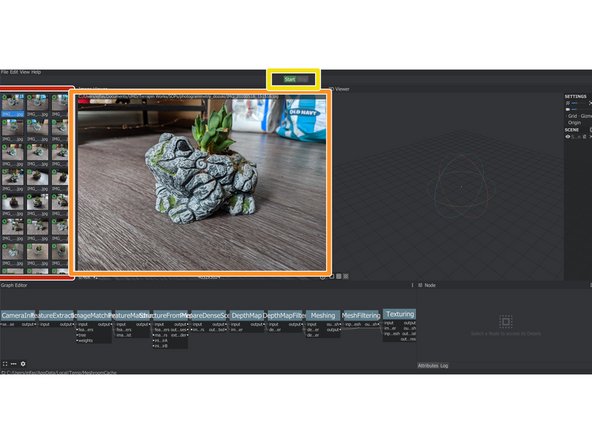
Save all of the pictures in a single folder, then drag-and-drop the folder into meshroom
-
Click on any individual image in the image catalog to view it at full resolution
-
Check all images are clear, focused, and centered
-
Click the start button to run the algorithm that converts images to mesh files. Note that this process may take a while and use lots of CPU resources.
-
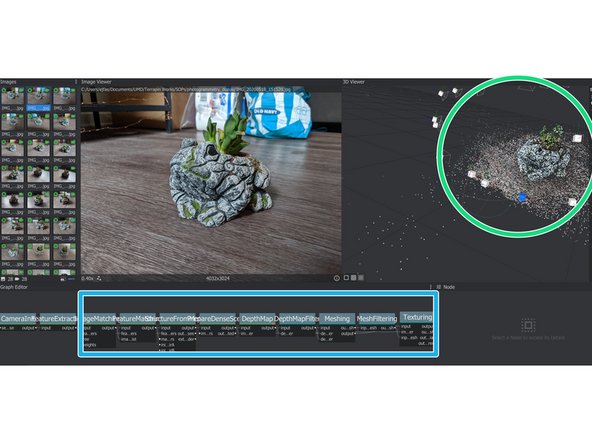
As the algorithm runs, it will begin to build a mesh. Once the algorithm finishes running, press the load model button
-
Track progress with the processes window at the bottom. The orange bar indicates the step currently operating
-
After clicking the load model button, a mesh file is automatically exported. Click the open containing folder button to see it.
-


Cancel: I did not complete this guide.
One other person completed this guide.