
Introduction
This guide will teach you how to use the ProMask and ProLegend kit to add the green solder mask layer silkscreen graphics to your PCB.
-
-
Solder mask is what makes circuit boards green and is used to protect the board and make soldering easier.
-
Silkscreen is used to embed white text on the surface of the circuit board.
-
Both of these layers must be applied to the surface of the PCB and selectively cured using a printed transparency sheet under a UV lamp.
-
Solder mask and silkscreen are added after the vias are drilled/plated and the top/bottom traces on the PCB are milled.
-
You should use scaling of 1:1.0021 or 1.0025 instead of 1:1 for a better result
-
-
-
Open your project in CircuitPro and in the CAM view make only the top and bottom solder mask layers of your design visible and drag them apart.
-
Select File->Print and make sure the paper comes from Manual.
-
Make sure that the scaling is letter size paper, and 1 to 1 scaling. You can change the margins to 150mm vertical to save ink for silkscreen
-
You can choose Print preview to make sure the print will turn out correctly.
-
You should use scaling of 1:1.0021 or 1.0025 instead of 1:1 for a better result
-
Click Print and insert a transparency sheet into the front of the printer located next to the computer.
-
Repeat the procedure for the silkscreen layers but check Invert before printing.
-
-
-
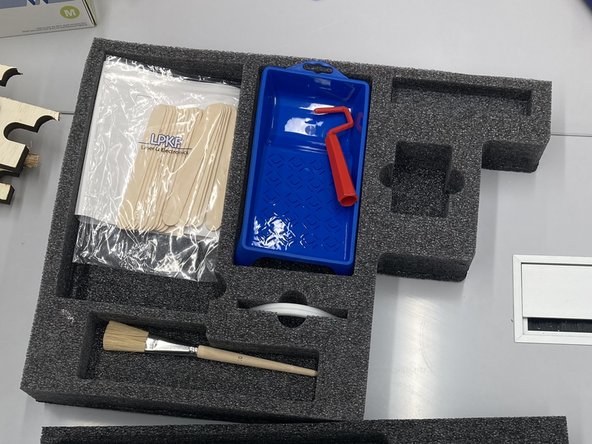
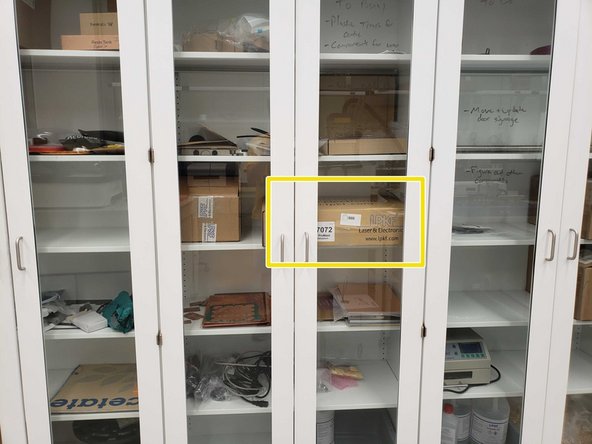
The solder mask/silkscreen kits are kept in a brown LPKF box in one of the tall white cabinets.
-
One part contains a roller, a paintbrush, handles for holding the board, and popsicle sticks
-
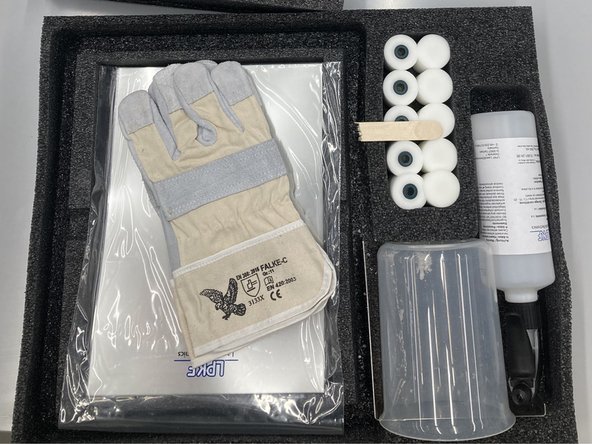
The other contains tips for the roller, gloves, a beaker, and a bottle
-
-
-
The main method of solder mas is using the green/white goo/paste in tubs iin the closet.
-
This tub is the Green goo, or the actual solder mask. It has a very pungent smell so try to not inhale too much fumes. It is highly viscous so be careful when measuring. 8 grams of the green goo is required for one side of a PCB
-
This tub is the white goo. It is the activator that solidifies and chemically cures the green goo and turns it into solder mask. It is very paste like and a semi-solid. 2 grams are required to activate the 8 grams of green goo
-
The general ratio is 8 grams green goo to 2 grams white goo to get a nice solder mask. This is about a 4:1 ratio.
-
-
-
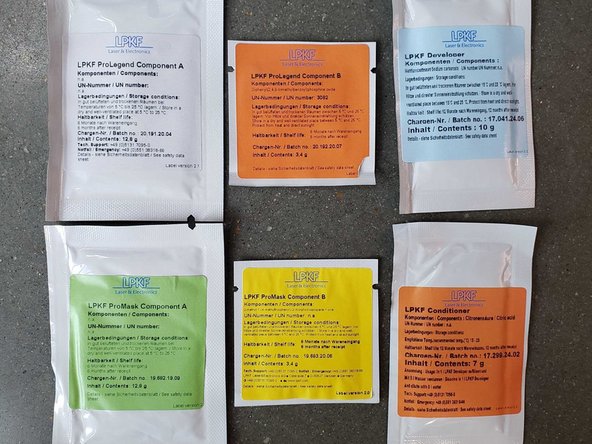
Retrieve one packet each of ProMask components A/B, ProLegend components A/B, LPKF Developer, and LPKF Conditioner.
-
They are located in the fridge outside the AFL
-
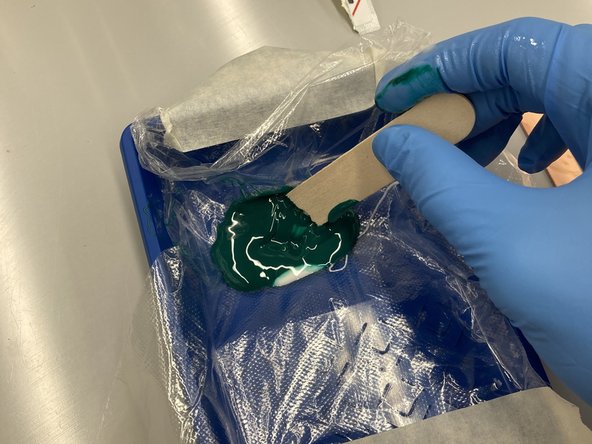
Place a plastic glove over the roller bin and mix ProMask compounds A and B with a popsicle stick (ProLegend A and B if you're doing silkscreen).
-
It may take several minutes until they are fully mixed
-
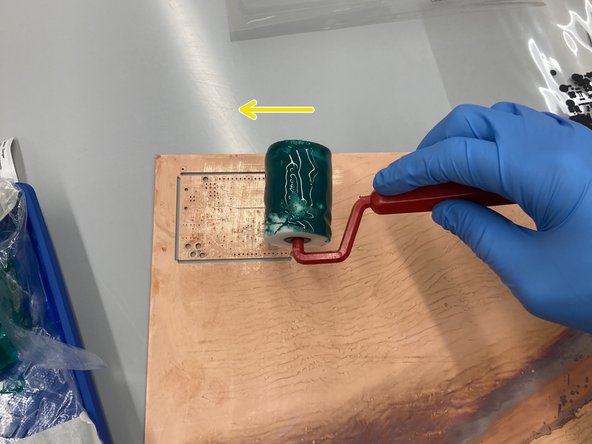
Use the roller to apply the solution on both the front and the back of the PCB.
-
IF using the two jars of activator and mask, it should be 8 grams of the green goo to 2 grams of the white goo.
-
-
-
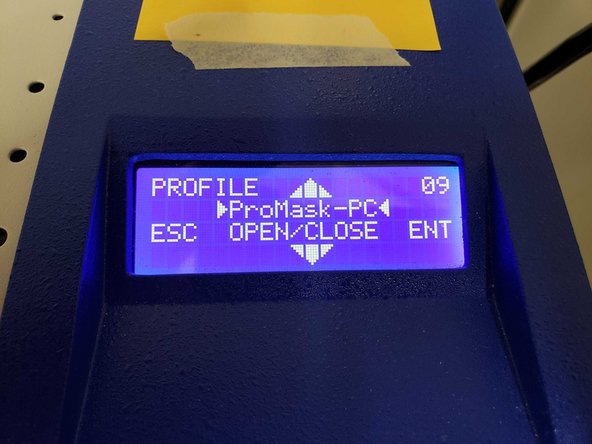
Use the curing oven and run the ProMask-PD profile
-
-
-
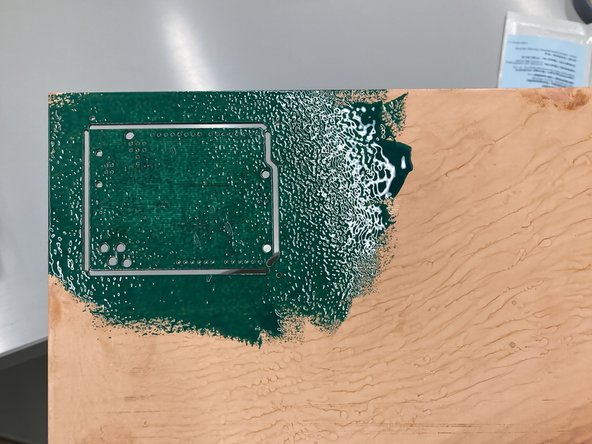
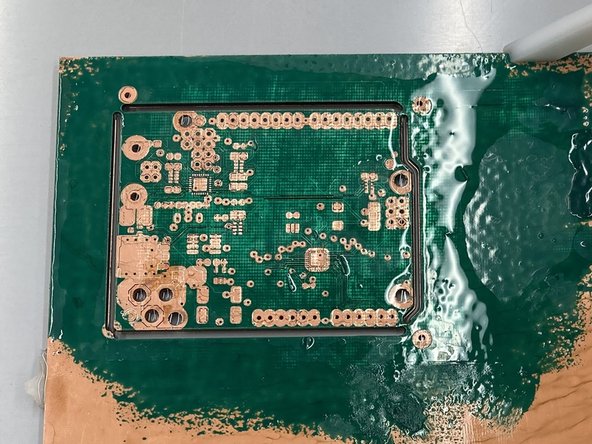
Once a thick layer of solder mask/silkscreen is present on both sides of the PCB it's time to cure it.
-
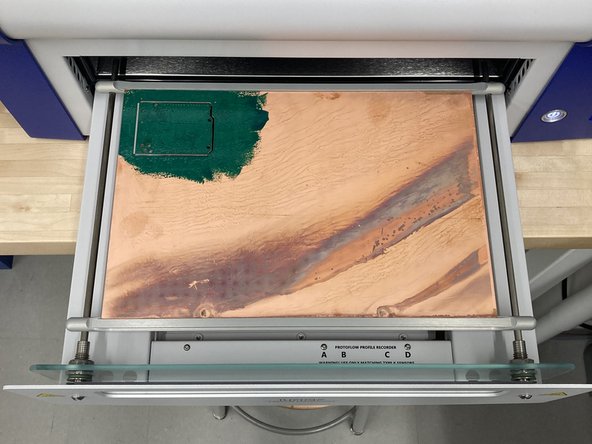
Place the PCB in the reflow oven and choose the ProMask-PD profile
-
-
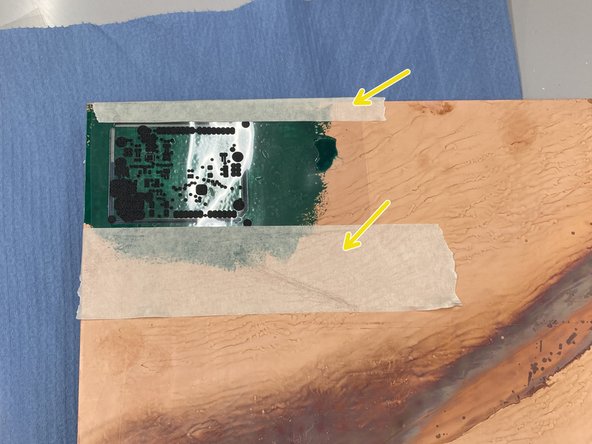
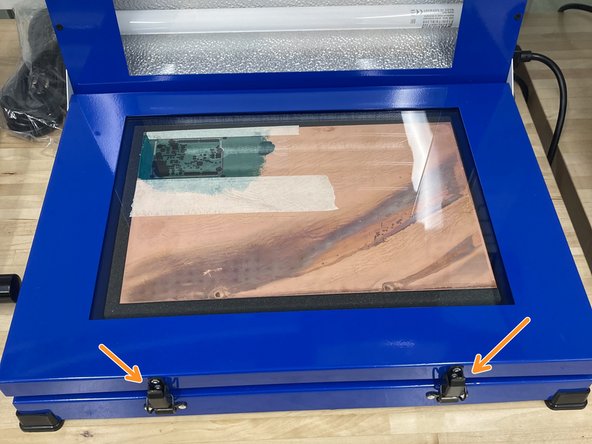
Once it is finished and cooled, line up and tape the appropriate cut out solder mask /silkscreen transparency sheet
-
Be sure not to mix up the top and bottom layer transparencies
-
-
-
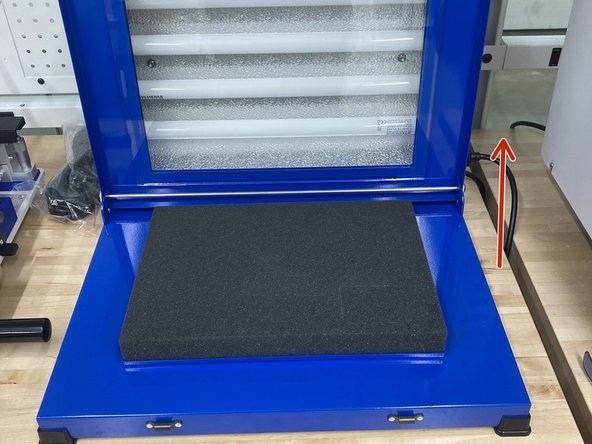
Open the UV lamp
-
Place the PCB under the glass and latch it shut
-
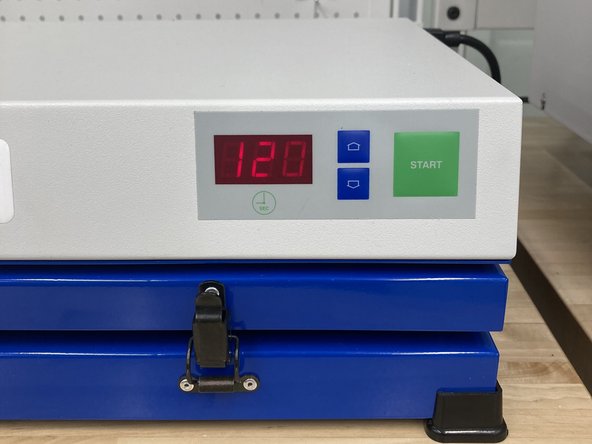
Close the lid, set exposure to 60 seconds for solder mask and 120 seconds for silkscreen, and push start.
-
Remember to cure both sides.
-
-
-
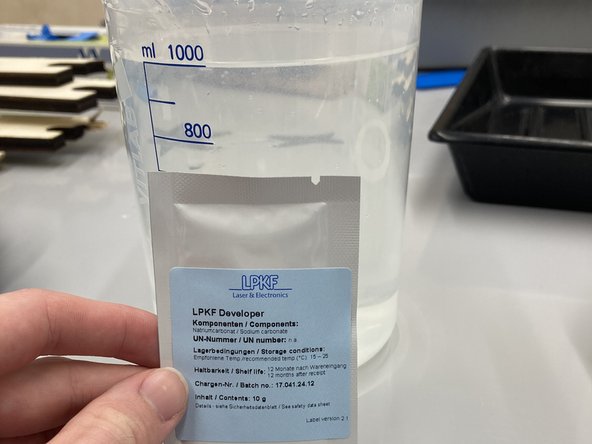
Add the developer power to 1000mL of water at 40-50°C
-
The water does not need to be this warm for the silkscreen so you can reuse the same developer solution for both processes.
-
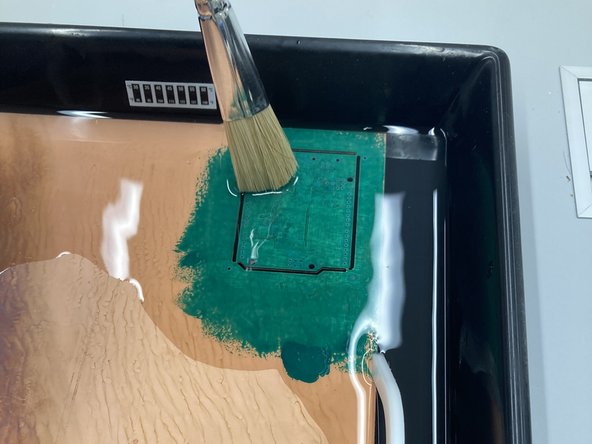
Pour the solution into the bin provided with the kit and scrub off the uncured solder mask/silkscreen with the paintbrush
-
-
-
Rinse the board off with water
-
Place the board in the reflow oven and choose ProMask-PC
-
-
Repeat the procedure starting from step 3 for the silkscreen if necessary.
-
-
-
Neutralize the developer solution with LPKF Conditioner before pouring it down the drain.
-
Throw away the used plastic gloves, popsicle sticks, rollers, and transparency sheets.
-
Pack up the kits and store the box away in the cabinet.
-


Cancel: I did not complete this guide.
8 other people completed this guide.