
Introduction
Short and quick version of how to use the Epilog. Read this if you are a new trainee or just want to quickly learn the basics of how to use the Epilog. A great way to use this guide is to follow along with your file as you read the guide.
If you want to know more, feel free to read the rest of the guides, just keep in mind they are a complete overview of every possible thing that the Epilog features and is really long as a result.
-
-
When you are creating a file for laser cutting, make sure it is a 2D outline of whatever you want cut out.
-
Best way to do this is either by using Fusion360, or SOLIDWORKS to sketch out the 2D shape you want cut.
-
Make sure to save your file as a .dxf as this is the easiest format for the program we use, Adobe Illustrator, to prepare the files for laser cutting.
-
Provided in the photo is an example of some outlines of tools.
-
-
-
Illustrator seems confusing at first, but we are really only doing a few things:
-
First, when opening a .dxf file, make sure to use the same units as what you originally created the file in. Ensure to set the scale as 1 and unit(s) = 1 with either inches or millimeters.
-
Then, double check your dimensions of the bounding box of your shapes in the top right hand corner under properties to ensure its what you are expecting.
-
Next, check the fill is set to none and the stroke is set to 0.001 for cutting, units do not matter for this. A stroke of 0.001 will ensure the next piece of software sets your lines as cut lines.
-
If you are engraving use a stroke of 1 or greater. Or, use a fill of black and stroke of 0.
-
-
-
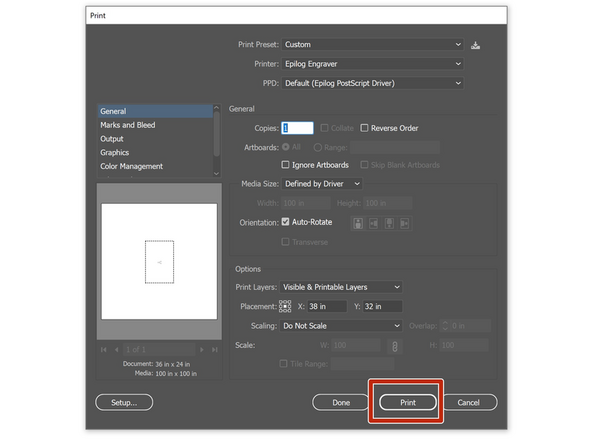
After double checking everything is correct, print your file from File - > Print the only thing you need to ensure is the printer says Epilog Engraver, nothing else needs to be changed.
-
If the dashboard says the printer is missing, grab a staff member.
-
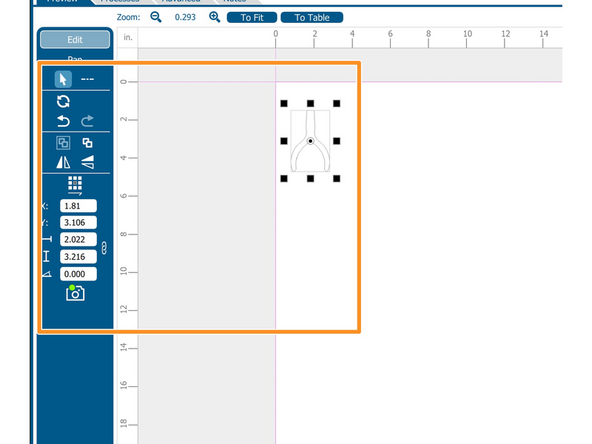
The dashboard is able to resize the shapes you have as well as position the shapes inside the laser cutter bed.
-
You should try to position your shapes somewhere near/in the top left corner to ensure it is square. Feel free to use the rulers in both the physical machine and the dashboard to align your parts.
-
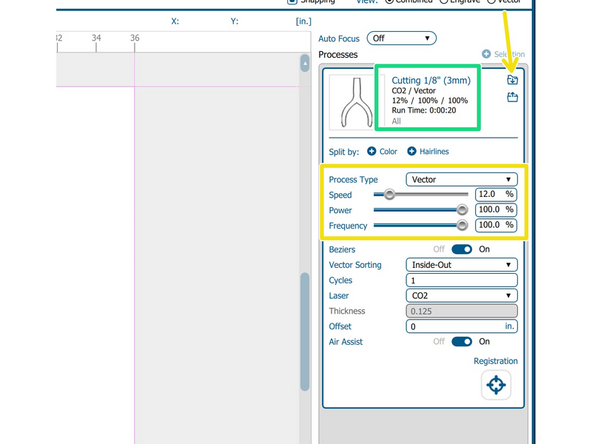
Then, select your material settings either from the presets or from this google sheet.
-
Double check if the process says Vector or Engraving. This will let you know if you decided your settings in Illustrator correctly.
-
Vector just means cutting
-
If you have any questions about what a particular setting in the dashboard means, the machine page has a list of definitions for all of the terms in the epilog dashboard.
-
-
-
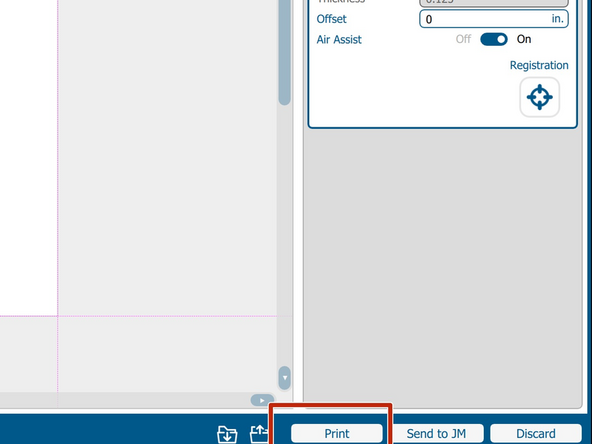
Once everything is set, double check your settings are set correctly. Grab a staff member if you are unsure about anything.
-
Next just hit the Print button on the bottom right of the dashboard to print to the Epilog.
-
-
-
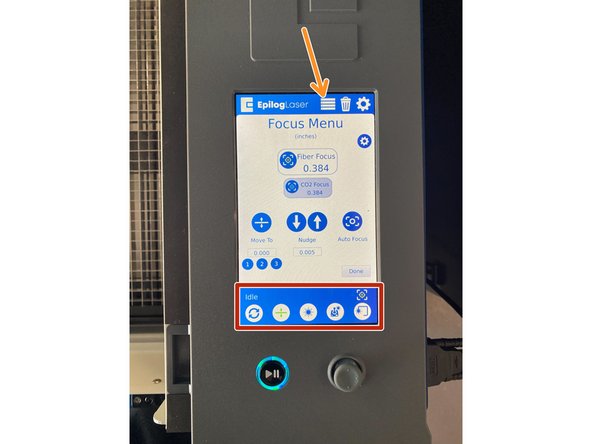
The control panel is a touch screen with a joystick and start/pause button near it.
-
The five buttons on the bottom of the screen from left to right are: reset to home position, focus menu, red dot laser pointer, jog menu, and preview file.
-
Focus is for moving the bed up and down, jog is for moving the gantry around the bed.
-
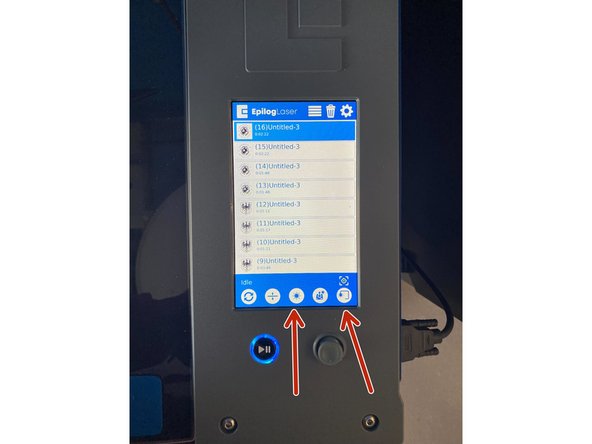
The hard drive icon shows the files that have been uploaded to the Epilog. If you upload multiples of the same file it will have a (1), (2), etc. next to it.
-
-
-
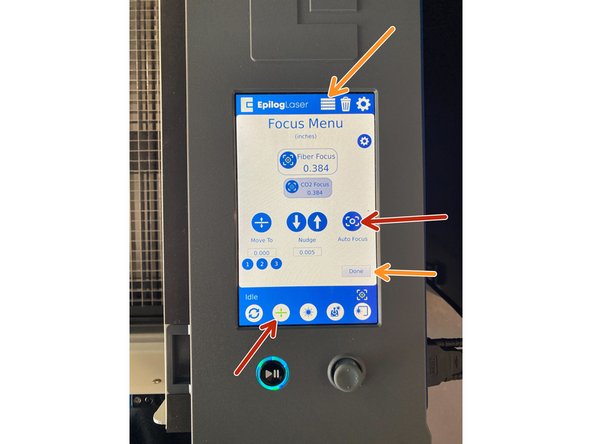
Hit the focus button and then the AutoFocus to focus your material properly as long as it is a flat object, for manual focusing, ask a staff member how or read about it in this guide.
-
Once the autofocus is complete, press on Done and press the hard drive icon to select your uploaded print.
-
-
-
Use the preview button and the red dot laser to double check your work in the epilog dashboard and feel free to reposition your shapes and print to the Epilog again if it looks off.
-
The preview will not stop until you hit the button again.
-
-
-
When the Epilog is open, the laser will never fire.
-
If the Epilog is opened while a job is running, the laser will stop firing, however, the Epilog will continue to run your file.
-
Keep the surrounding area of the Epilog clean and clear at all times. There should not be any clutter, combustible materials, explosives, or volatile solvents such as acetone, alcohol, or gasoline near the Epilog.
-
During usage of the machine, the cutting process poses a fire risk. WHENEVER YOU ARE CUTTING, YOU ARE REQUIRED TO STAY WITH THE LASER. Never operate the laser system while unattended.
-
There is NO emergency stop on this machine. To pause a job you either turn off the Epilog with the rocker switch on the side of the machine or press the Start/Pause button next to the control panel.
-
-
-
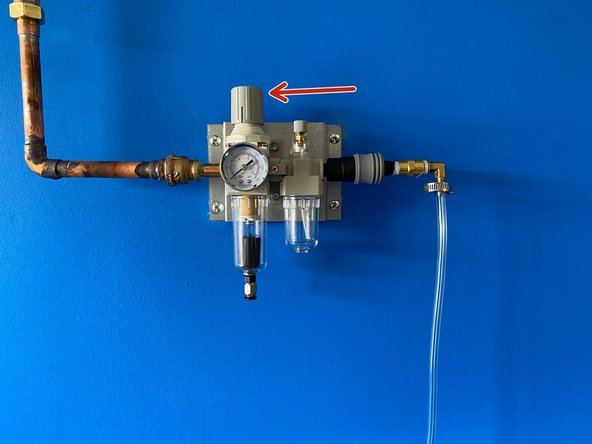
Once everything is setup how you expect, you need to turn on the assist air.
-
Turn the knob clockwise to change the psi to 15-20 PSI on the gauge. Do not go past 30 psi.
-
After that, close the lid and press the start/pause button to run your job.
-
The filtrabox next to the epilog should turn on once the epilog is running, if it does not, please get a staff member.
-
-
-
Once you are done using the Epilog, make sure to turn off the assist air and to remove any scrap pieces from the machine.
-


Now that you have read through this guide, ask your trainer any additional clarifications or questions you want answered!
Now that you have read through this guide, ask your trainer any additional clarifications or questions you want answered!
Cancel: I did not complete this guide.
3 other people completed this guide.