
Introduction
The rim-style rotary attachment allows for the engraving of any type of cylindrical object as long as it fits inside the engraving work area. It is extremely important to note that installing and uninstalling the rotary attachment requires the powering off of the Epilog Fusion Pro 36, as otherwise it will brick the main circuit board and render the Epilog as useless.
-
-
Installing the rotary attachment while the Epilog is still on WILL damage the main board on the laser cutter.
-
ALWAYS make sure to turn off the Epilog before installing the rotary attachment by using the power switch located on the right hand side of the machine.
-
ALWAYS use the engraving table as it provides a flatter and stronger surface for the rotary attachment to rest on.
-
Before turning off the Epilog, make sure you have enough clearance to insert the rotary attachment underneath the gantry.
-
If not, just use the focus feature and the joystick to lower the bed to the appropriate height to fit the rotary attachment.
-
Then, turn off the Epilog using the side rocker switch, and only after it is completely off, plug in the rotary attachment.
-
The gantry will then automatically set itself up in the correct place. If you go to the jog menu, you will notice it can only move in the lateral direction now.
-
-
-
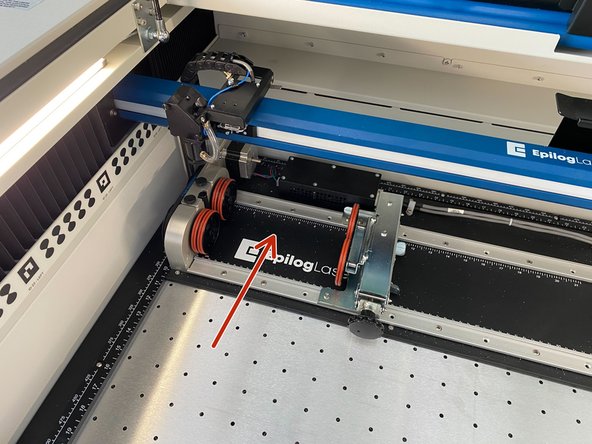
If desired, replace the grid cutting table with the stronger engraving table. The different tables are located behind the left side of the Epilog.
-
Plug the 14 pin connector in the righthand side of the inside of the machine. Once connected, then turn the Epilog back on. The machine should recognize the rotary attachment automatically.
-
Once the Epilog is done homing, it will move the gantry over the rotary engraving area in the top left corner of the machine.
-
Make sure the rotary attachment is square to the upper left corner of the machine. Otherwise, it will have the wrong position for the engraving.
-
-
-
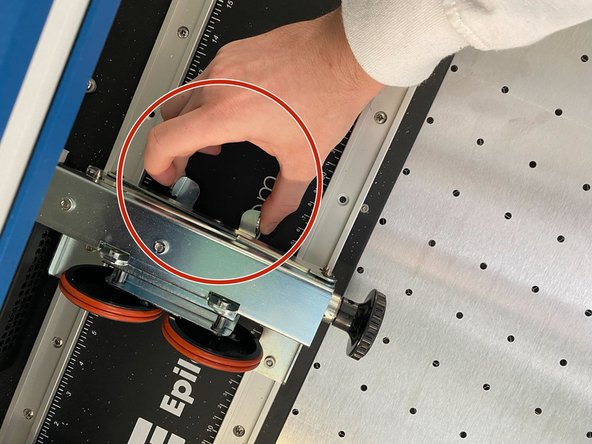
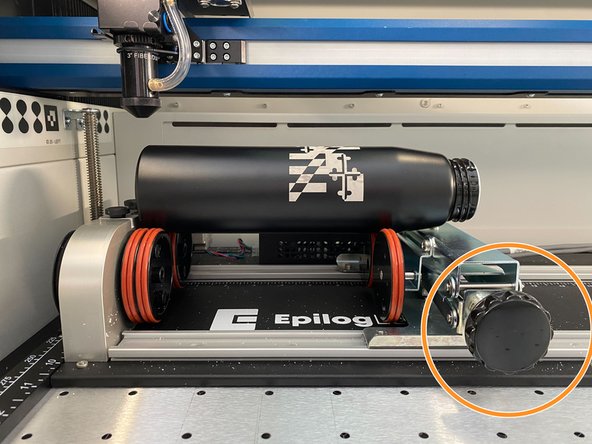
The rotary attachment can be adjusted laterally by squeezing the tabs to move the scissor jack left and right.
-
When engraving, it is important to have a flat surface. To achieve this, rotate the knob to lift or lower the scissor jack until the piece is properly leveled.
-
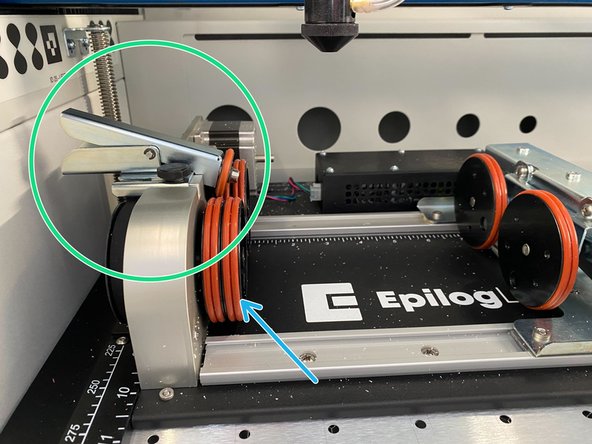
There is an optional rim clamp which is useful for objects such as pint glasses or cups. This is not necessary for all rotary engraving, but it can contribute to a better rotation depending on the shape of the object.
-
If your object is heavier on one side, try to position it so the heavy side is on the drive wheels.
-
-
-
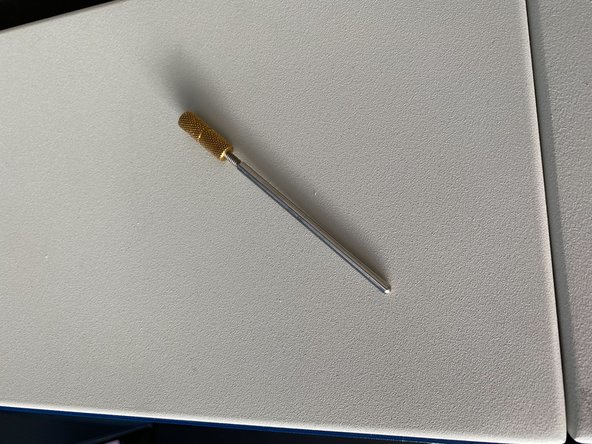
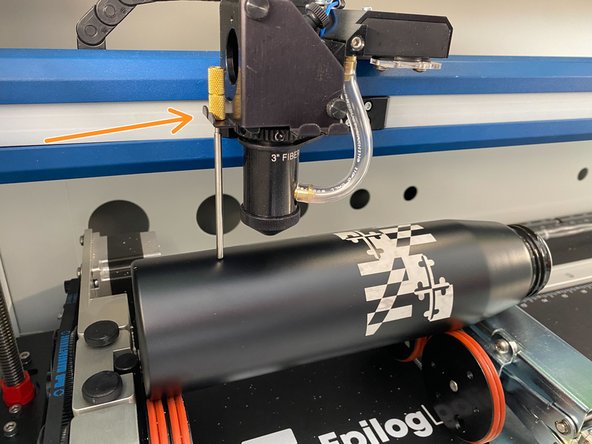
The focus should always be manually set when using the rotary attachment.
-
To do this, use the 3D printed manual focus tool that is located in the cabinet drawer next to the Epilog, NOT the adjustable focus tool.
-
Place the tool in the second position on the gantry head.
-
Use the focus menu on the Epilog to manually focus the bed. Once you are done, press Done on the screen.
-
-
-
The Epilog Dashboard automatically changes the available settings and options once the rotary attachment is plugged in and powered on.
-
For all CO2 laser material settings, please refer to this spreadsheet for engraving settings.
-
For all Fiber marking settings, please refer to this spreadsheet. Fiber can be used on most types of metals and engineered plastics
-
If you are unsure about a material, please ask a lab technician!
-
-
-
Due to the angle of the cameras, getting the proper positioning can be a little confusing at first, but only the x position matters.
-
To properly align your design, use the rulers on the rotary attachment. These directly correspond to the rulers in the Epilog Dashboard software.
-
To make sure your design is properly positioned in the Epilog Dashboard, align the top edge of your design to the top of the page. If the design is not placed here, the software will rotate the object until it reaches that "y" position you set it at.
-
Take advantage of the preview feature located on the Epilog control panel to double check your file position before you engrave.
-
-
-
Once everything is set up and you have ensured that the piece will be engraved where you want it, make sure to:
-
Close all of the doors.
-
Turn on the building air located on the wall above the Epilog.
-
Now you can press the Start/Pause button and start engraving your design.
-
-
-
ALWAYS TURN THE EPILOG OFF BEFORE INSTALLING OR UNINSTALLING THE ROTARY ATTACHMENT.
-
If the Epilog is not turned off before plugging or unplugging the rotary attachment, the main circuit board WILL be fried, and essentially make the machine dead.
-
Not every engraving will be perfectly repeatable due to the way the rotary attachment works. Please keep this in mind if you intend to have multiple passes.
-


This concludes the basic overview of how to use the rotary attachment for the Epilog Fusion Pro 36. Attached at the bottom of this guide is the pages from the user manual that give a little more in-depth look at some tips and tricks to engraving cylindrical objects.
This concludes the basic overview of how to use the rotary attachment for the Epilog Fusion Pro 36. Attached at the bottom of this guide is the pages from the user manual that give a little more in-depth look at some tips and tricks to engraving cylindrical objects.
Cancel: I did not complete this guide.
2 other people completed this guide.