-
-
Circuit Pro is the CAM software used to control the S64
-
It is used to set up files for milling and send CNC commands to the S64
-
-
-
On startup, the first screen will have 2 tabs: Projects and Templates
-
Projects are used to resume work on a project
-
Templates are used to start from scratch. They're essentially blank projects
-
For the purpose of this guide, we will be starting from a template and saving it as a project so we can save progress as we work on it
-
-
-
The different templates detail the type of board and steps needed to make the board
-
Theres a long list of templates, each with different settings
-
Layers - the number of layers of the board. Most will be 2, but we can do up to 8 with the multipress
-
THP/No THP - Stand for Through Hole Plating. All vias require THP. If there are no vias, then no THP is required
-
Galvanic/ProConduct or EasyContac - the THP process. We have Galvanic, so make sure to select that
-
ProConduct and EasyContac are LPKF's other plating methods. Becase we have the Contac S4, we use galvanic
-
Click on a template to begin a project
-
You'll probably want to use DoubleSided_GalvanicTHP.cbf most of the time
-
-
-
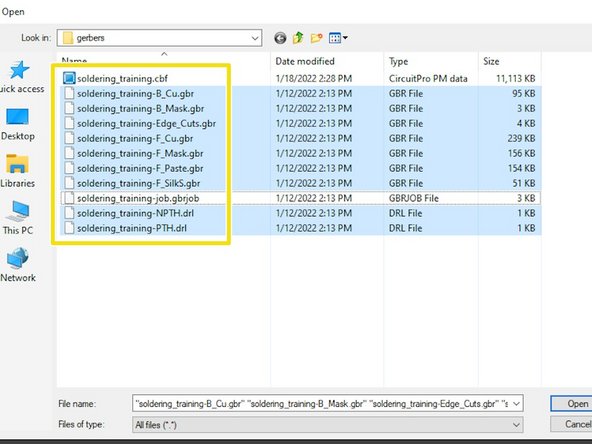
The main type of PCB files are .gbr (gerber) and .drl (drill) files
-
Each layer will have its own file
-
Click the import button to import your gerber and drill files
-
Disregard .gbrjob files when importing
-
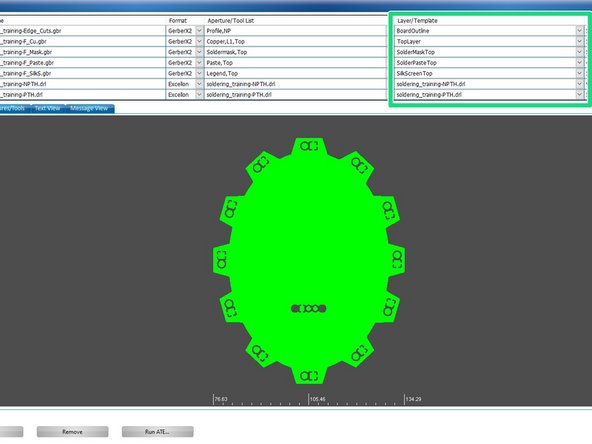
Make sure your files are assigned to the correct layers. CircuitPro will detect most by default but some must be assigned manually
-
-
-
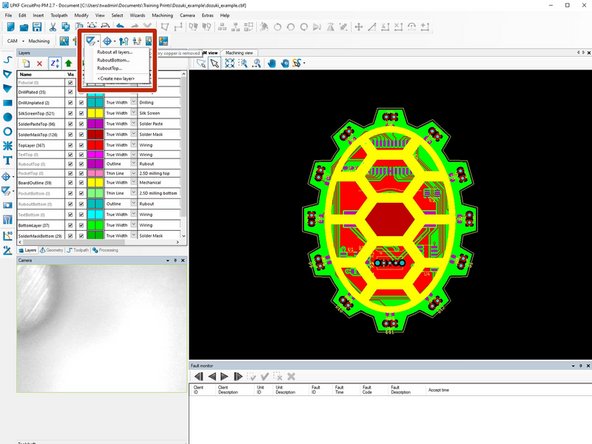
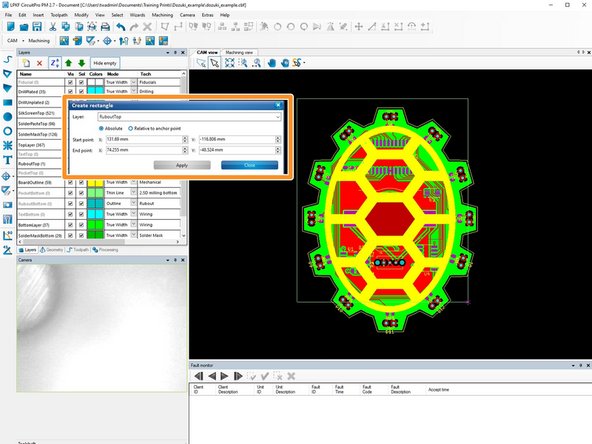
You can add rubout to the top or bottom layers if you wish
-
Draw a rectangle and all unused copper in that area will be removed
-
-
-
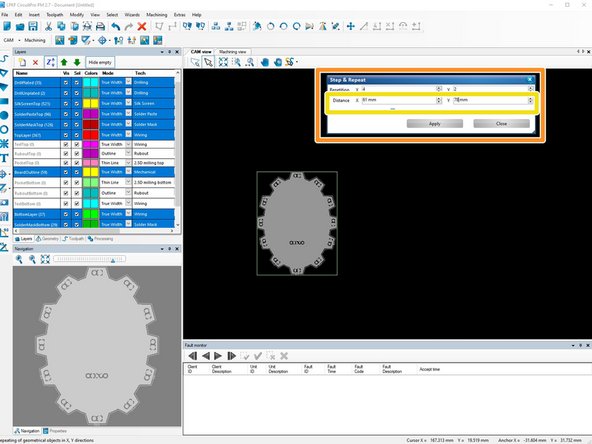
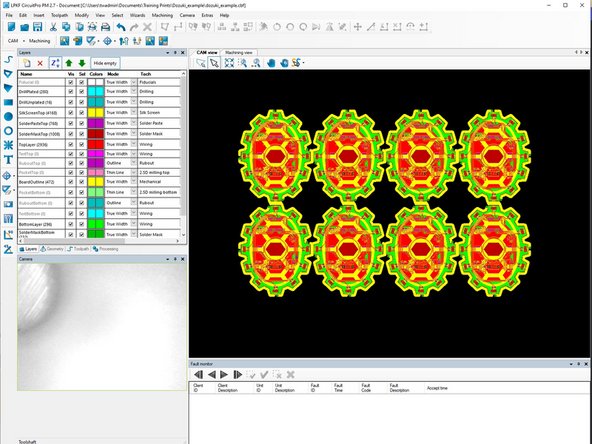
Drag a box to select your entire board and click the duplicate button along the top row to create more copies
-
The dialogue box will ask you how many copies you want and how much space should be between each copy
-
By default, the edges of the copied boards will touch each other and this will cause problems when the board outline is being cut out. Add about 3mm to the x and y directions to give some space.
-
Keep in mind that a sheet of FR4 is 9"x12" (228x305mm) so make sure your copied boards can fit
-
-
-
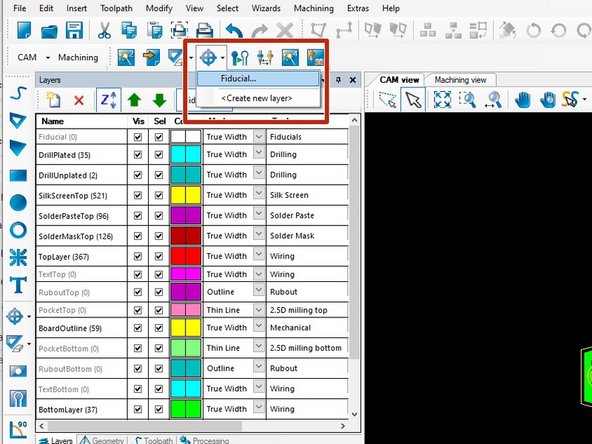
Now that the board is copied we must add fiducials for the vision system to stay aligned
-
Click to make four fiducials in the corners of your design (these do not need to be precise)
-
Click Close when you're finished and NOT Apply; clicking Apply will create another fiducial at the xy-coordinates in the text box (probably 0,0)
-
-
-
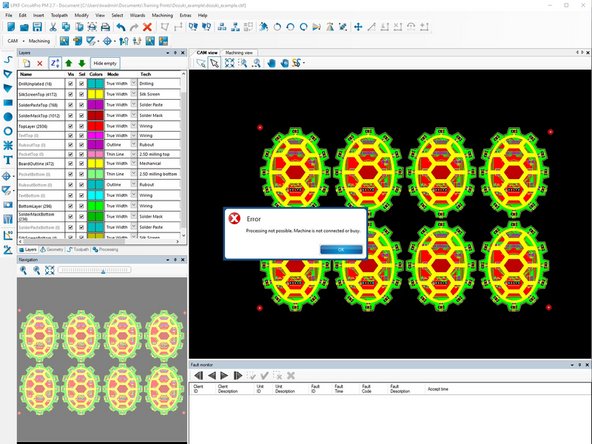
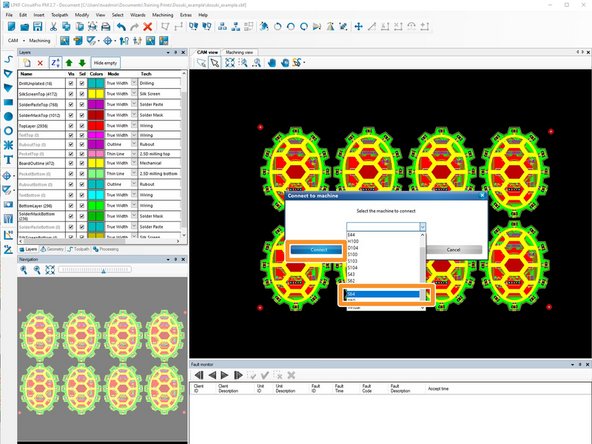
The ProtoMat may have connected automatically if you had it on when you started CircuitPro
-
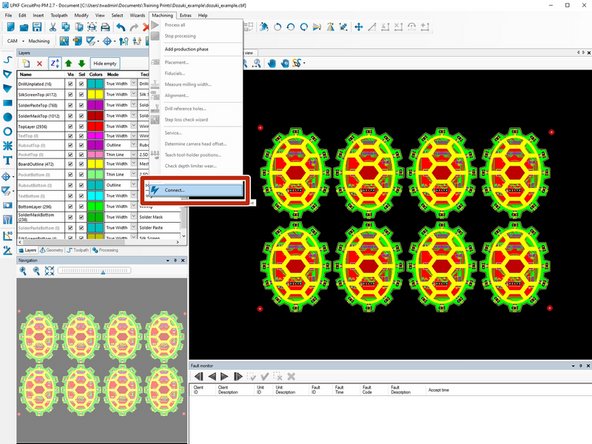
If not, then turn the machine on and navigate to Machining->Connect
-
Select S64 from the drop-down menu and click Connect
-
-
-
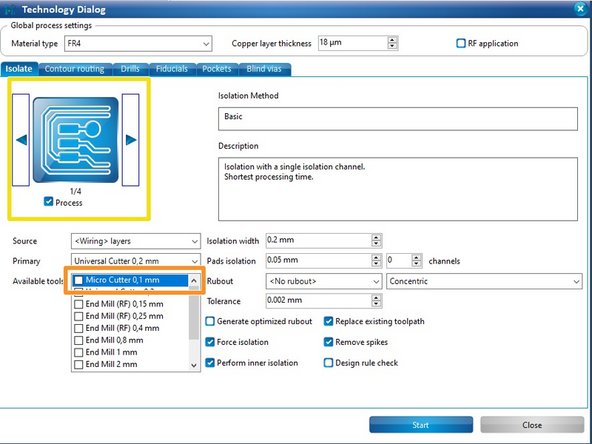
Now we're going to generate the toolpath. This step is comparable to slicing for 3D printers - we are generating the code that the S64 will follow to route out the PCB
-
Click the Generate isolation and contour routing toolpath button
-
Uncheck Micro Cutter 0,1 mm from the list of available tools
-
You can change the Isolation Method if you want more space around your traces
-
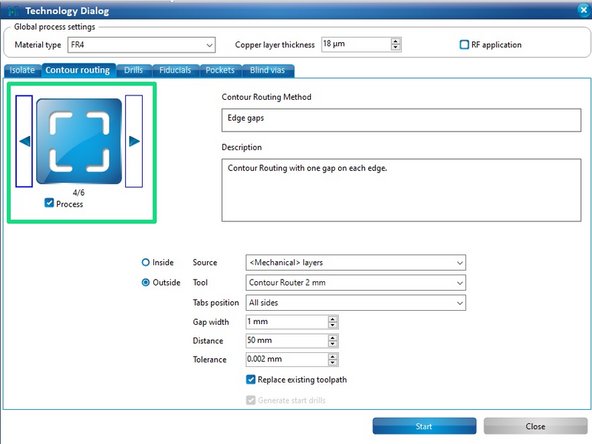
Choose whichever Contour Routing Method you want on the Contour routing tab
-
-
-
Under Marking tool on the Drills tab, choose MarkingDrills for Assign to Phase
-
Click Start to begin generating the toolpath
-
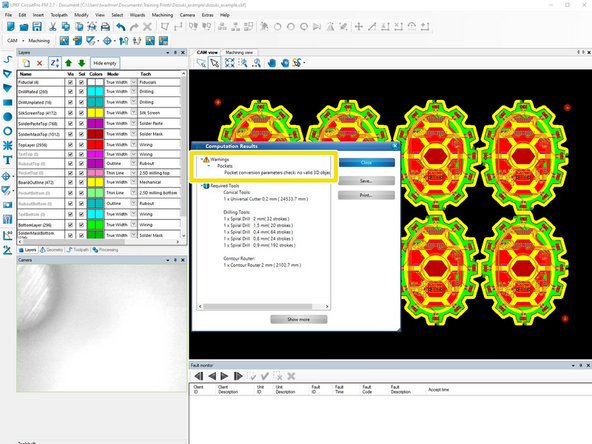
Check that you don't have any warnings or errors before proceeding
-
You can disregard the pocket conversion warning; it always appears
-
-
-
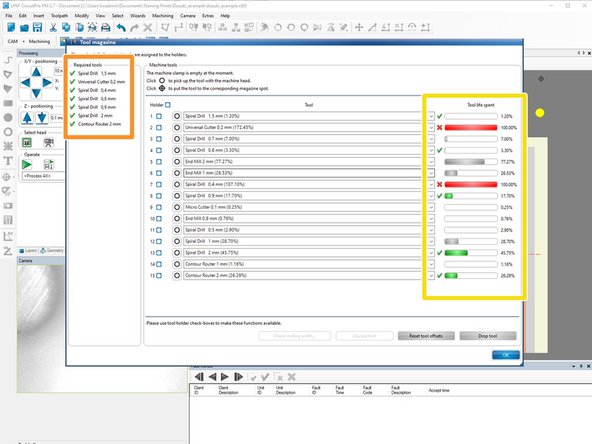
Check that all the required tools are in the machine
-
Tools are listed on the left
-
Tool life is listed on the right
-
Use this window to put needed tools into the machine and replace spent ones
-
-
-
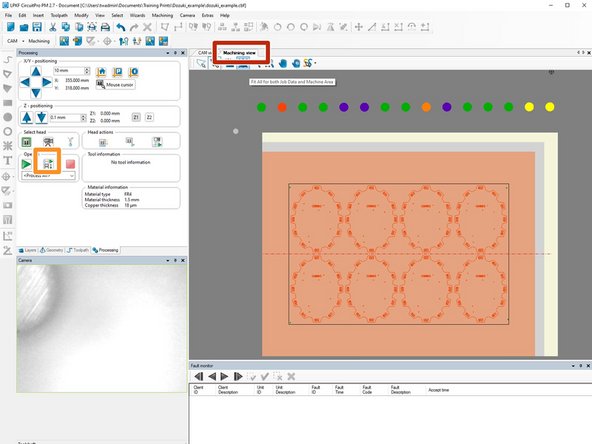
You can see where your board will be routed on the FR4 under Machining view
-
Click the middle button above <Process All> to begin routing
-
CircuitPro will guide you through the whole process
-