Introduction
This guide will explain how to slice files in Simplify3D to generate gcode for a wide variety of 3D printers.
Images by: TW and MakerGear
Video Overview
Reference Video
-
-
Simplify3D works similarly to most other 3D slicing software
-
A key difference of Simplify3D is the element of processes
-
Processes can be created and applied to different models so you could have one model print with a 15% infill density and another with a 30% in the same job
-
These processes can become much more complex than just differences in infill but that'll be for another guide
-
-
-
Click on the import button on the left side banner to open up a file explorer
-
From there you can select your model either in .stl, .obj or .3mf file types
-
-
-
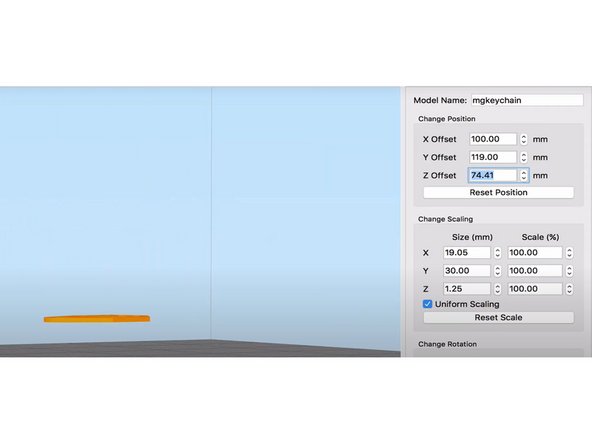
Double Clicking on your part allows you to change your position, scaling, and rotation of the part
-
Notice that you can choose to use uniform scaling or individual scaling by selecting the Uniform selecting checkbox
-
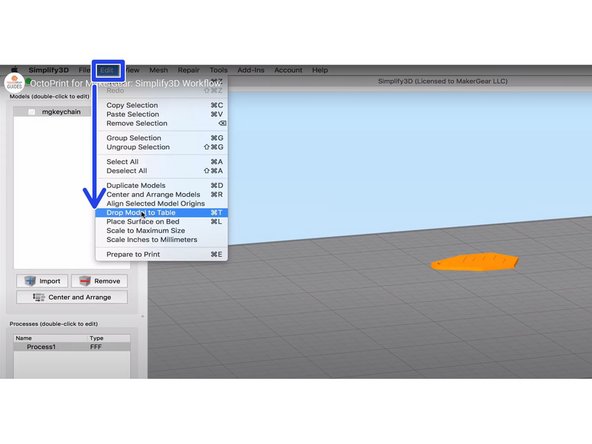
Make sure that your part is not floating before you print otherwise you will create a lot of unnecessary support material.
-
To make sure that your part is not floating, press "Ctrl+T" or go to edit and select "Drop Model to Table"
-
-
-
In the bottom left corner, you can double click on your process to open a window that controls your printer, quality of print, material, and infill percentage.
-
You can click on show advanced for more options
-
It is unlikely you will need to look at "Show Advanced"
-
Be sure that you are selecting the correct model in the upper left hand corner
-
-
-
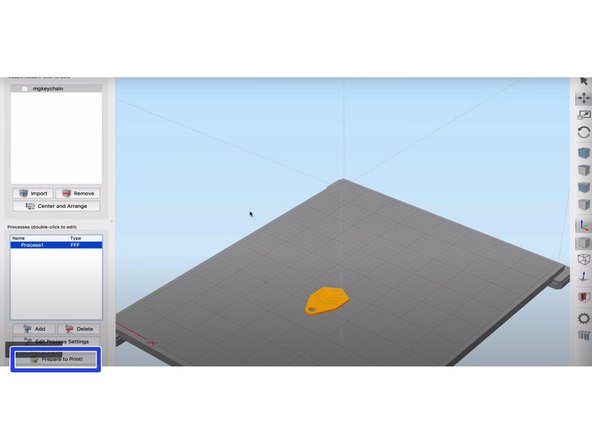
When you are ready to finish up your print click on "Prepare Print" in the bottom left hand corner
-
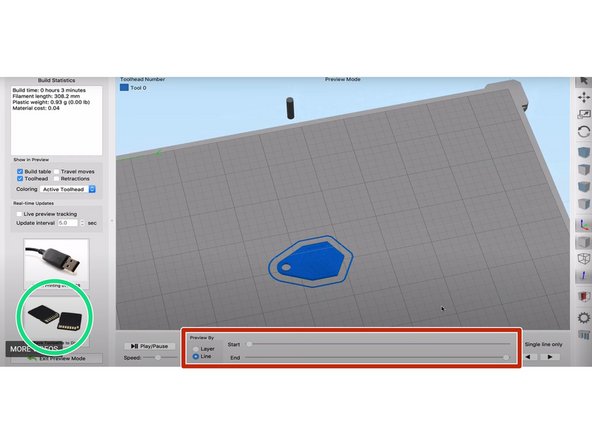
You will come to a new interface with your part in a different color. Your part is being represented as the toolpath the printer will take to actually print your part.
-
At the bottom, you can view the layers and how each one will look throughout the process. You can also follow the exact toolpath.
-
When you are ready to export your final part simply click on "Save toolpaths to Disk" in the bottom left hand corner and save your gcode somewhere you can easily access it.
-
-
-
You can also import .fff files
-
A .fff file is just the process that you can setup depending on your print
-
It isn't common than you will have to change this
-
All you do is go to file, import .fff file, and select it
-
After selecting it you should see in the middle left hand side of the page a box titled Processes
-
Double click your current process
-
A new window should pop up and you want to select the box that says "Select Profile"
-
Scroll down until you see your process file and select it. After selecting it, you should see your workplace change. Now you can work relative to whatever your printer dimensions may be.
-
-
-
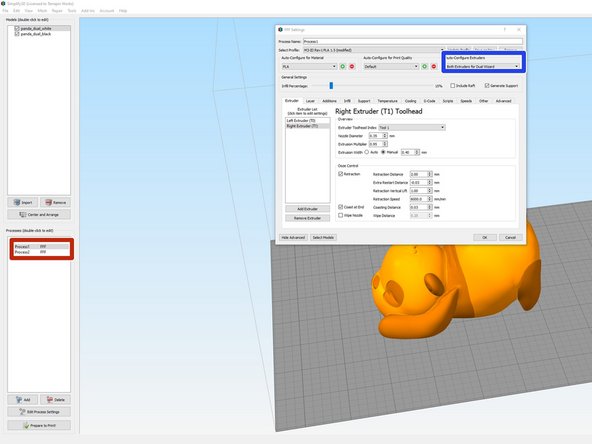
The MakerGears have a unique ability to print two things at once or print in two different colors
-
To print two identical objects simultaneously navigate to the process you are using and double click to open it
-
Find the the options menu underneath "Auto-Configure Extruders" and under the menu select "Both Extruders for Dual Wizarrd"
-
When choosing this option your build plate will split in half meaning you can't utilize the whole space
-
-
-
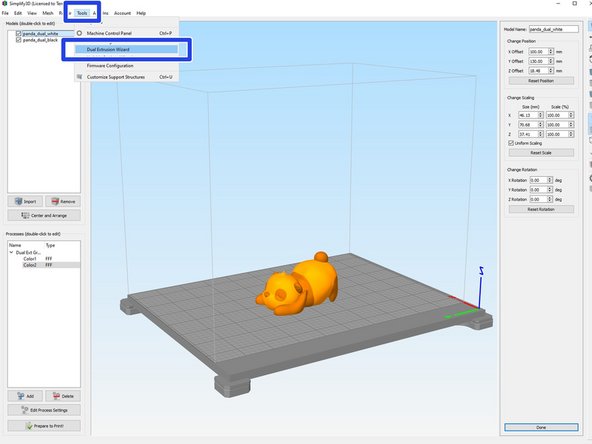
If you want to print with two materials you need to create two separate STL files where each file will be printed with a different extruder
-
Navigate to "Tools" then click "Dual Extrusion Wizard"
-
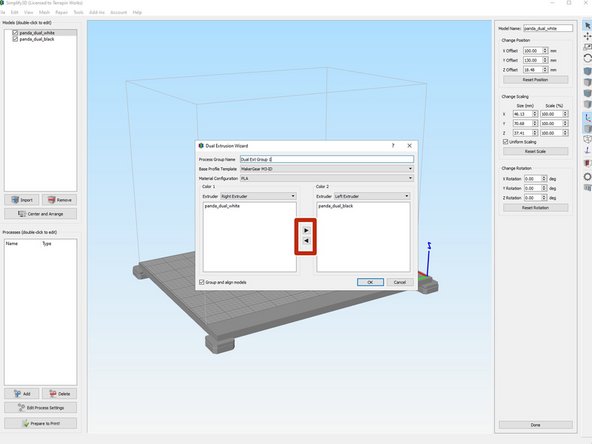
Make sure each STL is designated to the correct extruder, then click ok.
-
if the files are not ordered correctly, click the left and right arrows to change which extruder will print which part
-
Notice how this created a "Group Process", this is two processes grouped together from the dual extrusion wizard
-
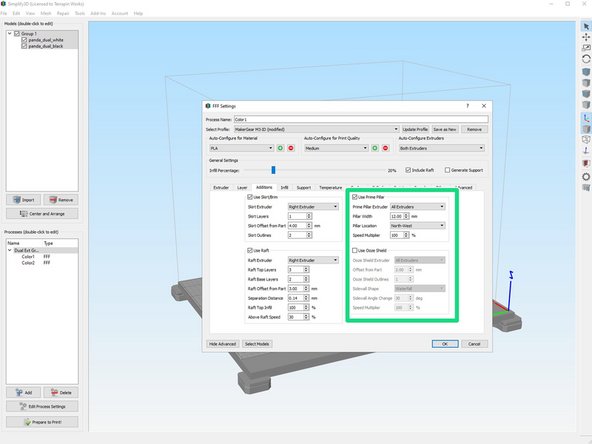
In the process settings, under Additions make sure to turn ON "Use Prime Pillar", and turn OFF "Use Ooze Shield"
-
The prime pillar is a small tower created by the nozzles extruding a small amount of plastic before each layer
-
Make sure to select BOTH processes after clicking "Prepare to Print"
-