
Introduction
This guide will serve as an introduction to the PACE soldering station. It will show the basic operation of the PACE, and some standard best practices for soldering. This guide will cover the pace and the standard soldering iron accessory (TD-100A).
Tools
Parts
No parts specified.
-
-
The PACE comes with 5 different accessories
-
TD-100a - Standard Iron
-
TJ-70 (Thermojet) - Hot air soldering
-
SX-100 (Soldr-X-tractor) - Vacuum desoldering
-
MT-100 (MiniTweez) Tweezers great for surface mount devices
-
TP-100 (ThermoPik) - surface mount with vacuum great for use with Quad Flat Packages (QFPs)
-
-
-
PPE (Personal Protective Equipment) is a must while using the soldering station
-
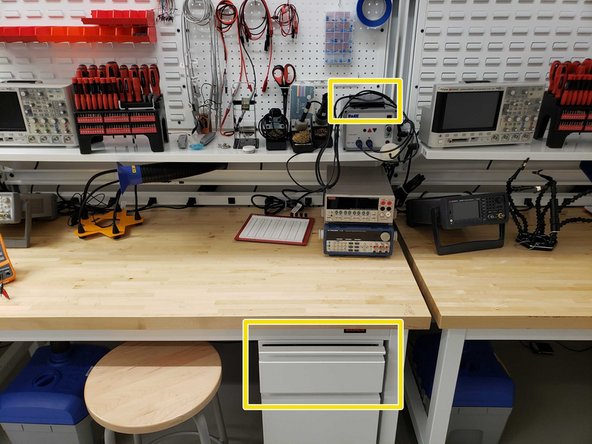
Safety glasses are the only required PPE in case solder or flux sprays or splatters anywhere. They are located in the cabinet next to the door.
-
A fume extractor is also required to protect from the dangerous fumes while soldering
-
Soldering Irons are hot (upwards of 650+ degrees Fahrenheit) so be careful while handling them so that you do not accidentally burn yourself or a work piece and/or the workbench
-
-
-
Power switch
-
LCD Display - Shows temperature and settings
-
Scroll Keys - Change temperature and scroll through setting menus
-
Program Key - Select channel, bring up settings, and move through menus
-
Air port and pressure adjustment - Provides air for the TJ-70 Thermojet; air pressure can be adjusted using the knob
-
Indicator LEDs - used to show accessory status (Green - accessory connected, Amber - in progress, Red - no connection)
-
Power receptacle - Plug irons in here
-
Vaccum Port - provides vacuum for desoldering and is used by the SX-100 (Soldr-Xtractor)
-
-
-
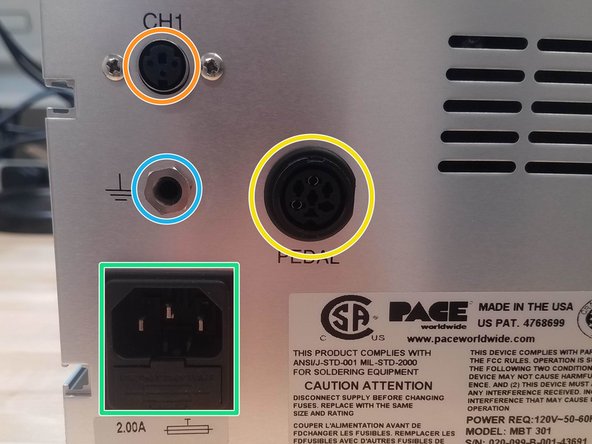
Instant Setback for channel 1 - used with the TD-100 handpiece and an instant setback cubby
-
Earth Ground Port - a positive earth ground cable can be connected as part of a static control program
-
AC Power Receptacle and Fuse - port to plug AC power in with the fuse below
-
Foot pedal port - used with a foot pedal to control the vacuum and air
-
-
-
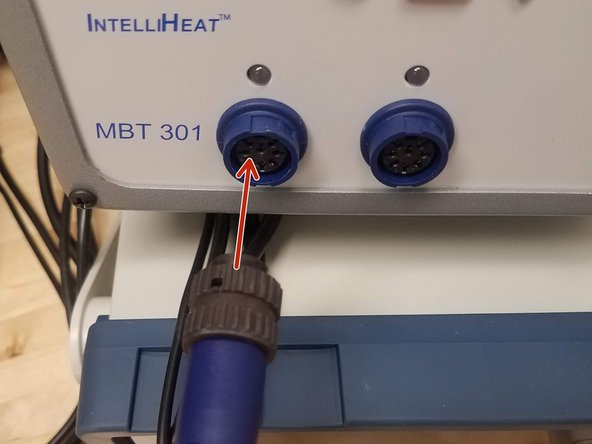
One of the advantages of the PACE is inserting and changing tools is extremely easy
-
Put the tool in the channel you want (channel 1 or channel 2)
-
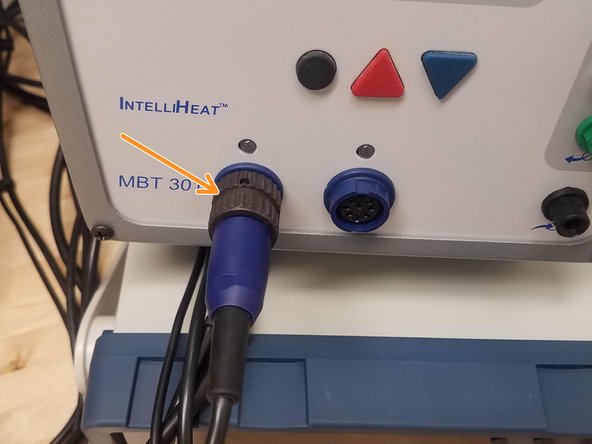
Rotate the black piece clockwise to lock the tool in place
-
Rotate counterclockwise to remove the plug
-
-
-
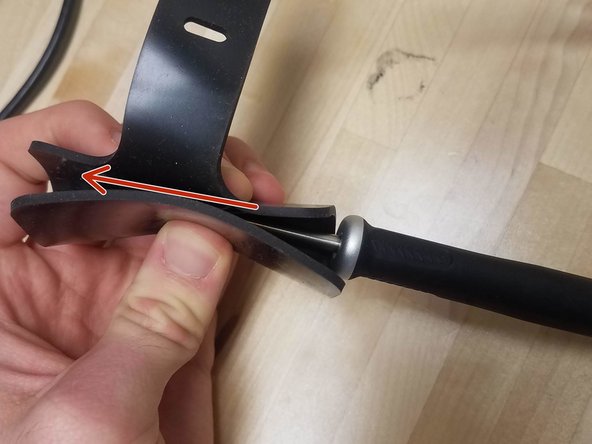
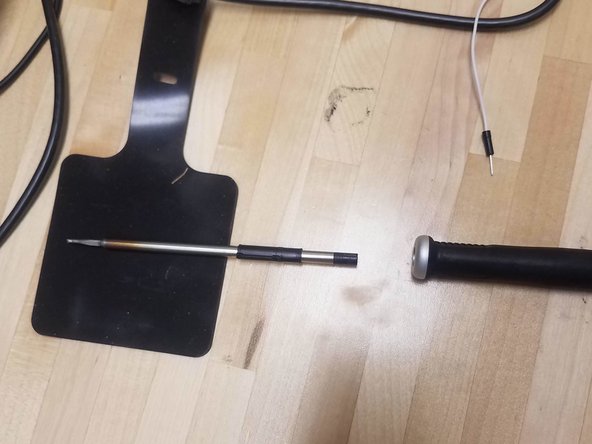
The TD-100A (standard iron) has a quick tip change feature
-
Simply pull the tip out to change it and insert the new one
-
Use a black silicone pad if the tip is hot
-
There are extra tips located in the black case that is on 2 of the 3 stations, in the top drawers of all the workbenches, and in a box in the closet.
-
-
-
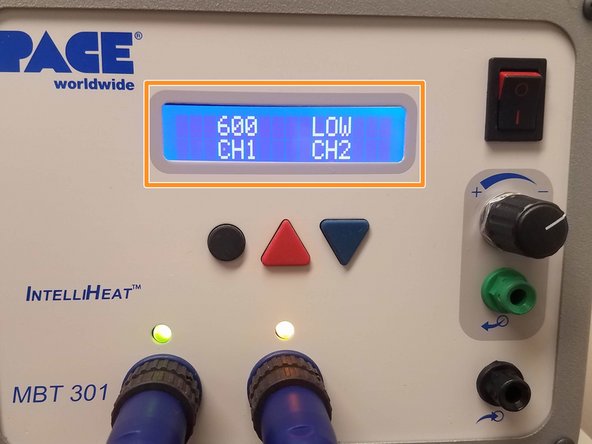
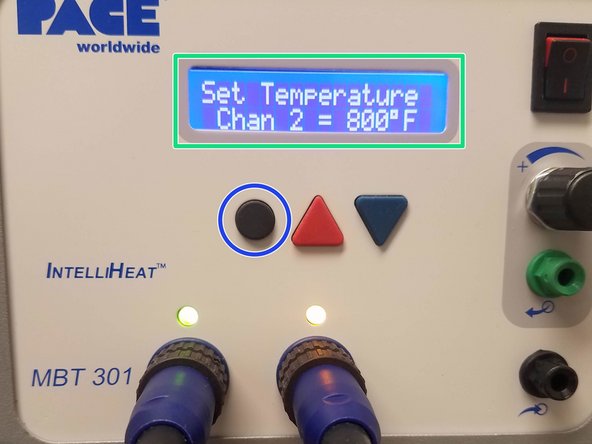
When first turning the PACE on, this screen will show up
-
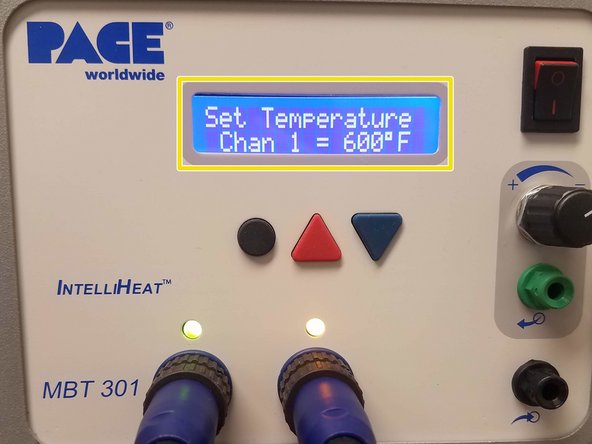
To start changing the temperature, press one of the arrows and the following screen will show up
-
Use the black button (circled in blue) to change between channel 1 and channel 2's temperatures
-
For most applications, 650 degrees maximum is fine. Do not go higher than 650 because it causes tips to oxidize and wear out faster
-
-
-
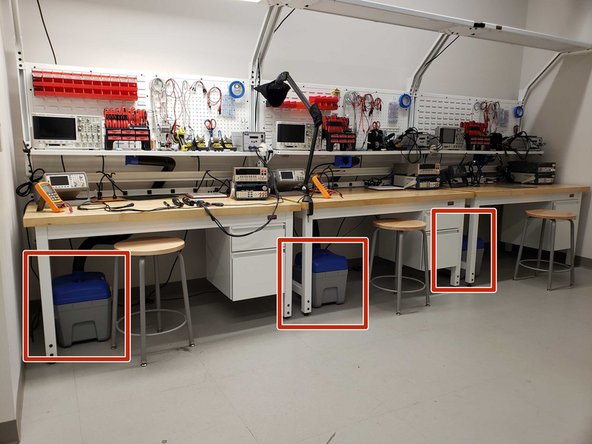
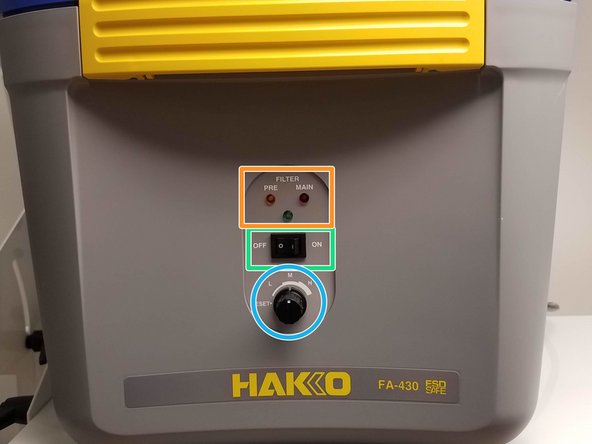
Each station has a HAKKO FA-430 fume extractor
-
Power button
-
Control knob - Adjust fan speed
-
Filter and power indicators - LEDs that indicate the machine is on (Green LED labeled power) and filter status for the pre and main filters
-
The fume extractors must be used at all times when you are soldering
-
-
-
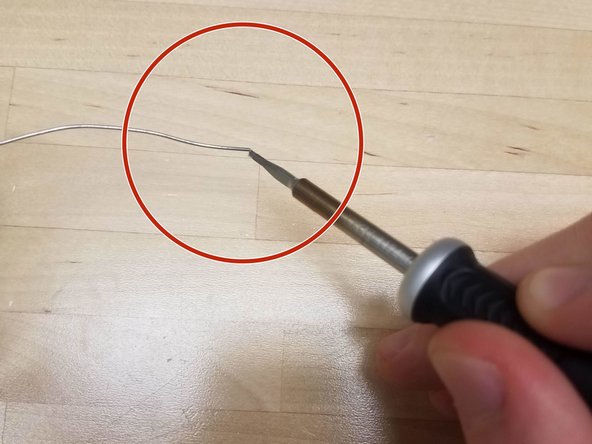
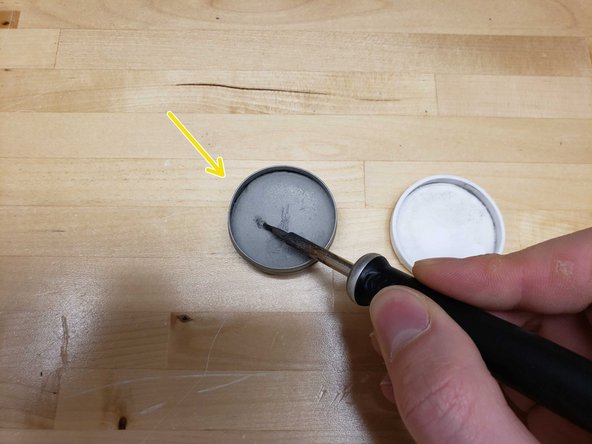
Tinning the tip is the process of adding a little bit of solder to the tip of the iron
-
Tinning helps prevent oxidation of the tips and improves heat transfer from the iron to the work piece
-
Melt some solder on the tip. If there is too much wipe it off using the wire brush in the tool stand
-
Alternatively, if tip tinner is available, dip the hot iron into that instead
-
Tin the tip periodically while soldering and always make sure to tin the tip when you put the iron away
-
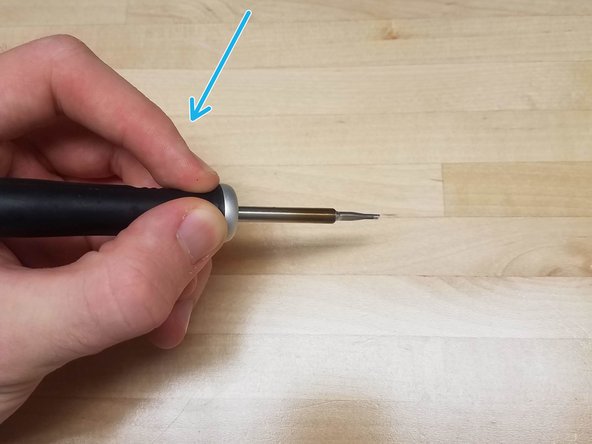
Hold the iron like a pencil near the tip for the most stability and control
-
-
-
Always make sure to clean up at the end
-
Turn off any equipment used
-
Tin solder tips before turning the iron off
-
Wipe off any stripped wires or scraps from the table
-


Cancel: I did not complete this guide.
6 other people completed this guide.