Introduction
The Markforged Mark Two have a specific workflow. This guide will explain order management for the Markforged Mark Two.
-
-
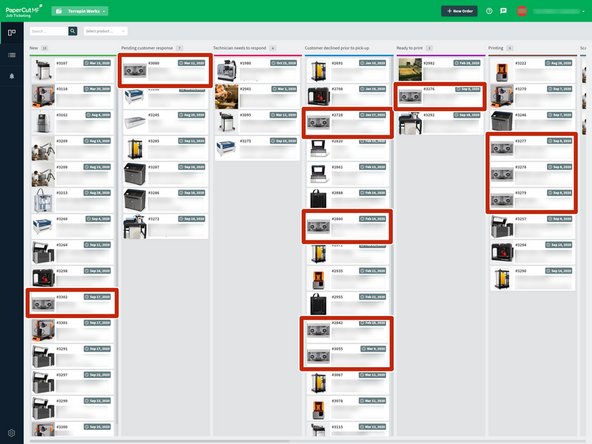
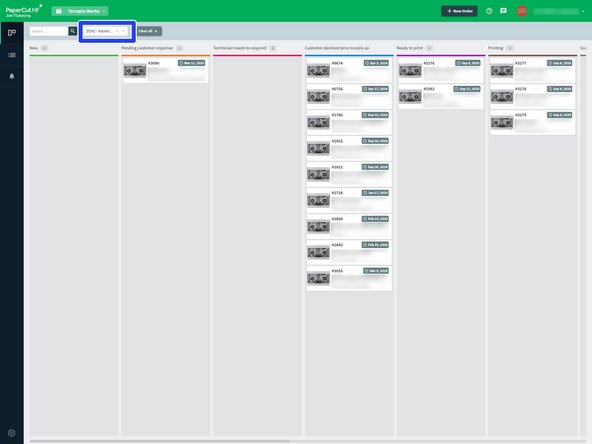
Look for the jobs with the Markforged thumbnail
-
If the new column appears too cluttered you can always filter for just the machine you're looking for
-
-
-
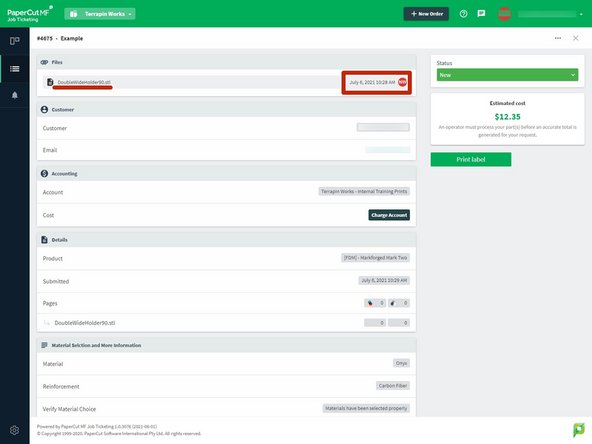
Download the attached .stl file by hovering over the date
-
If the file is not in the .stl format, send them a message requesting the correct file type in the integrated comment section below
-
You'll want to make note of the material and reinforcement material if the customer asked for it
-
If we do not have the material in stock send them a message and inform them that there may be a delay unless they want to change materials
-
Submit purchase requests on the Additive Procurement Jira board if we are out of stock.
-
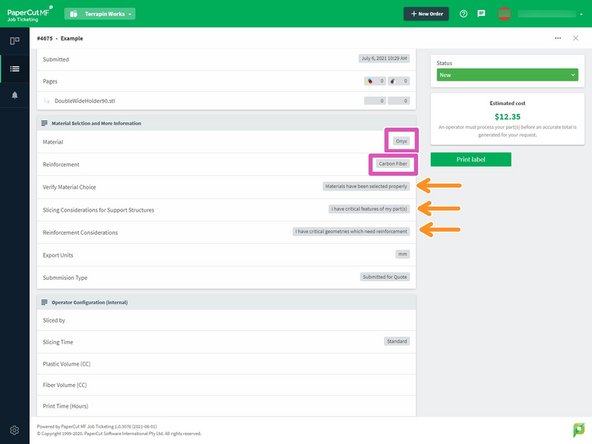
There are three fields in the "Material Selection and More information" section which help urge the customer to give us information needed for more accurate slicing
-
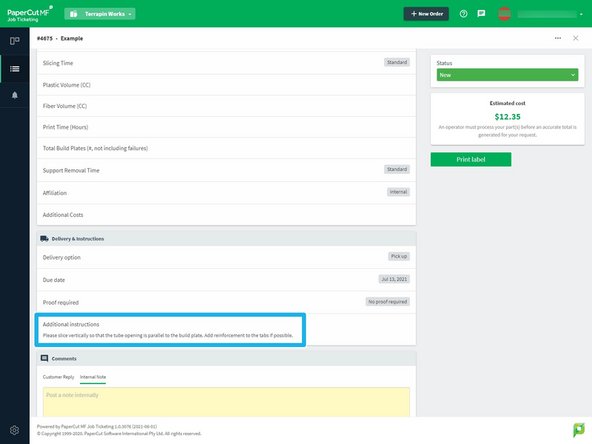
If the customer has critical features for their part, make note of their "Additional Instructions"
-
-
-
This step will only apply to approximately 10% of the job requests for the Markforged, if not less.
-
Given how complex fiber reinforcement can get, you'll need to talk the customer through how much reinforcement they want and in what locations they want it
-
To understand how to best walk a customer through this process read this article from Markforged about Fiber Reinforcement
-
Fiber costs significantly more than model material so make sure the customer understands that reinforcement comes at a cost
-
-
-
You will learn about Eiger a little later, which is the web interface used to manage and slice for the Markforged machines
-
In Eiger, a folder is created for each client (most clients using our services already have a folder) in the format "FirstName LastName"
-
Verify that a client does not already have a folder before making a new one in Eiger
-
Parts downloaded from PaperCut can be dumped into the client folder, making sure the part is titled with the PaperCut #
-
Jobs sent to the printer should also include the PaperCut # and name of the customer in the format Naming convention is just the format that PaperCut uses when downloading: #### - Customer Name
-
-
-
Follow the slicing guide on how to import the files you retrieved from PaperCut
-
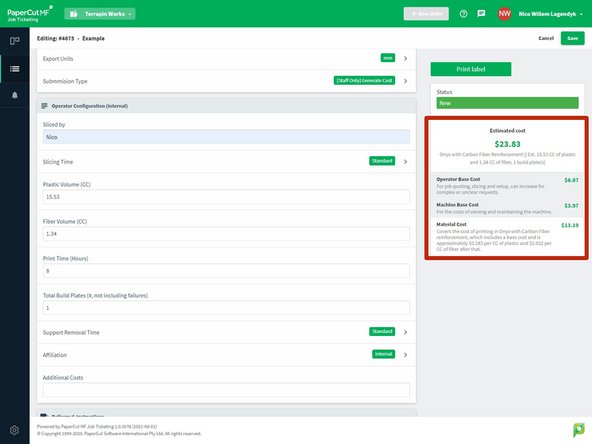
Change submission type to "[Staff Only] Generate Cost"
-
Add your name to the "Assignee" section so that if there are any issues with the print other technicians can find you and fix the problem
-
Modify the slicing time if necessary
-
Add the plastic and fiber volumes and the print time directly from Eiger
-
Add the total number of build plates necessary to complete the job
-
Modify the support removal time if necessary
-
Change affiliation if necessary
-
-
-
Once all the fields have been filled out and the submission type is changed a full breakdown of the cost is produced
-
If you do not see this, you probably need to set the submission type to "[Staff Only] Generate Cost"
-
Move the job status to "Ready to print" or "Pending Customer Response" depending on what their Submission type was
-
Queue the build on a machine in Eiger or start the print if there is a machine avaliable
-
-
-
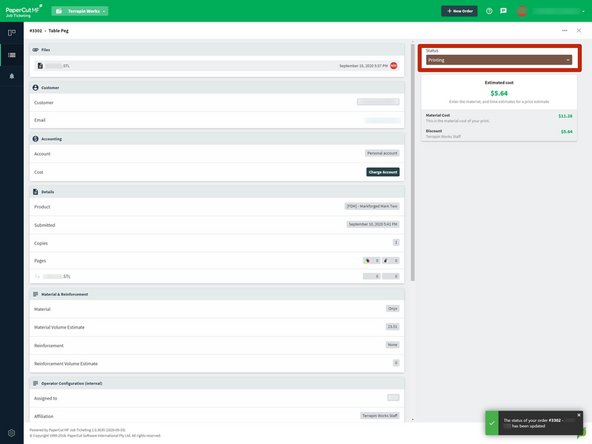
Update PaperCut to "Printing" once the print is on the printer
-
Make an internal note on PaperCut of what printer the job was started on
-
If any aspect of the job fails notify the customer immediately and make an internal note of what happened
-
-
-
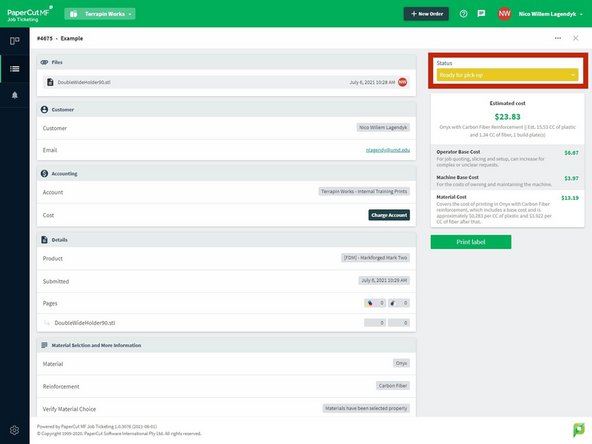
Once the print is harvested place the model in a bag with the following information
-
PaperCut Number
-
Customer Name (Last, First)
-
Date
-
Price
-
Machine/Material
-
Update the PaperCut status to "Ready for pick-up" once the bag is placed in the correct bin in the AFL
-

![If you do not see this, you probably need to set the submission type to "[Staff Only] Generate Cost"](https://d3t0tbmlie281e.cloudfront.net/igi/umd/yMwR4gIVLVHNWOt5.medium)