
-
-
Nexa3D XiP orders will appear on the Kanban as blank images.
-
We are working to add an image of the machine but it may take a while.
-
To sort through machines quickly, filter the requests to only see Nexa3D XiP jobs.
-
-
-
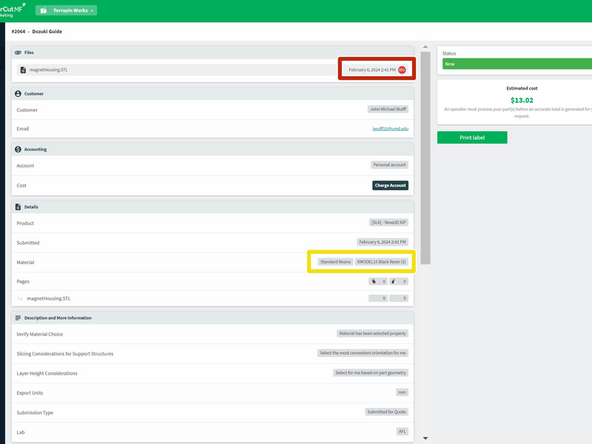
Download the attached .stl file by hovering over the date.
-
We only accept .stl files for this machine- if necessary send a message in PaperCut asking for the correct format.
-
You'll want to make note of the material, material color, and resolution if the customer asked for it.
-
Inform the customer via PaperCut if we do not have their requested color and ask if they will accept an alternative.
-
Let a LC know we are out of stock.
-
Note any additional instructions- this section often includes details of relevant dimensions or requests for specific print settings
-
If the printer cannot accommodate any of the customer's requests, send them a message in PaperCut.
-
Change submission type to "[Staff Only] Generate Cost" and add your name to the "Assignee" section so that if there are any issues with the print other technicians can find you and fix the problem.
-
-
-
Slice the part in NexaX and save the .NXA locally.
-
To add the sliced file and print mass, edit the request
-
Click the attach button, then upload the .NXA file.
-
Uploading the .NXA file to PaperCut is required to avoid reslicing parts.
-
Make sure the name is professional, typically use the format [PaperCut #] - [stlfilename].form
-
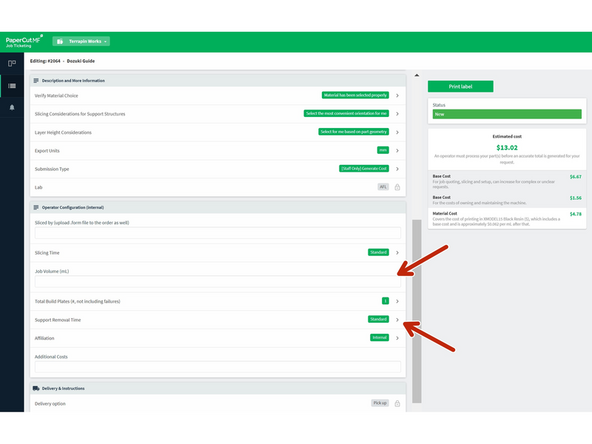
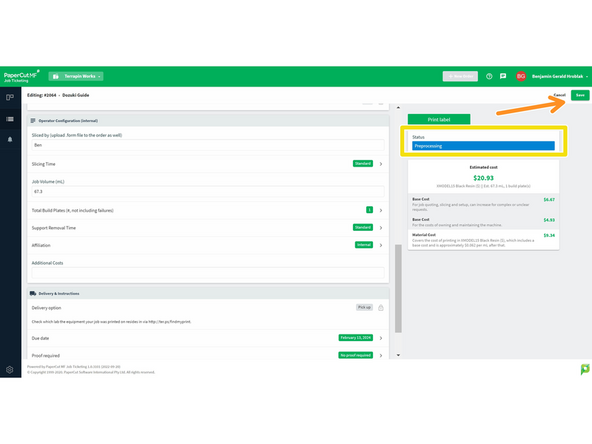
Add the Build Mass Estimate, Export units, # of Build Plates, and select the appropriate Support Removal Time.
-
Click Save on the top right of the request.
-
Change the request status to Ready to Print
-
-
-
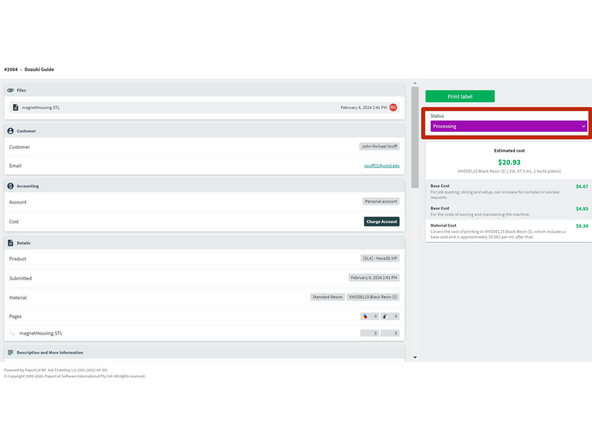
Update PaperCut to "Processing" once the print is on the printer.
-
Make an internal note on PaperCut of what printer the job was started on.
-
If any aspect of the job fails notify the customer immediately and make an internal note of what happened.
-
-
-
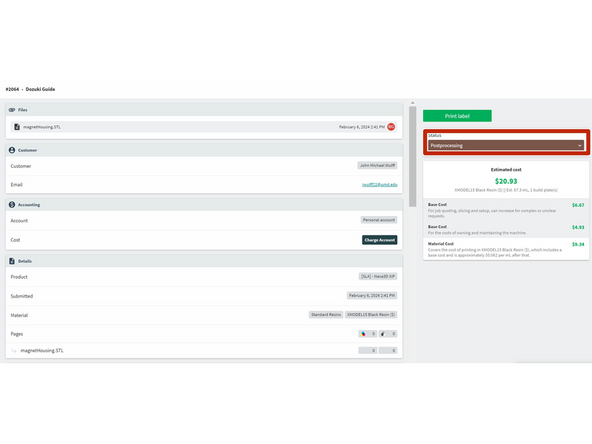
Change the job order to "Post Processing" once the print is done on the Nexa3D XiP and ready for the Wash+Cure
-
-
-
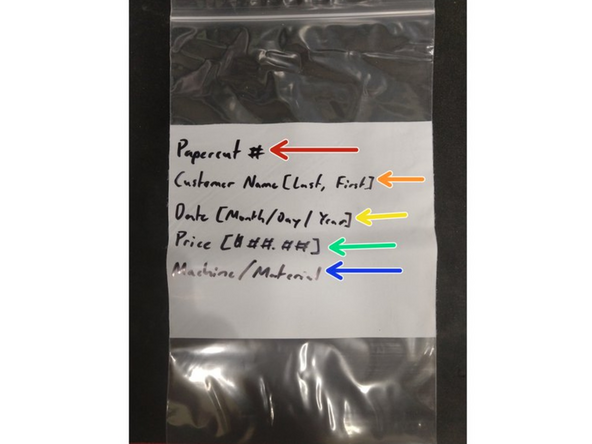
Once the print is done curing and the supports are removed, place the model in a bag with the following information...
-
PaperCut Number
-
Customer Name {Last, First}
-
Date
-
Price
-
Machine/ Material
-
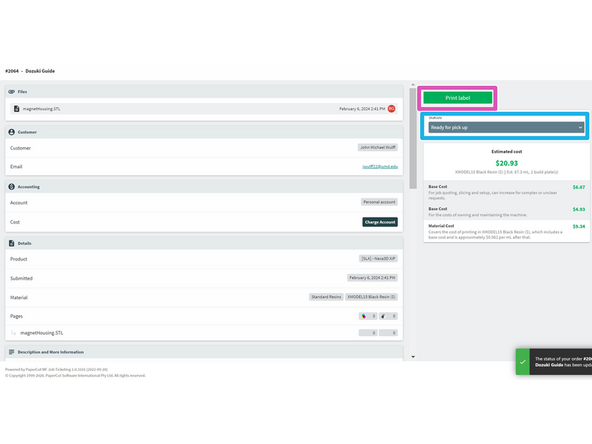
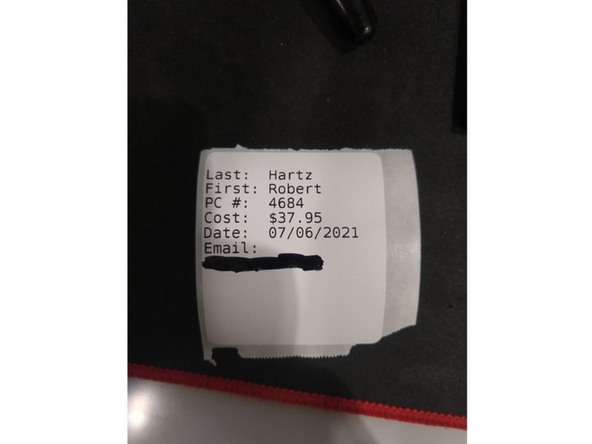
If you have the TW Extension installed, pressing the "Print Label" button will produce this same information
-
Update the PaperCut status to "Ready for pick-up" once the bag is placed in the correct bin in the AFL
-


Cancel: I did not complete this guide.
3 other people completed this guide.