Difficulty
Easy
Steps
3
Time Required
00:05:00 - 00:10:00
- Filament 3 steps

Missing Images
This guide needs more images to properly convey the procedure being described.
Introduction
This guide will explain the steps needed to change the filament on the Ultimaker 3.
Sources: Changing materials and print cores on the Ultimaker 3, Ultimaker 3 Print Core Material Compatibility
Images by: Terrapin Works
-
-
Go to the menu Material/PrintCore > Material [x] > Change
-
Make sure compatible print cores are installed before you insert materials. Check this link for compatibility, and this for the guide on replacing print cores
-
Wait for the print core to heat up and reverse the material
-
Remove the material from the feeder and spool holder
-
-
-
Place the new material on the spool holder and wait until the Ultimaker 3 detects it
-
Unless you are using Ultimaker material with a digital tag, at this point it will prompt you saying "material not detected" where you can now manually select what type you are using
-
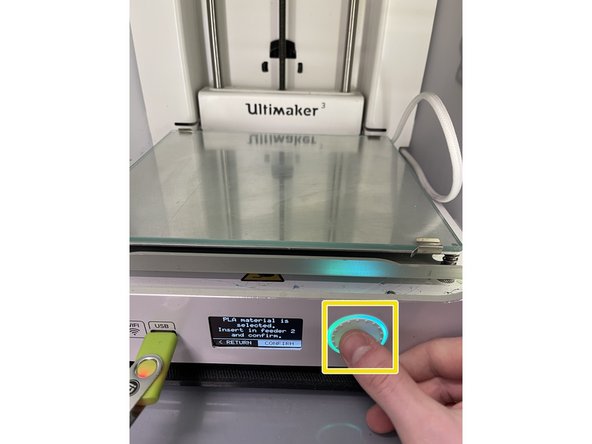
Insert the material into the feeder and push it until the feeder grips it
-
You must have clicked confirm on the previous step in order for the feeder to start turning, you should be able to hear it
-
You may need to lift up the spring on the side of the feeder to get the filament in
-
The feeder in the images are for bondtech upgraded extruders but the stock extruder included in the Ultimaker 3 has all the same levers and adjustments
-
-
-
Confirm that you have inserted the material into the feeder by pushing the button on the front of the Ultimaker 3
-
After the material has been forwarded, wait until it extrudes from the print head, and then push the button
-