
Introduction
GradCAD Print is an alternative slicing and print management software provided by Stratasys that is compatible with the Fortus line of printers. It has a more modern and approachable user interface, and it has all of the functionality needed to process a standard print. There are, however, some more advanced features that are only found in Insight.
This guide covers the basic operation of GrabCAD Print, including part manipulation, modeler configuration, slicing, and building jobs from Insight. Always ensure your version of GrabCAD Print is up to date.
-
-
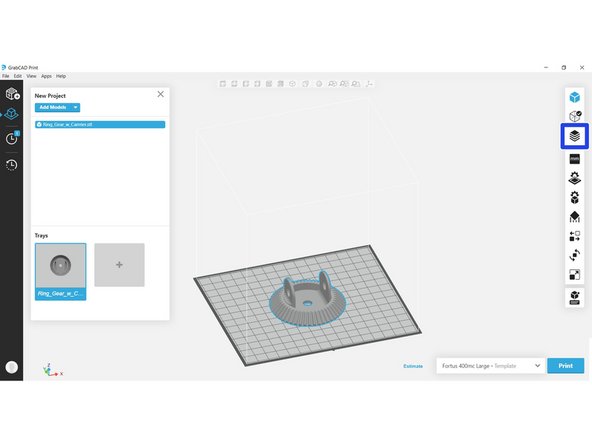
These icons switch between Model View, Analysis Mode, and Slice Preview
-
These are all the functions and settings needed to prepare a file. Clicking an icon will expand its menu
-
This area contains a preview of the build tray
-
This menu shows what printer or printer template you are using
-
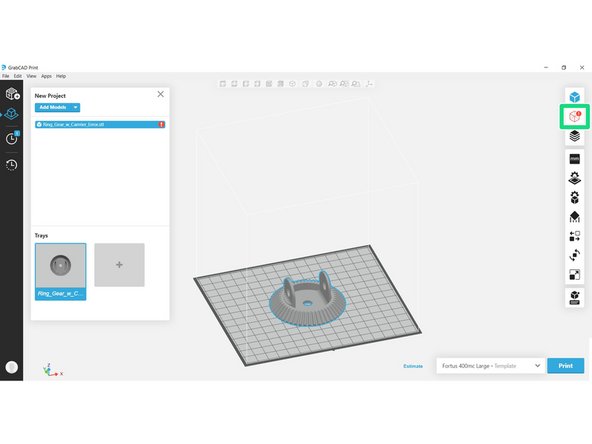
This area will show a list of all the models in the project
-
-
-
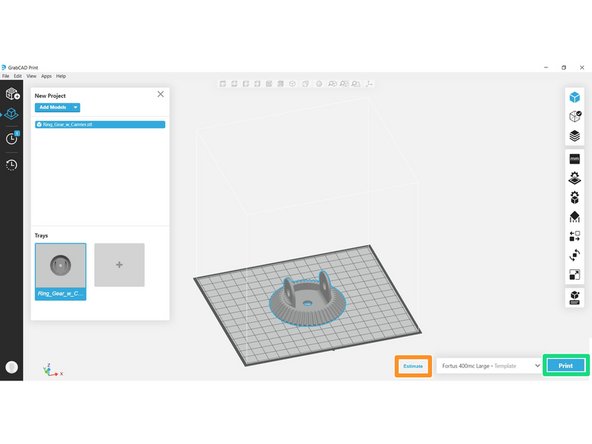
Insert a file, either by dragging and dropping it into the window or clicking Add Models
-
Unlike Insight, GrabCAD will accept native CAD files as well as STL files
-
If needed, select Model Info to change the unit system applied to the part
-
Each part in a GrabCAD project can have a different unit system, if desired
-
-
-
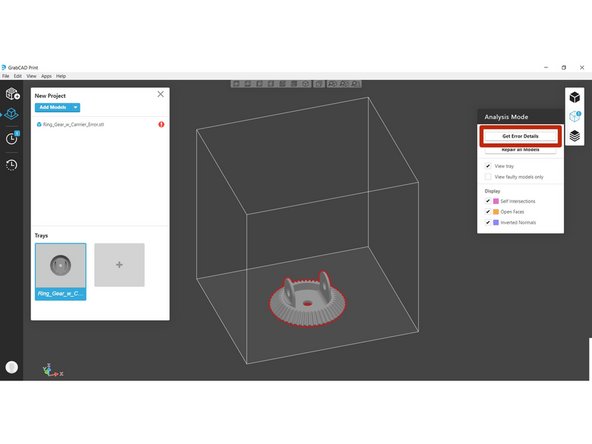
Sometimes there may be errors in the mesh of an file. If GrabCAD detects an error, a red warning symbol will be displayed
-
Select the Analysis Mode icon to view and repair the error
-
If you wish to see the type and location of the error, click Get Error Details to highlight the issue
-
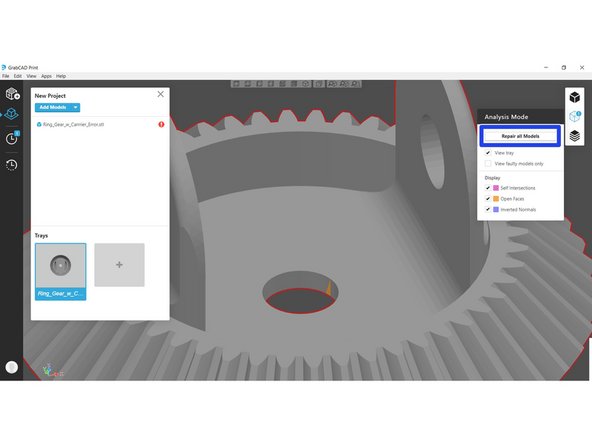
Click Repair all Models to run GrabCAD's repair script, which will attempt to resolve any mesh errors
-
-
-
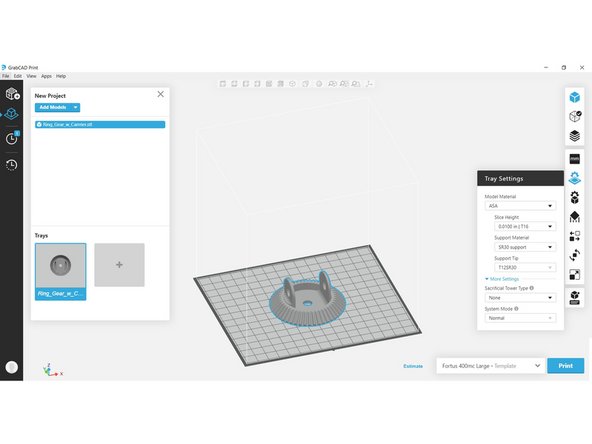
Ensure the tray settings, such as materials and tips, match your intended setup
-
If you are connected to the machine over the local network, these fields will auto-populate with the current printer configuration
-
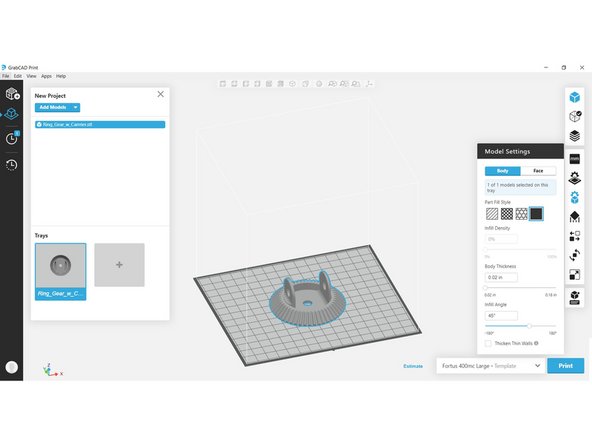
Change the model settings for each part in the project
-
In general, you can just select a part fill style, but you may customize the other parameters if necessary
-
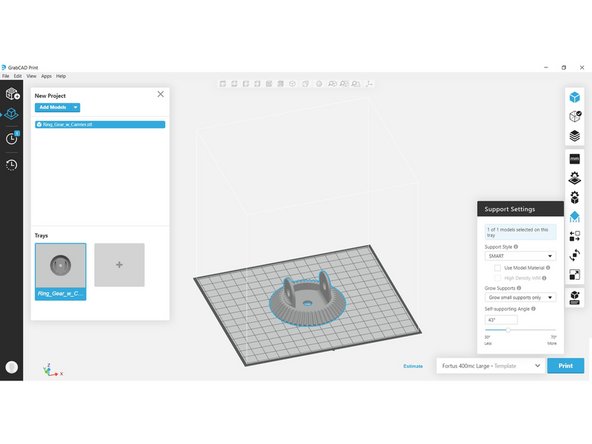
Select the desired support settings for each part in the project
-
As in Insight, the recommended support style will be set automatically for the model material you have chosen
-
If you need to choose a different support style, the information tooltips provide good descriptions of each option
-
-
-
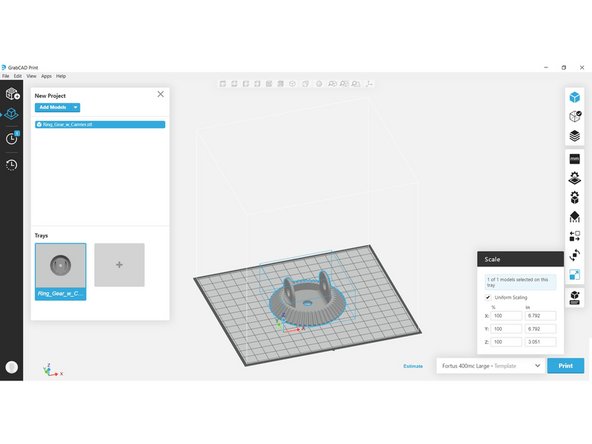
If needed, scale the part by the appropriate factor or to the desired bounding dimensions
-
For simpler parts, you can orient a specific face to one of the datum planes, or rotate the part about a specific axis by an arbitrary amount
-
More complex part can be automatically oriented
-
Unlike Insight, GrabCAD does not provide different orientation methods, but instead always orients to minimize support and build time
-
-
-
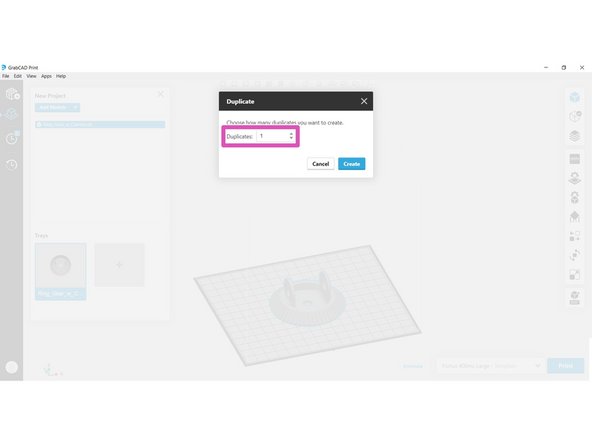
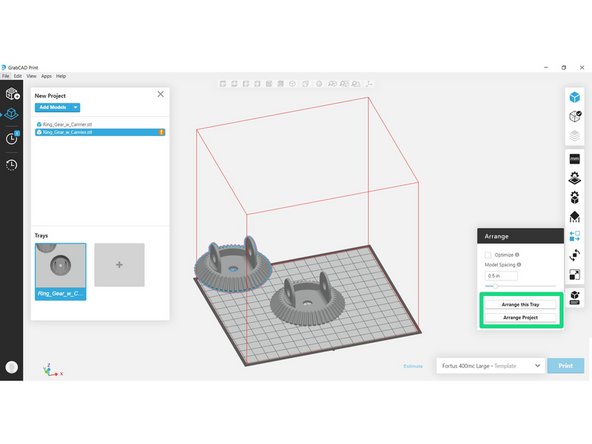
To create copies of a part, right click on it and select Duplicate. Choose the number of copies to create in the dialog box
-
Use the Arrange menu to automatically position parts. If your copied parts were placed on a new tray, you may want to use Arrange Project for greater efficiency
-
Turning on the Optimize option will slice the parts before calculating a layout, which can result in a more efficient arrangement
-
In general, it is not advisable to reduce the model spacing below its default value, although it can be increased if desired
-
-
-
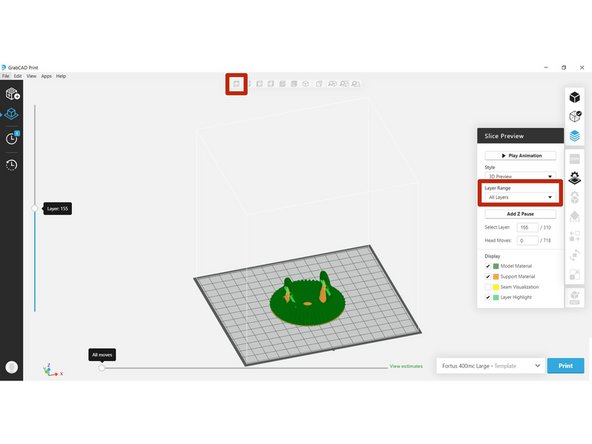
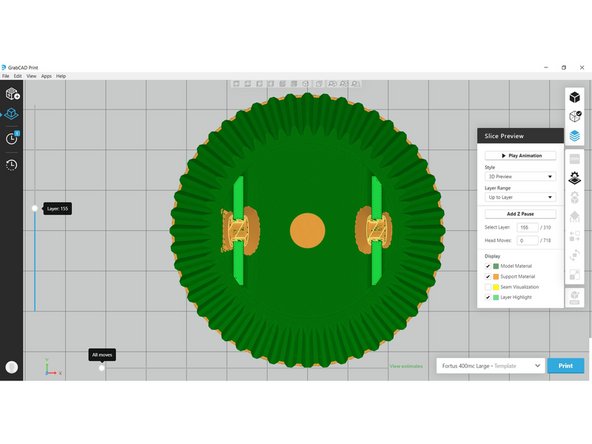
Click Show Slice Preview to view the sliced and supported model
-
To view toolpaths, change the Layer Range to any option other than All Layers and switch to a top view
-
-
-
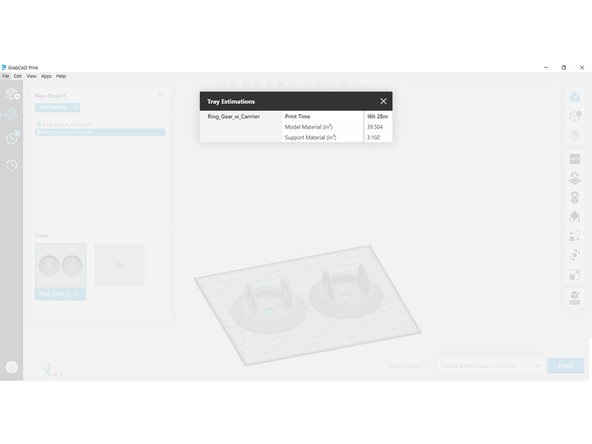
Click the Estimates button to view estimated print time and material usage
-
If you have already viewed the slice preview or performed some other function that slices the model(s), this will say View Estimates instead
-
Click Print to send the current tray to the printer queue
-


One Comment
Introduces GrabCad Print as an alternative to Insight, but I haven't been introduced to Insight yet.
Evan Hutzell - Open Reply