
Introduction
This is the second of a three-part sequence to using Kenny, the official 3D printer of R@M. This part gives an overview of how to set up & use PrusaSlicer.
-
-
-
Navigate to the software tab to download the latest version of PrusaSlicer.
-
(Downloading drivers is optional.)
-
NOTE: Skip this step if you already have PrusaSlicer from ENES100 (Fall 2022 or later).
-
-
-
Once you have downloaded the PrusaSlicer software, configure the settings for it to work with Kenny.
-
NOTE: If you need the settings for the Prusa i3 MK3S in ENES100, don't worry; you will be able to easily switch between configurations.
-
Click this link to download the configuration file for Kenny.
-
-
-
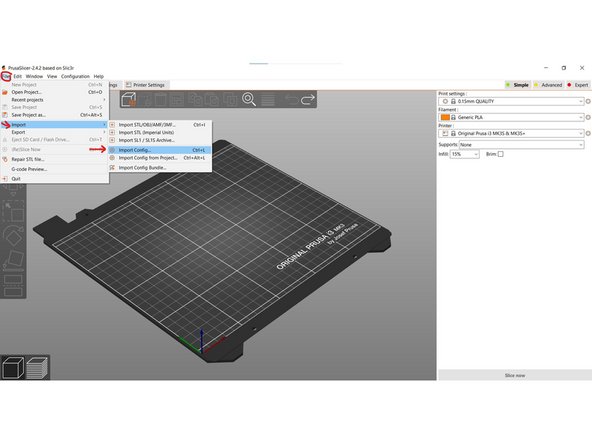
Click File > Import > Import Config.
-
Locate config.ini (the configuration file you downloaded in the last step) on your computer and click "Open."
-
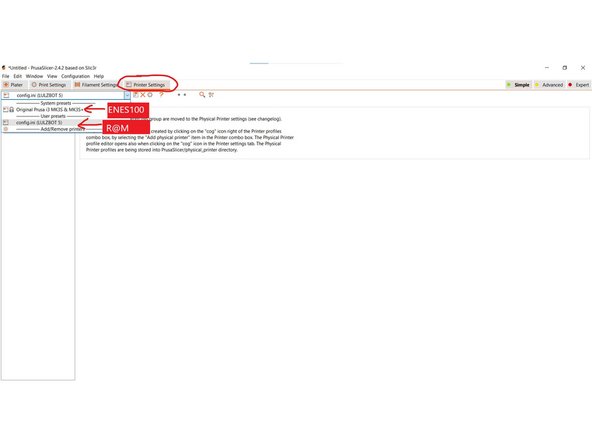
NOTE: To change to the ENES100 configuration, navigate to Printer Settings and select the Original Prusa i3 MK3S / MK3S+
-
-
-
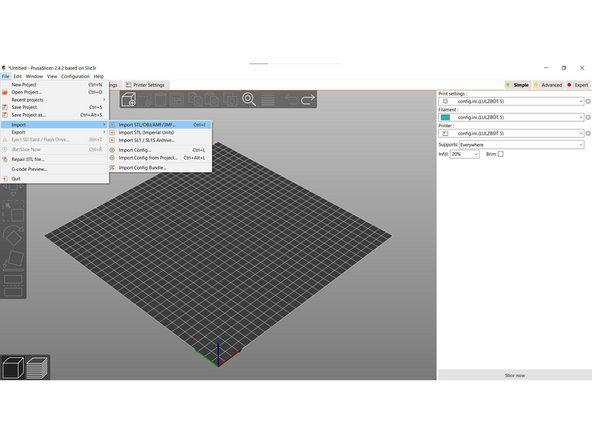
Click File > Import > Import STL/OBJ/AMF/3MF
-
Locate your STL file that you wish to 3D print, then click "Open"
-
-
-
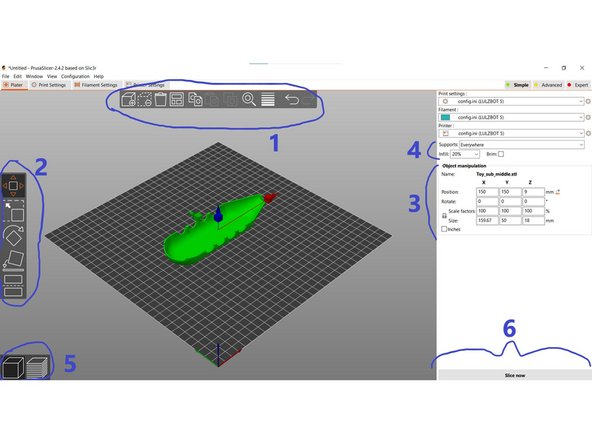
Do not change configuration settings unless you are told otherwise!
-
1) Major settings, such as undo, add additional parts to the same print, delete parts, etc.
-
2) Graphically manipulate parts (scaling, moving, rotating)
-
3) Numerically manipulate parts
-
4) Supports and Infill Settings. Make sure supports are on when you part of your object is hanging with nothing underneath. (ie. arches)
-
5) Change view between basic view and layered view. In layered view, you can manipulate the path of the extruder.
-
6) "Slice Now" Button. Once satisfied, you can have PrusaSlicer create the GCODE file that Kenny will need for your print!
-
Save your GCODE file to your computer.
-
Cancel: I did not complete this guide.
5 other people completed this guide.
