-
-
A wood lathe is used to make axisymmetric wooden objects like bowls, vases, and plates.
-
As the lathe spins, an operator uses specially designed wooden chisels to remove material from the workpiece until a desired form is reached.
-
Max workpiece size: 24"L x 15"D
-
-
-
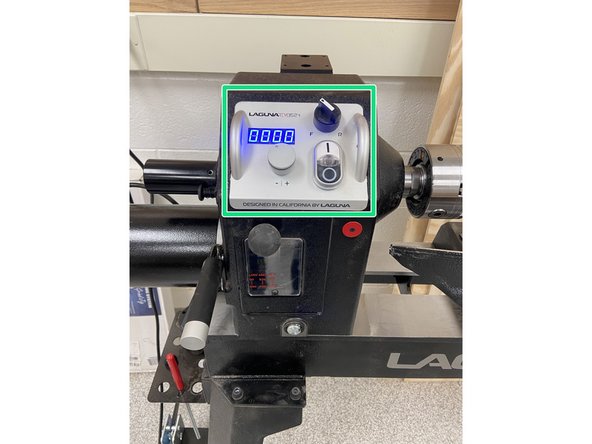
Control Panel
-
Speed control knob
-
On/Off Switch
-
Digital Speed Gauge
-
Forward/Reverse Knob
-
Head Stock
-
Tail Stock
-
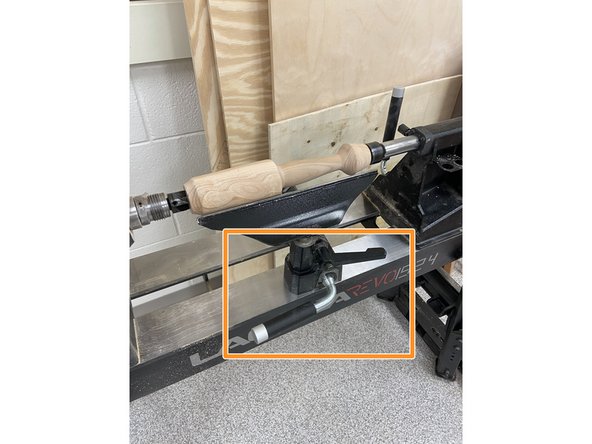
Tool Rest
-
-
-
A face shield and safety glasses should be worn at all times.
-
A dust mask is advised during sanding, and dust extraction should also be used.
-
Tight fitting work gloves may also be worn, as the turning tools may become hot during use.
-
Loose fitting gloves are unsafe as they may get caught in the workpiece.
-
-
-
Never place your fingers or lathe tools in the space between the tool rest and the workpiece.
-
Avoid wearing loose clothing and jewelry. Roll up long sleeves and tie back all long hair as this may get caught in the rotating machinery.
-
Be careful as the workpiece may eject during use. To avoid this always check the workpiece is securely held, and that the lathe is operating at a safe speed.
-
Faster lathe turning speeds allows for more efficient turning, but too fast can be dangerous for the user.
-
Do not exceed 2000rpm when turning anything on the lathe.
-
Rule of thumb: the turning speed should be 9000/max diameter of the workpiece (in inches).
-
-
-
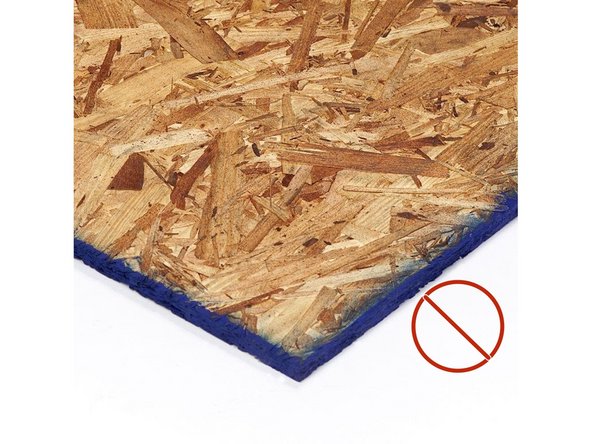
Banned Materials: Pressure treated lumber, MDF, OSB, metals
-
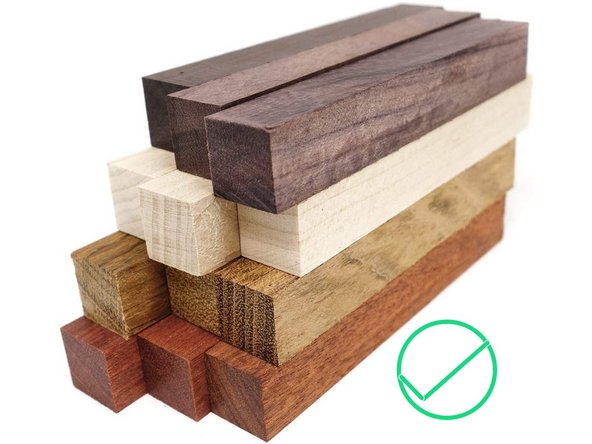
Acceptable materials: Hardwoods, softwoods, hardened epoxy resin, green cut wood
-
Talk to a staff member if you are trying to use plywood
-
-
-
All pieces should be secured safely to the headstock by an appropriate means (either screwed onto the threads of the headstock, or inserted into the tapered hole).
-
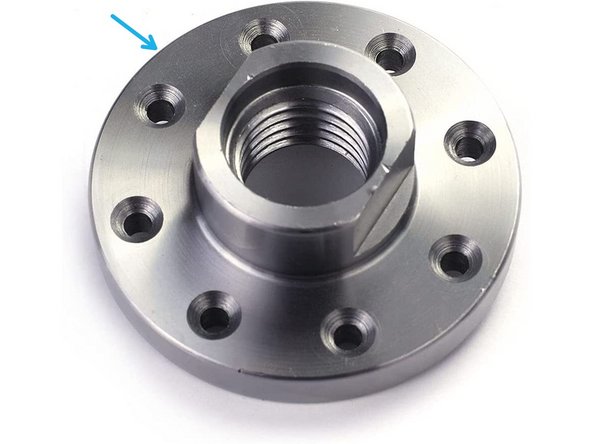
A faceplate is one of the most secure methods to secure piece. Screw the faceplate onto a workpiece about it's desired axis of rotation
-
Keep in mind there will screw holes into your workpiece now. Typically this is used to hold a workpiece while turning a mortise or tenon for the chuck to hold the piece.
-
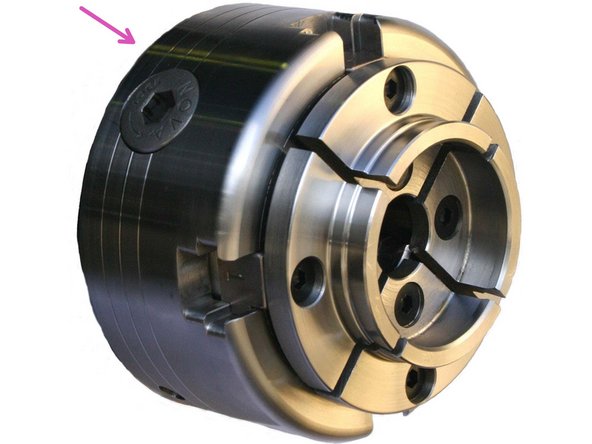
A chuck is one of the most versatile ways of holding a work piece. A mortise or tenon can be turned onto a workpiece for the chuck to grab.
-
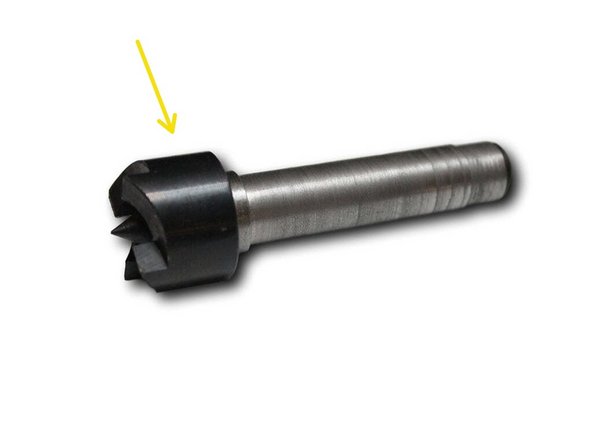
A forstener bit may also be used to drill a mortise onto a workpiece
-
A drive or spur center can also be used as a minimally invasive way of securing a workpiece. This is the least secure of all method, and care should be taken to make sure the tailstock is tightly engaged with the part
-
Hammering the spur drive into the workpiece prior to installing the spur drive on the lath can help with aligning the spur about the desired axis of rotation.
-
Other hardware exists for specific turning projects like screw centers for bottle openers & handles, and a pen mandrel for turning pens.
-
-
-
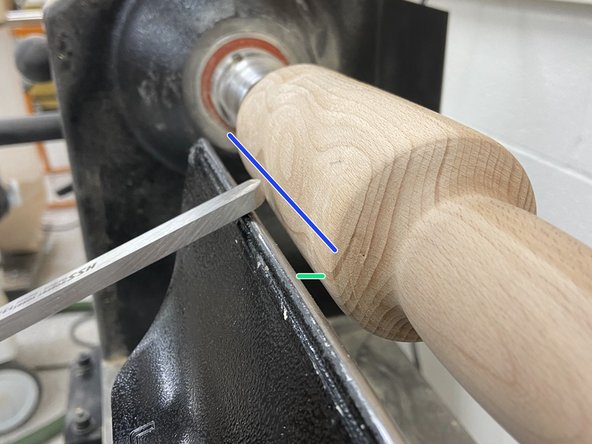
Always keep the tool rest within 5 mm of the workpiece. As your remove material, adjust the tool rest as necessary.
-
Stop the lathe whenever making adjustments to the tool rest.
-
Adjust the tool rest by unlocking the tool rest holder and/or height adjustment lock.
-
Set the height of the tool rest that the cutting edge of chisel resting on the tool rest is exactly in-line with the centerline of the work piece.
-
-
-
Ensure your workpiece is securely held in the lathe prior to turning on the machine.
-
The tail stock should be locked and engaged tightly with workpiece.
-
Move the tool rest to be about 5mm away from the widest part of the workpiece. Rotate the workpiece by hand to ensure the workpiece does not contact the tool rest.
-
Set the height of the tool rest that the cutting edge of chisel resting on the tool rest is exactly in-line with the centerline of the work piece
-
Change the lathe speed to an appropriate speed. Rule of thumb is 9000/max diameter of the workpiece in inches, although for non-round workpieces you should operate initially at a lower speed.
-
Turn on the lathe by pressing the On/Off button on the control plate. Ensure the lathe is rotating in the forward direction. Rotate the speed control knob to an appropriate speed.
-
-
-
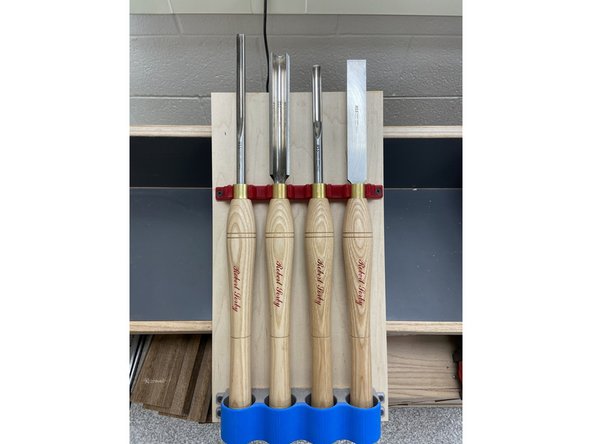
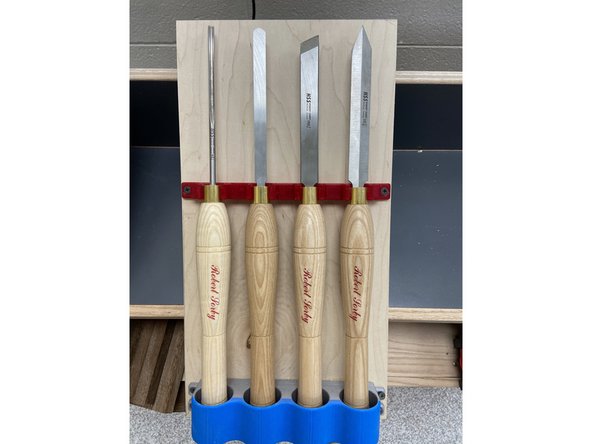
Roughing gouge - used for removing bulk material to make a workpiece round
-
Spindle gouge - useful for removing material from long workpieces
-
Bowl gouge - great for all-round use
-
Round nose scraper - great beginner tool and for making final passes for a smooth finish
-
Skew chisel -
-
Spear Scraper -
-
-
-
Hold all turning tools firmly with tool hands. Your dominant hand should hold near the wooden end of the handle, and your non-dominant near on the metal part of the tool near the tip.
-
Take a balanced stance in front of the lathe.
-
Place the tip of the tool on the tool rest with the index finger of your non-dominant hand against the side of the tool rest.
-
You should hold the tool between 0 and 45 degrees from horizontal, and between 0 and 45 degrees from perpendicular, pointing in the direction of tool travel. You may also rotate the tool about it's axis between 0 and 45 degrees.
-
-
-
With the tool positioned on the tool rest and the lathe on, slowly bring it into contact with the workpiece.
-
Rotate or position the tool till materials starts cleanly removing from the workpiece. If you find the tool constantly biting or chipping the workpiece, perhaps try a different tool, or approach the workpiece from a different orientation.
-
Do not apply heavy pressure. Your non-dominant or lead hand should simply be guiding the tool while the lathe does most of the work.
-
Several light passes are preferred to a single deep cut and will yield a smoother finish.
-
-
-
Once you are happy with the shape of your workpiece, you can begin sanding.
-
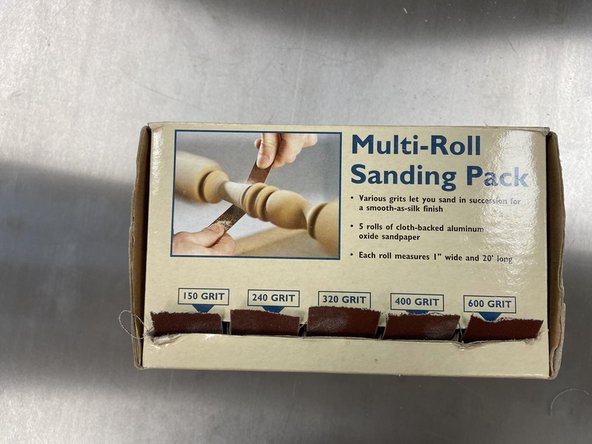
Use wood turners sanding rolls as these do not rip as easily as regular sandpaper.
-
Turn the lathe on. Starting with the lowest grit, begin sanding the work piece by hand. Be careful not to sand in one place for too long as you can leave behind visible sanding marks.
-
Progress through the sanding grits until you are happy with the finished result. For wood projects this around 600 grit, but for acrylic this can be as high as 3000.
-
Remove the tool rest to have access to the workpiece. Make sure the workpiece is still held securely in the lathe.
-
-
-
Remove the chuck from the lathe by engaging the rotation lock on the side of the head stock, then unthreading the chuck from the headstock.
-
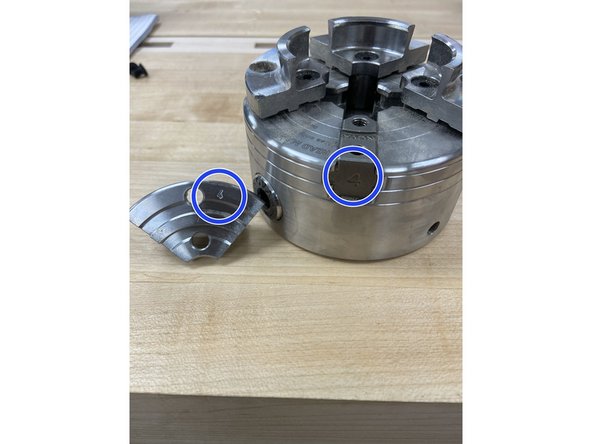
Loosen the jaws of the chuck using the 5/16 hex key. Then remove each piece of the jaws using the small 5/32 hex key.
-
When installing new jaws, the pieces each have a number on the backside that corespond to a location on the chuck. Install them in that order.
-
Back-off each screw a quarter turn. Tighten the chuck and then tighten each screw holding the jaws in place.
-
-
-
In order to hold a workpiece with the chuck, you will need to either turn a round mortise, or tenon on your workpiece.
-
First secure your workpiece with either a faceplate or the drive/spur center. Longer workpieces can use the drive center, while wider workpieces should use the faceplate.
-
With the workpiece securely in the lathe, use the turning tools to turn a mortise (image 1) or tenon (image 2). Have the chuck on hand to ensure the mortise/tenon will fit securely in/on the chuck.
-