
Introduction
The Artec Leo 3D scanner captures a large area at less detail than many other scanners, so is typically used to scan large objects.
-
-
Default scanning range is from 0.35 to 1.2 meters from the scanner to the target object
-
Optimal scanning distance for most objects is about 0.5 – 0.7 meters
-
It is recommended to place the scanned object in a position that allows 360 degree access
-
-
-
Tap the New Project button on the touch screen to start a new project
-
Tap on an existing project tile to resume a project
-
The colors of the preview window provide information about the relative proximity of the scanner to the object
-
No color: The object is out of the scanner working range
-
Red: The scanner is too close to the object
-
Orange: The scanner is at the almost optimal distance
-
Green: The scanner is at the optimal distance from the object
-
Blue: The scanner is too far away from the object
-
-
-
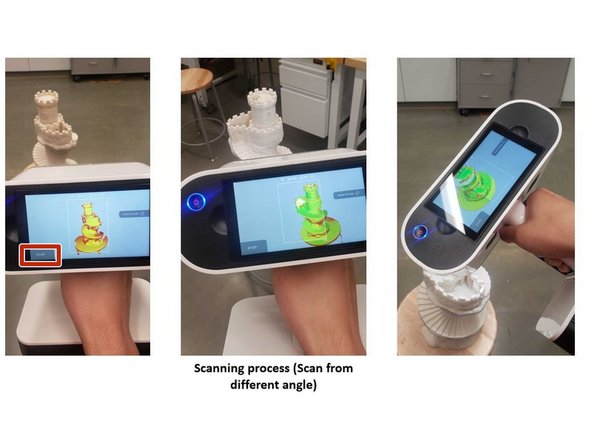
Tap the scan button on the screen
-
Move the scanner slowly to scan the object from different angles
-
Try to get a 360 degree scan of the subject
-
Unlike Artec Spider, Leo has a build in gyroscope to track its location → As long as you don’t move the scanner too fast, the scanner will not lose alignment
-
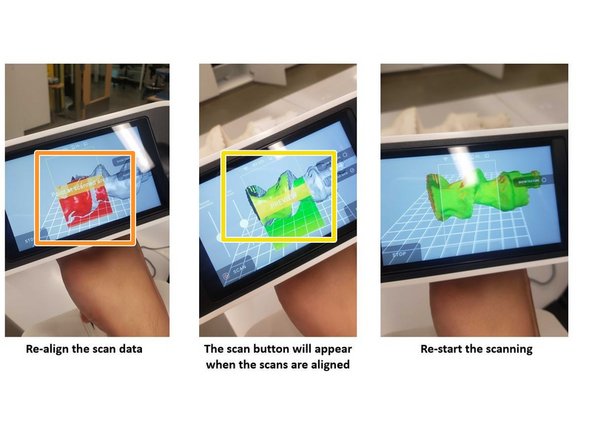
If the scanner loses alignment, follow these steps to restart it successfully:
-
Point the scanner at the scanned area to align the new scan with the old scan
-
When both scans are aligned, the scan can be restarted by push the scan button on the screen
-
-
-
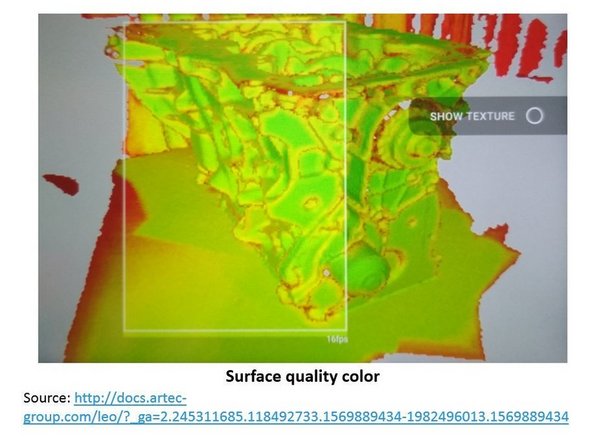
The color of the scanned surface determine the scan quality
-
Red: Insufficiently scanned area, distant object, fast movements
-
Orange: Satisfactory scanned area
-
Green: Well-scanned area
-
Holes and thin edges may remain red and orange even if thoroughly scanned because these regions are likely to have smaller resolution than the other parts of the subject
-
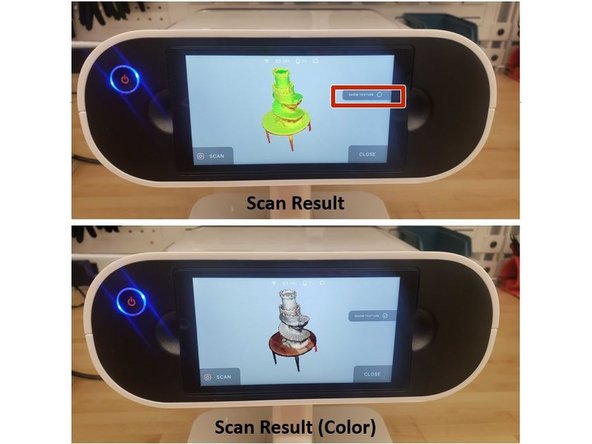
Tap the stop button on the screen to end the scanning
-
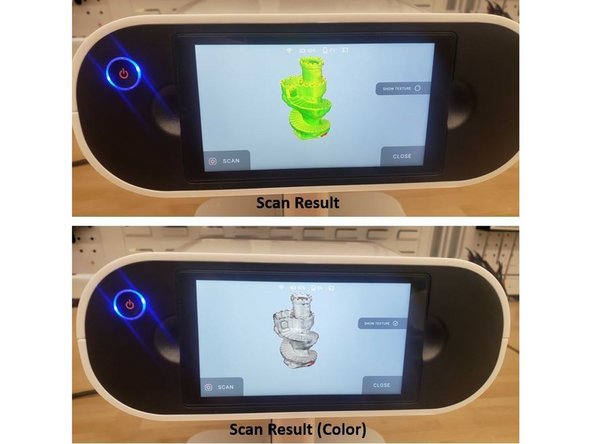
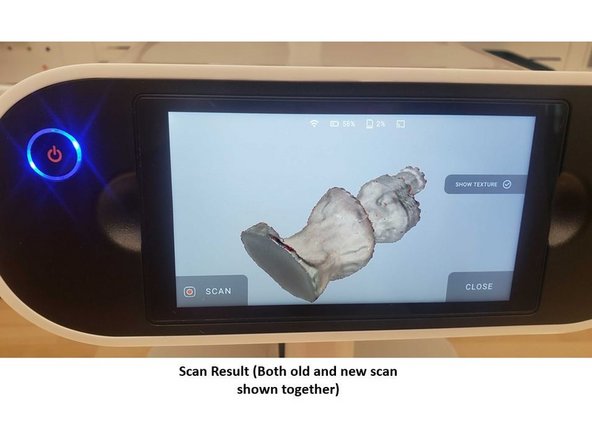
Rotate the scan result to inspect all sides of the scan data
-
Tap the show texture option to show the color texture of the subject
-
-
-
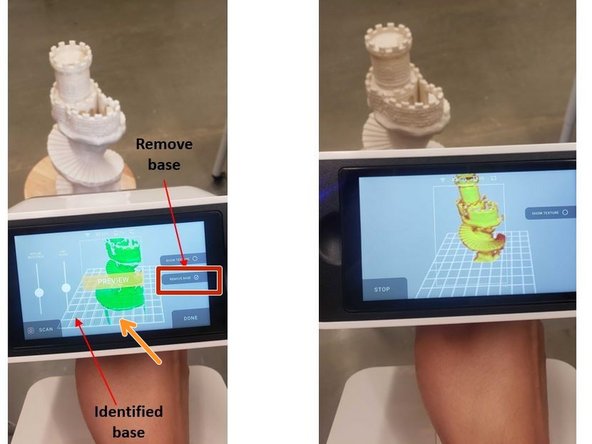
The Artec Leo has an option to automatically identify and remove the base
-
Tap Remove base for automatic base removal
-
The base will be identified as the rectangular mesh in the screen
-
The base removal option will automatically remove the indicated surface during the scanning
-
-
-
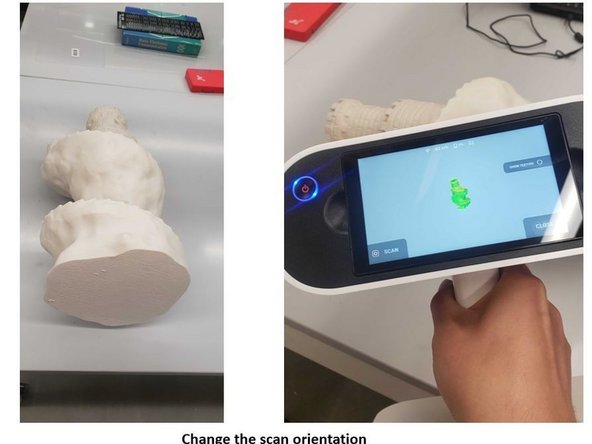
Often, objects require scans from multiple orientations to capture all surfaces. In this example, previous scans missed the bottom of the statue.
-
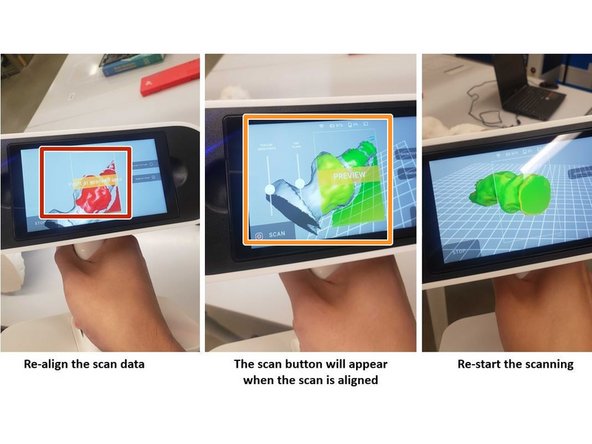
Open a prior scan and point the scanner at the scanned area to align the new scan with the old scan
-
When both scans are aligned (You will see green color part instead of red color), the scan can be restarted by push the scan button on the screen
-
Continue scanning the object
-
When desired areas have been scanned, the scan will combine into one set of scan data
-
-
-
For post-processing, the scan result needs to be imported to Artec Studio
-
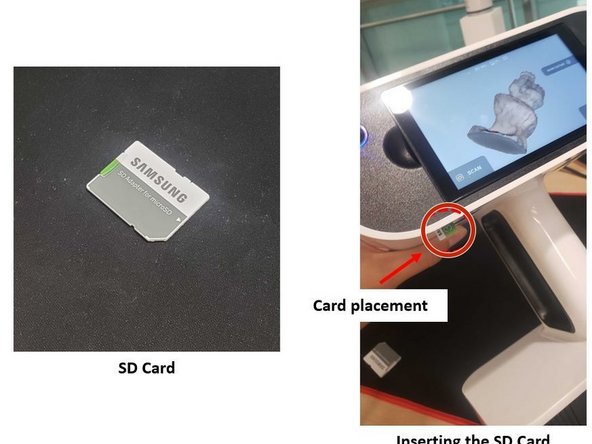
Insert the SD card to the lower section of the scanner
-
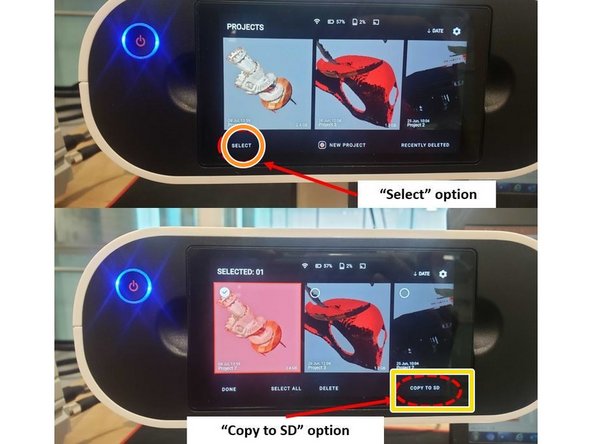
Tap Select to select which projects need to be copied to the SD card
-
Tap Copy to SD to copy the selected projects to the SD card
-
-
-
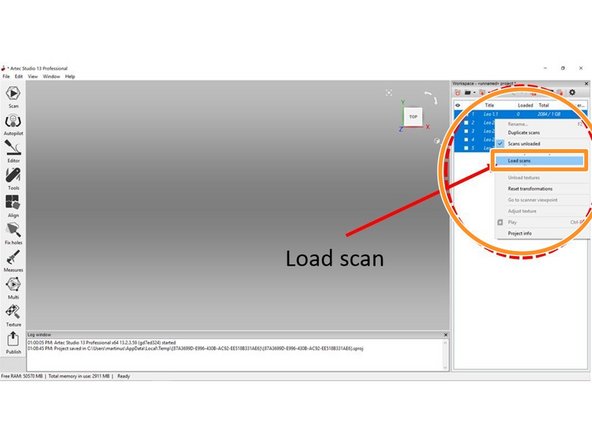
For processing Artec Leo scan result, Artec studio 13 or newer is needed
-
Go to: File > Import > Leo project
-
Select the file you want to import from the SD card
-
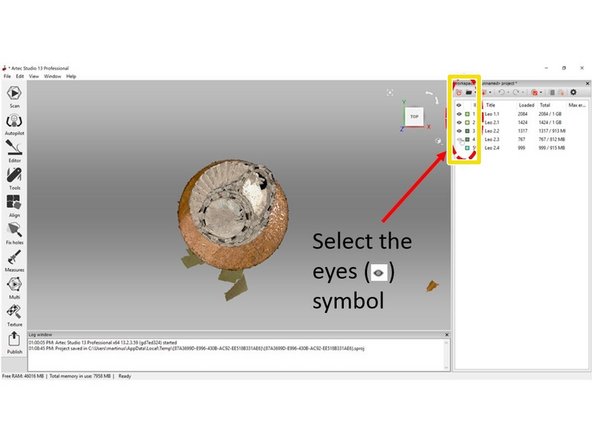
Once imported, right click on the scan results and select Load scan
-
To make the scan results viewable, select the eyes symbol next to the scan results
-
-
-
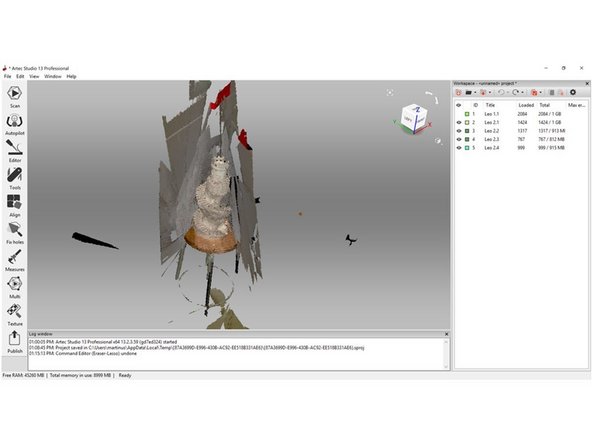
Scan results can be viewed in Artec Studio and further analyzed
-
See the guide Post-Processing in Artec Studio for an introduction to post processing the scan and extracting a usable mesh
-


Further information about how to operate the Artec Leo can be found on the main category page.
Further information about how to operate the Artec Leo can be found on the main category page.